Salta al contenuto principale

Wacker Pump PT3A 2012 Mechanical Seal Replacement

Cosa ti serve

  1. Wacker Pump PT3A 2012 Mechanical Seal Replacement, Disconnect the spark plug wire: passo 1, immagine 1 di 2 Wacker Pump PT3A 2012 Mechanical Seal Replacement, Disconnect the spark plug wire: passo 1, immagine 2 di 2
    • Before you begin, make sure the device is switched off and the engine is cool to the touch.

    • Grab the plastic housing at the end of the spark plug wire.

    • Pull firmly to disconnect the wire from the spark plug.

  2. Wacker Pump PT3A 2012 Mechanical Seal Replacement, Remove the pump housing cover: passo 2, immagine 1 di 3 Wacker Pump PT3A 2012 Mechanical Seal Replacement, Remove the pump housing cover: passo 2, immagine 2 di 3 Wacker Pump PT3A 2012 Mechanical Seal Replacement, Remove the pump housing cover: passo 2, immagine 3 di 3
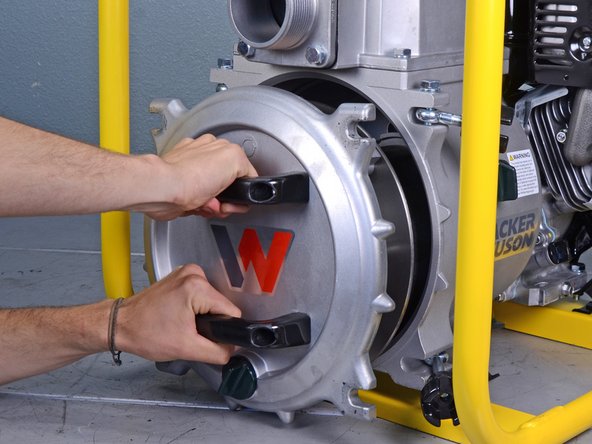
    • Use the included wrench to loosen the four black knobs securing the pump housing cover.

    • If the wrench is missing, slide a screwdriver shank through the knob and twist to loosen the knobs.

  3. Wacker Pump PT3A 2012 Mechanical Seal Replacement: passo 3, immagine 1 di 3 Wacker Pump PT3A 2012 Mechanical Seal Replacement: passo 3, immagine 2 di 3 Wacker Pump PT3A 2012 Mechanical Seal Replacement: passo 3, immagine 3 di 3
    • Slide the pump housing cover out of the pump and remove it.

  4. Wacker Pump PT3A 2012 Mechanical Seal Replacement, Remove the recoil starter: passo 4, immagine 1 di 1
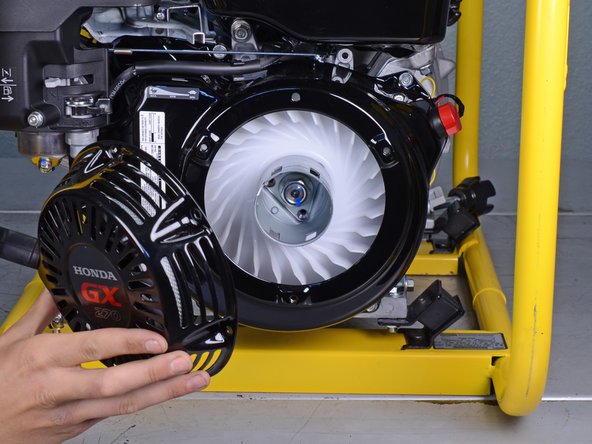
    • Use a 10 mm socket and wrench to remove the three bolts securing the recoil starter.

  5. Wacker Pump PT3A 2012 Mechanical Seal Replacement: passo 5, immagine 1 di 2 Wacker Pump PT3A 2012 Mechanical Seal Replacement: passo 5, immagine 2 di 2
    • Remove the recoil starter from the engine.

  6. Wacker Pump PT3A 2012 Mechanical Seal Replacement, Brace the driveline: passo 6, immagine 1 di 1
    • Slide a large screwdriver through the slots in the starter cap and brace the screwdriver with a wooden block to prevent the driveline from turning clockwise.

  7. Wacker Pump PT3A 2012 Mechanical Seal Replacement, Remove the impeller: passo 7, immagine 1 di 2 Wacker Pump PT3A 2012 Mechanical Seal Replacement, Remove the impeller: passo 7, immagine 2 di 2
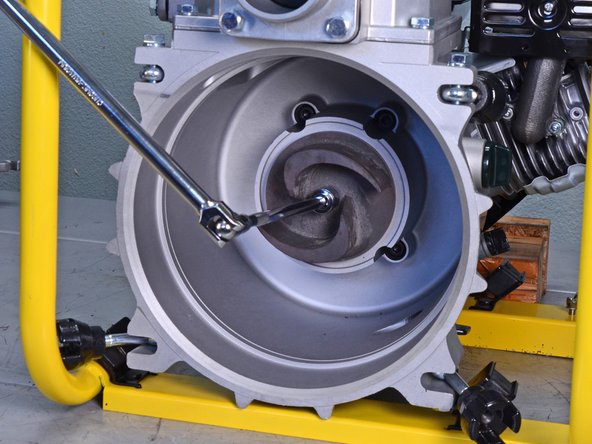
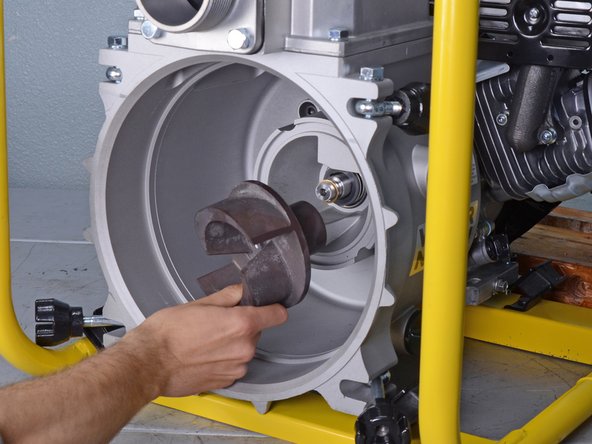
    • Use a 19 mm socket, extension, and wrench to loosen the impeller from the driveline.

  8. Wacker Pump PT3A 2012 Mechanical Seal Replacement: passo 8, immagine 1 di 2 Wacker Pump PT3A 2012 Mechanical Seal Replacement: passo 8, immagine 2 di 2
    • Remove the impeller from the driveline.

  9. Wacker Pump PT3A 2012 Mechanical Seal Replacement, Remove the washers: passo 9, immagine 1 di 1
    • Remove the two washers from the driveline.

    • Replace these washers if they look worn.

  10. Wacker Pump PT3A 2012 Mechanical Seal Replacement, Remove the mechanical seal: passo 10, immagine 1 di 3 Wacker Pump PT3A 2012 Mechanical Seal Replacement, Remove the mechanical seal: passo 10, immagine 2 di 3 Wacker Pump PT3A 2012 Mechanical Seal Replacement, Remove the mechanical seal: passo 10, immagine 3 di 3
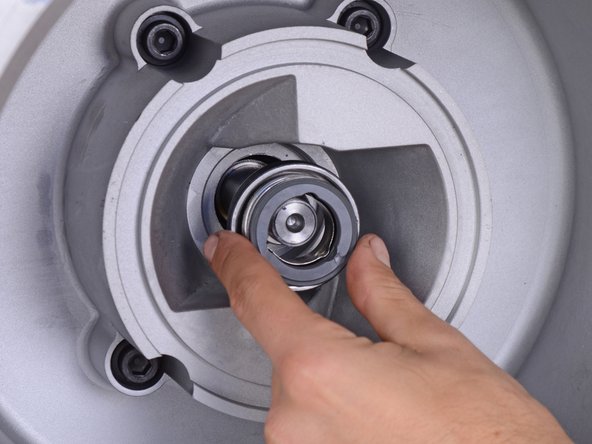
    • Use a flathead screwdriver to pry and loosen the mechanical seal from its recess.

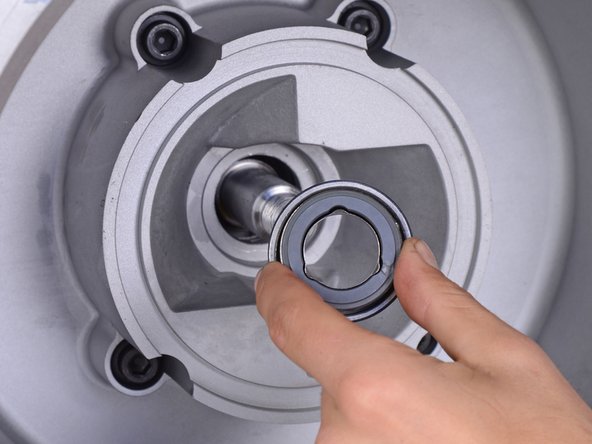
    • Remove the mechanical seal.

Conclusione

To reassemble your device, follow these instructions in reverse order.

Altre 2 persone hanno completato questa guida.

Arthur Shi

Membro da: 01/03/18

254.032 Reputazione

529 Guide realizzate

Team

iFixit Membro di iFixit

Staff

135 Membri

17.243 Guide realizzate

0 Commenti

Aggiungi Commento

Visualizza Statistiche:

Ultime 24 Ore: 1

Ultimi 7 Giorni: 6

Ultimi 30 Giorni: 32

Tutti i Tempi: 1,538