Salta al contenuto principale

Vtech InnoTab 3S Headphone Port Replacement

Cosa ti serve

  1. Vtech InnoTab 3S Headphone Port Replacement, Rear Panel: passo 1, immagine 1 di 3 Vtech InnoTab 3S Headphone Port Replacement, Rear Panel: passo 1, immagine 2 di 3 Vtech InnoTab 3S Headphone Port Replacement, Rear Panel: passo 1, immagine 3 di 3
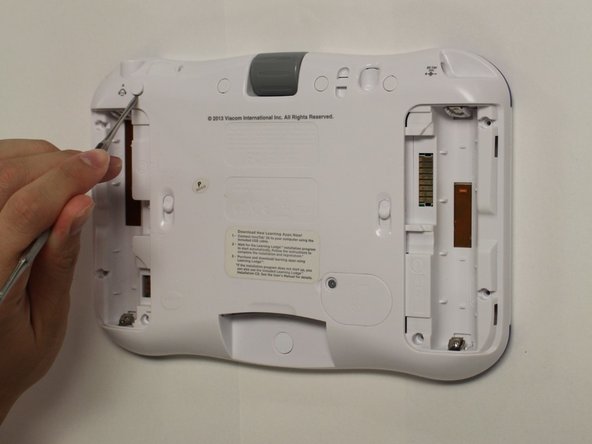
    • While holding the battery compartment locks down, slide the two battery doors outwards from the sides of the device.

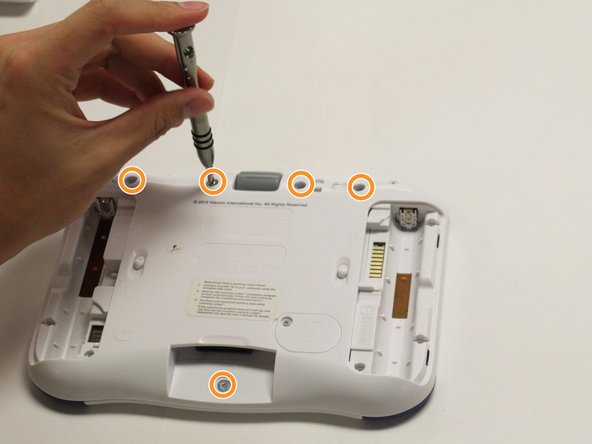
    • Remove the batteries from the device.

  2. Vtech InnoTab 3S Headphone Port Replacement: passo 2, immagine 1 di 2 Vtech InnoTab 3S Headphone Port Replacement: passo 2, immagine 2 di 2
    • Remove six 7 mm screws from the interior of the battery compartment using a Phillips #1 screwdriver.

  3. Vtech InnoTab 3S Headphone Port Replacement: passo 3, immagine 1 di 3 Vtech InnoTab 3S Headphone Port Replacement: passo 3, immagine 2 di 3 Vtech InnoTab 3S Headphone Port Replacement: passo 3, immagine 3 di 3
    • Using a nylon spudger, remove the five caps that hide the screws.

    • Potential for device damage: Be careful not to scrape the plastic from the device using the spudger.

    • When removing the caps, hold the spudger vertical to the board to make removal easier. Also try to push in with your spudger pointing towards the bottom of the device.

    • Remove the five 5 mm Phillips #1 screws from the rear panel of the device.

  4. Vtech InnoTab 3S Headphone Port Replacement: passo 4, immagine 1 di 1
    • Carefully remove the rear panel from the front panel of the device.

    • Once the rear panel is removed, you'll be able to see the motherboard and other components within the Vtech InnoTab 3s.

  5. Vtech InnoTab 3S Headphone Port Replacement, Headphone Port: passo 5, immagine 1 di 3 Vtech InnoTab 3S Headphone Port Replacement, Headphone Port: passo 5, immagine 2 di 3 Vtech InnoTab 3S Headphone Port Replacement, Headphone Port: passo 5, immagine 3 di 3
    • The headphone port is located towards the top left side of the device.

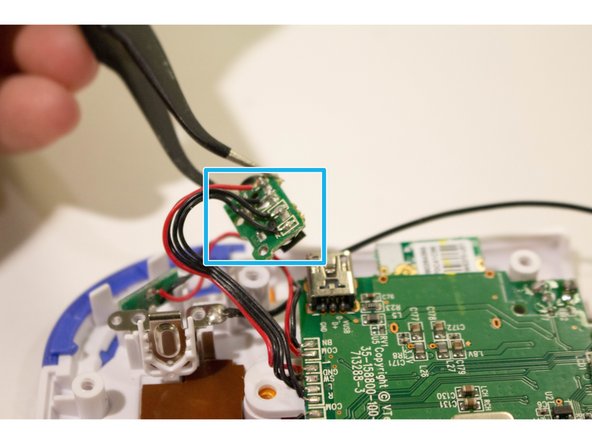
    • With tweezers remove the headphone port from its slot on the device.

    • The headphone port is fastened by two plastic poles. For easier removal lift the headphone port perpendicular to the device upwards.

    • Avoid damaging the plastic poles fastening the headphone port to the device. They are extremely fragile.

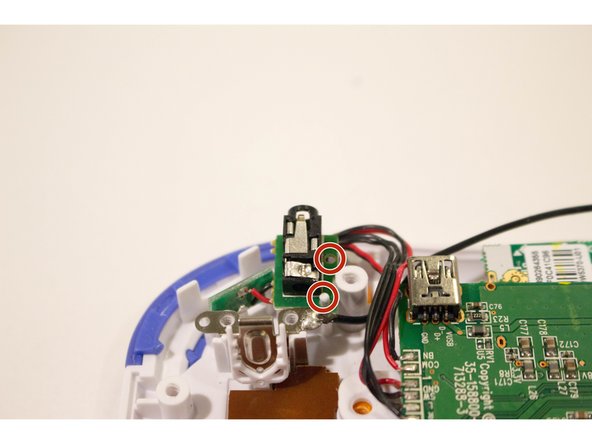
    • Solder the wires securing the headphone port to the device.

    • Avoid forceful movements when soldering to prevent damage to device components and personal injury.

Conclusione

To reassemble your device, follow these instructions in reverse order.

Team

USF Tampa, Team 8-2, Eyestone Fall 2015 Membro di USF Tampa, Team 8-2, Eyestone Fall 2015

USFT-EYESTONE-F15S8G2

4 Membri

9 Guide realizzate

0 Commenti

Aggiungi Commento

Visualizza Statistiche:

Ultime 24 Ore: 0

Ultimi 7 Giorni: 1

Ultimi 30 Giorni: 2

Tutti i Tempi: 194