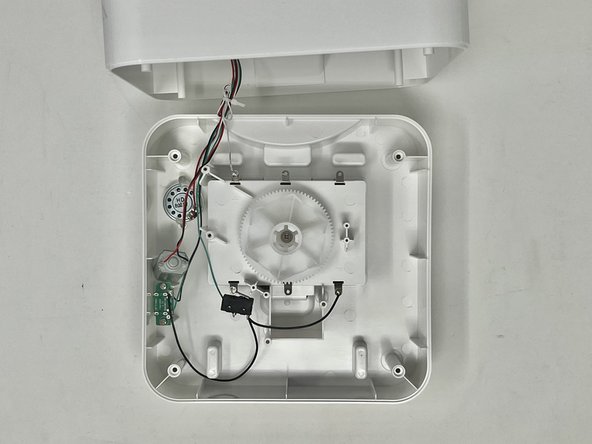
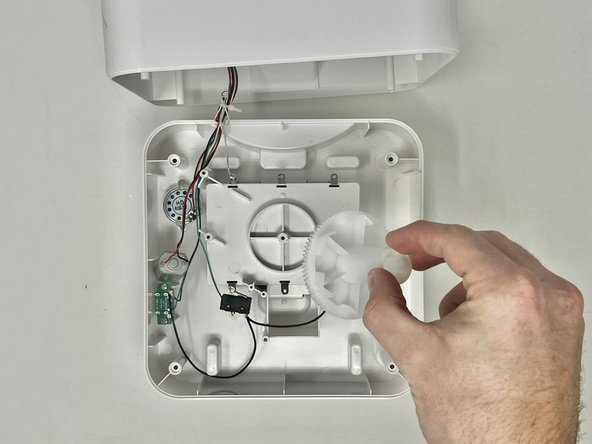
Salta al contenuto principale

Voluas VL001 Main Drive Gear Replacement

Cosa ti serve

  1. Voluas VL001 Main Drive Gear Replacement, Storage Tank: passo 1, immagine 1 di 3 Voluas VL001 Main Drive Gear Replacement, Storage Tank: passo 1, immagine 2 di 3 Voluas VL001 Main Drive Gear Replacement, Storage Tank: passo 1, immagine 3 di 3
    • Remove the lid to the storage tank by using the latch and lifting off.

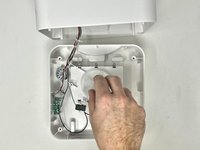
    • Grab the food storage tank on both sides. Depress the tabs that say "Push" on them and lift the tank off.

  2. Voluas VL001 Main Drive Gear Replacement, Battery: passo 2, immagine 1 di 3 Voluas VL001 Main Drive Gear Replacement, Battery: passo 2, immagine 2 di 3 Voluas VL001 Main Drive Gear Replacement, Battery: passo 2, immagine 3 di 3
    • Place your pet feeder upside down.

    • Squeeze the lock and remove the battery cover.

    • Remove the three 1.5V D alkaline batteries.

  3. Voluas VL001 Main Drive Gear Replacement, Housing: passo 3, immagine 1 di 3 Voluas VL001 Main Drive Gear Replacement, Housing: passo 3, immagine 2 di 3 Voluas VL001 Main Drive Gear Replacement, Housing: passo 3, immagine 3 di 3
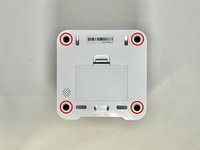
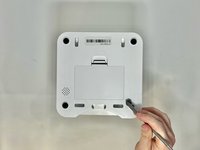
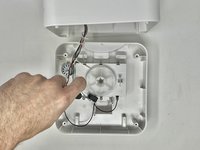
    • Insert a metal spudger under the adhesive part of each rubber foot.

    • Pry the foot off.

  4. Voluas VL001 Main Drive Gear Replacement: passo 4, immagine 1 di 2 Voluas VL001 Main Drive Gear Replacement: passo 4, immagine 2 di 2
    • Remove four screws from the corners of the device using a Phillips #2 screwdriver.

    • These holes were previously covered by the rubber feet.

    • Using the magnetic tip of the screwdriver, carefully lift the screw out of the hole.

  5. Voluas VL001 Main Drive Gear Replacement: passo 5, immagine 1 di 1
    • Turn the device over so it is oriented right-side up.

    • Lift the top part of the feeder off, exposing the mechanisms that run the feeder.

  6. Voluas VL001 Main Drive Gear Replacement, Main Drive Gear: passo 6, immagine 1 di 3 Voluas VL001 Main Drive Gear Replacement, Main Drive Gear: passo 6, immagine 2 di 3 Voluas VL001 Main Drive Gear Replacement, Main Drive Gear: passo 6, immagine 3 di 3
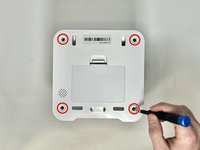
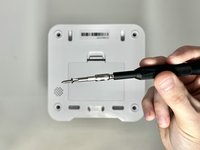
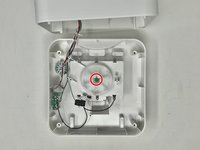
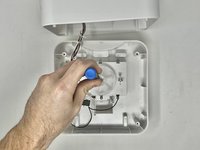
    • Remove the two 11 mm screws that attach the portion switch to the device using a #2 Phillips screwdriver.

  7. Voluas VL001 Main Drive Gear Replacement: passo 7, immagine 1 di 2 Voluas VL001 Main Drive Gear Replacement: passo 7, immagine 2 di 2
    • Using a Phillips #2 screwdriver, remove the single 13 mm screw that is found in the center of the main drive gear shaft.

  8. Voluas VL001 Main Drive Gear Replacement: passo 8, immagine 1 di 3 Voluas VL001 Main Drive Gear Replacement: passo 8, immagine 2 di 3 Voluas VL001 Main Drive Gear Replacement: passo 8, immagine 3 di 3
    • Firmly grab the gear and remove it from the device.

Conclusione

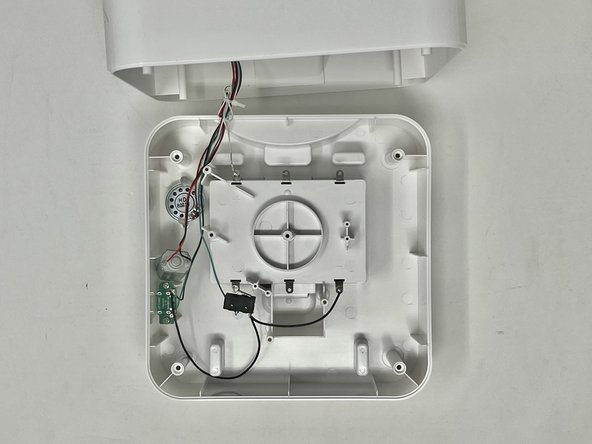
To reassemble your device, follow these instructions in reverse order.

0 Commenti

Aggiungi Commento

Visualizza Statistiche:

Ultime 24 Ore: 0

Ultimi 7 Giorni: 0

Ultimi 30 Giorni: 3

Tutti i Tempi: 41