Salta al contenuto principale

Vixen 21 Oil Cooler Replacement

Cosa ti serve

  1. Vixen 21 Oil Cooler Replacement, Oil Cooler: passo 1, immagine 1 di 1
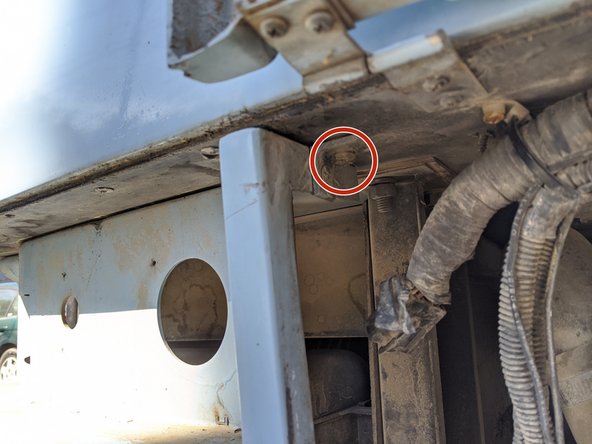
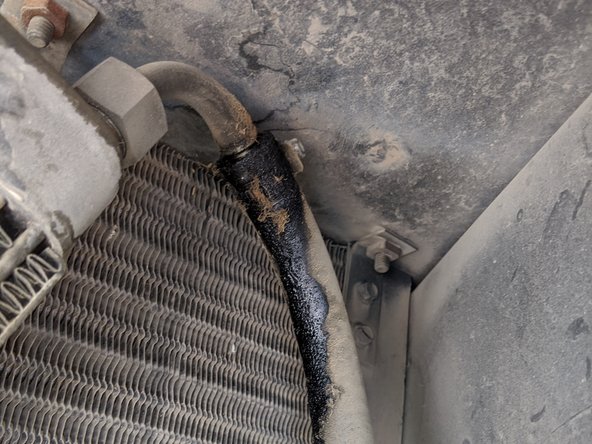
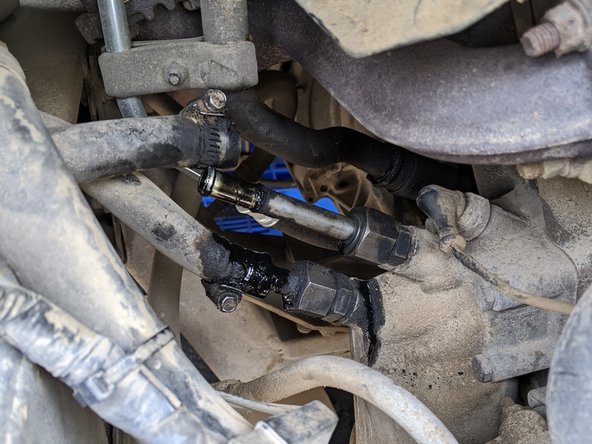
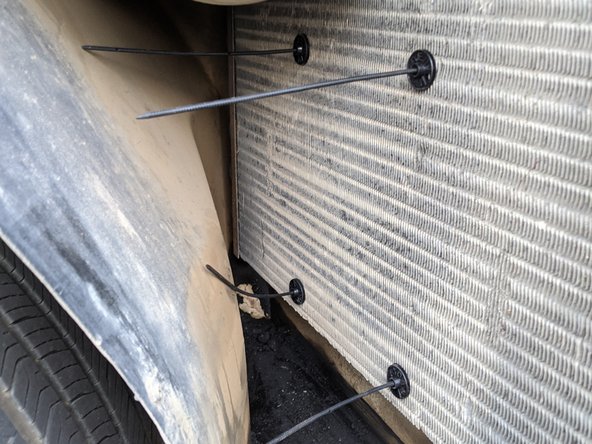
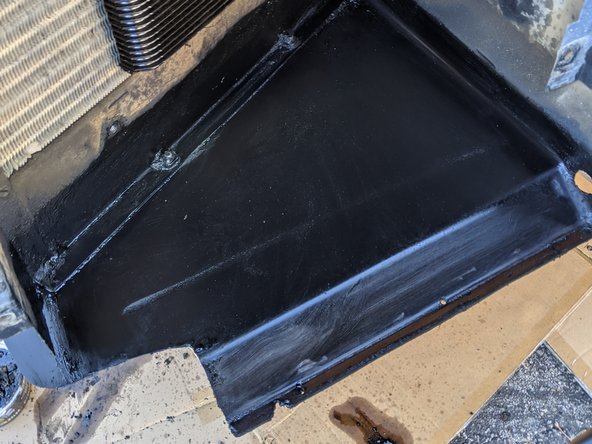
    • After removing the side panel, it's clear that my oil cooler has been leaking for a while. Fortunately, AFAB sells a complete replacement kit including a new oil cooler and new hoses!

  2. Vixen 21 Oil Cooler Replacement: passo 2, immagine 1 di 3 Vixen 21 Oil Cooler Replacement: passo 2, immagine 2 di 3 Vixen 21 Oil Cooler Replacement: passo 2, immagine 3 di 3
    • The tail light covers come off easy enough with 10 screws and a single connector.

    • The white housing beneath comes off with a bolt on the left and a screw on the right.

  3. Vixen 21 Oil Cooler Replacement: passo 3, immagine 1 di 2 Vixen 21 Oil Cooler Replacement: passo 3, immagine 2 di 2
    • On my Vixen there was a hex head bolt on the top right, and a on-its-way-to-being-stripped Phillips head bolt on the top left.

  4. Vixen 21 Oil Cooler Replacement: passo 4, immagine 1 di 1
    • There were two Phillips screws in the bottom of the panel, but these weren't actually attached to anything.

    • My new side-routed exhaust definitely made it harder to get this panel out.

  5. Vixen 21 Oil Cooler Replacement: passo 5, immagine 1 di 1
    • There's one electrical plug and 4 obvious hex bolts to remove the condenser fan.

  6. Vixen 21 Oil Cooler Replacement: passo 6, immagine 1 di 2 Vixen 21 Oil Cooler Replacement: passo 6, immagine 2 di 2
    • Once the condenser fan is removed we can get a good look at the oil cooler. The fittings are certainly leaking, but the cooler itself might actually be fine.

    • The Vixen bleeds black and I bleed red, whoops!

  7. Vixen 21 Oil Cooler Replacement: passo 7, immagine 1 di 2 Vixen 21 Oil Cooler Replacement: passo 7, immagine 2 di 2
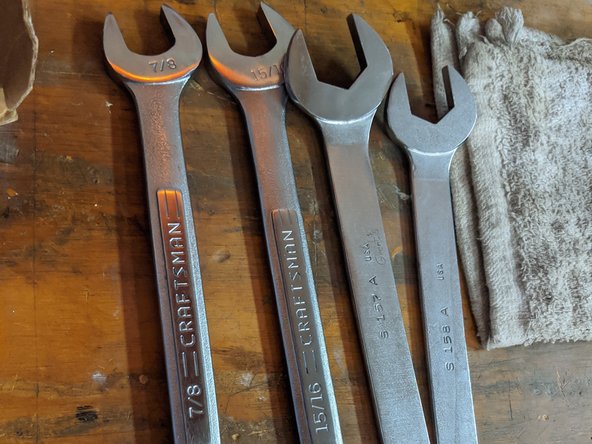
    • Here's all the shiny new replacement parts. You can buy the oil cooler kit from AFAB.

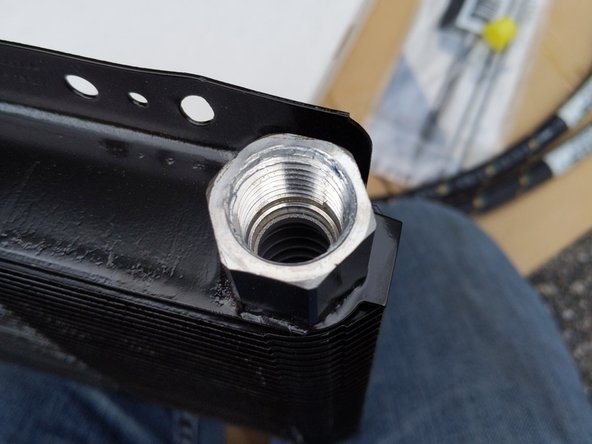
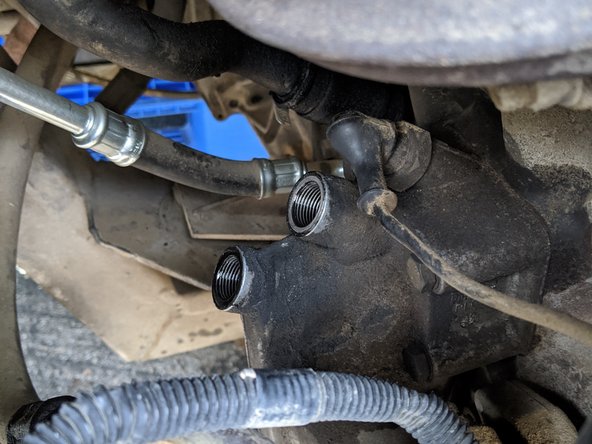
    • I made a mess of the threads putting one of the blue aluminum fittings in to the top of the new oil cooler. Thanks to a 1/2" NPT tap and die from Harbor Freight and a friend's help I was able to salvage it and I don't think it leaks, but time will tell...
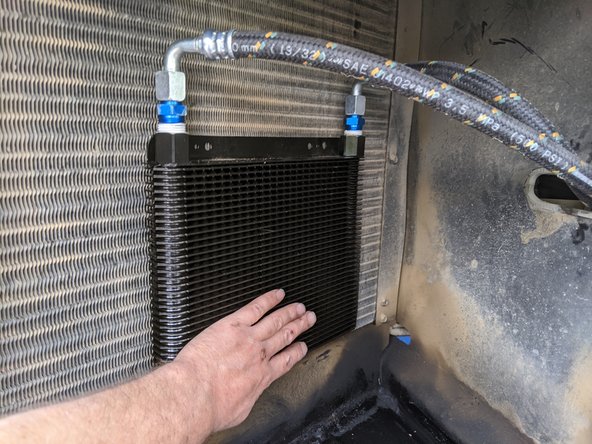
  8. Vixen 21 Oil Cooler Replacement: passo 8, immagine 1 di 3 Vixen 21 Oil Cooler Replacement: passo 8, immagine 2 di 3 Vixen 21 Oil Cooler Replacement: passo 8, immagine 3 di 3
    • On a closer inspection, all my existing fittings are leaking, which at this point I suppose is a good sign.

  9. Vixen 21 Oil Cooler Replacement: passo 9, immagine 1 di 1
    • Getting the oil cooler off the condenser was easy, there's just two bolts. But it's still attached to the engine...

  10. Vixen 21 Oil Cooler Replacement: passo 10, immagine 1 di 2 Vixen 21 Oil Cooler Replacement: passo 10, immagine 2 di 2
    • It was easy enough to loosen the hose clamps and pop the hoses off.

    • This made a mess, because not surprisingly, there's oil in the lines.

  11. Vixen 21 Oil Cooler Replacement: passo 11, immagine 1 di 1
    • The old oil cooler is out!

  12. Vixen 21 Oil Cooler Replacement: passo 12, immagine 1 di 3 Vixen 21 Oil Cooler Replacement: passo 12, immagine 2 di 3 Vixen 21 Oil Cooler Replacement: passo 12, immagine 3 di 3
    • There was a lot of oil/dust sludge beneath the oil cooler, requiring a rather dirty cleanup.

  13. Vixen 21 Oil Cooler Replacement: passo 13, immagine 1 di 3 Vixen 21 Oil Cooler Replacement: passo 13, immagine 2 di 3 Vixen 21 Oil Cooler Replacement: passo 13, immagine 3 di 3
    • Removing the remaining couplers was quite challenging.

    • I was able to borrow some large metric wrenches (24 mm and 27 mm) from a friend to help with this step.

  14. Vixen 21 Oil Cooler Replacement: passo 14, immagine 1 di 3 Vixen 21 Oil Cooler Replacement: passo 14, immagine 2 di 3 Vixen 21 Oil Cooler Replacement: passo 14, immagine 3 di 3
    • After the first fitting was off, I was able to get a 24 mm socket over the second one to remove the fitting.

  15. Vixen 21 Oil Cooler Replacement: passo 15, immagine 1 di 2 Vixen 21 Oil Cooler Replacement: passo 15, immagine 2 di 2
    • I routed the new lines the same as the old ones.

    • The plastic lining the hole the hoses go through is definitely decaying, but seems like it'll still protect the hoses ok.

  16. Vixen 21 Oil Cooler Replacement: passo 16, immagine 1 di 2 Vixen 21 Oil Cooler Replacement: passo 16, immagine 2 di 2
    • The lines are just barely long enough, but it reaches!

  17. Vixen 21 Oil Cooler Replacement: passo 17, immagine 1 di 3 Vixen 21 Oil Cooler Replacement: passo 17, immagine 2 di 3 Vixen 21 Oil Cooler Replacement: passo 17, immagine 3 di 3
    • Mounting to the condenser is straightforward.

  18. Vixen 21 Oil Cooler Replacement: passo 18, immagine 1 di 2 Vixen 21 Oil Cooler Replacement: passo 18, immagine 2 di 2
    • Everything's in place!

    • I spent some more time cleaning the dirty panel below. Thus far I have no leaks from the new oil cooler!

Conclusione

To reassemble your device, follow these instructions in reverse order.

Team

iFixit Membro di iFixit

Staff

135 Membri

16.767 Guide realizzate

0 Commenti

Aggiungi Commento

Visualizza Statistiche:

Ultime 24 Ore: 1

Ultimi 7 Giorni: 10

Ultimi 30 Giorni: 38

Tutti i Tempi: 964