Salta al contenuto principale

Verizon Ellipsis 7 Speaker Replacement

Cosa ti serve

  1. Verizon Ellipsis 7 Speaker Replacement, Charging Port: passo 1, immagine 1 di 3 Verizon Ellipsis 7 Speaker Replacement, Charging Port: passo 1, immagine 2 di 3 Verizon Ellipsis 7 Speaker Replacement, Charging Port: passo 1, immagine 3 di 3
    • Hold down the power button until the screen goes black to turn off the device.

    • Remove the SIM card from the device to prevent damage.

    • To remove the SIM card, open the SIM card cover on the side of the device.

    • Push SIM card in and pull it out after hearing a click.

  2. Verizon Ellipsis 7 Speaker Replacement: passo 2, immagine 1 di 2 Verizon Ellipsis 7 Speaker Replacement: passo 2, immagine 2 di 2
    • Take off the back panel.

    • Pry open the back cover carefully with a plastic opening tool.

    • Use the opening tool to disconnect the cover completely. Do not attempt to pry the back cover off with your hands.

    • Be sure to pry open all sides of the device. Attempting to take off the back cover when part of it is attached may snap the cover.

  3. Verizon Ellipsis 7 Speaker Replacement: passo 3, immagine 1 di 3 Verizon Ellipsis 7 Speaker Replacement: passo 3, immagine 2 di 3 Verizon Ellipsis 7 Speaker Replacement: passo 3, immagine 3 di 3
    Attrezzo utilizzato in questo passaggio:
    Tweezers
    $4.99
    Compra
    • Remove the charging (micro-USB) port.

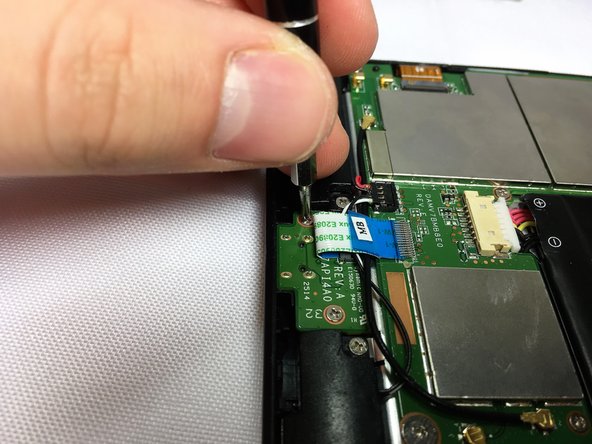
    • Unscrew the indicated screws using the Phillips #00 screwdriver.

    • The screws shown in the picture are the more common 4.76 mm.

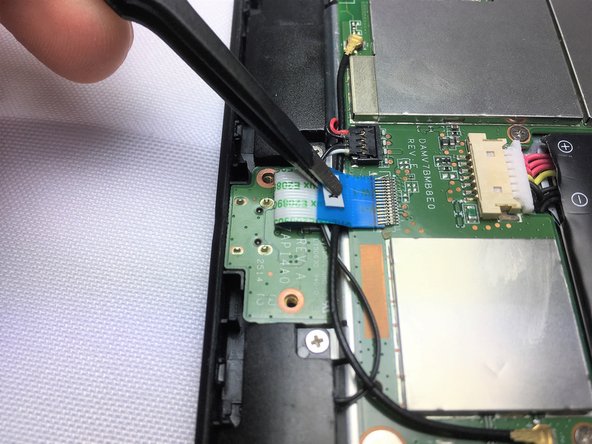
    • Disconnect the ribbon cable connecting the charging port board to the motherboard using tweezers.

    • Use the tweezers to grab the sides of black, plastic connector. Do not grab from the wires or try to wedge it out from the bottom.

    • Be extremely careful when disconnecting the ribbon cable. It is very delicate.

  4. Verizon Ellipsis 7 Speaker Replacement: passo 4, immagine 1 di 2 Verizon Ellipsis 7 Speaker Replacement: passo 4, immagine 2 di 2
    • Remove the charging port board from the phone using tweezers.

    • Place the replacement charging port into the phone.

    • Be cautious when replacing the ribbon cable onto the new charging port board.

  5. Verizon Ellipsis 7 Speaker Replacement, Speaker: passo 5, immagine 1 di 2 Verizon Ellipsis 7 Speaker Replacement, Speaker: passo 5, immagine 2 di 2
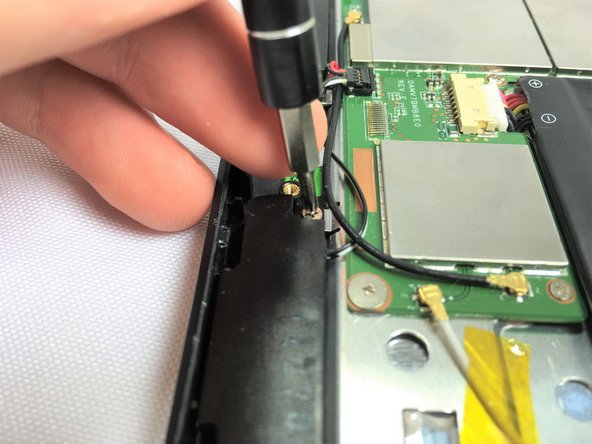
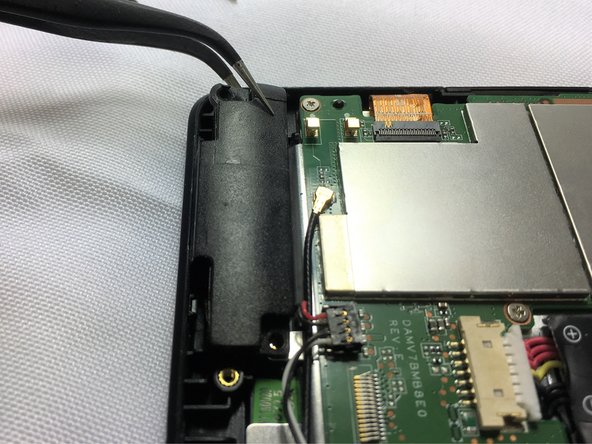
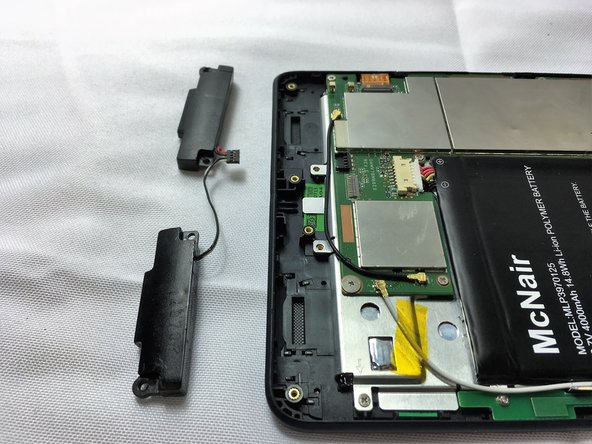
    • Remove 2 screws from each speaker, 4 screws in total, using a Phillips #00 screwdriver.

    • The screws shown in the picture are the more common 4.76 mm.

  6. Verizon Ellipsis 7 Speaker Replacement: passo 6, immagine 1 di 3 Verizon Ellipsis 7 Speaker Replacement: passo 6, immagine 2 di 3 Verizon Ellipsis 7 Speaker Replacement: passo 6, immagine 3 di 3
    Attrezzo utilizzato in questo passaggio:
    Tweezers
    $4.99
    Compra
    • Using tweezers carefully lift the connector up to disconnect it from the motherboard.

    • Using tweezers carefully pull the speakers up and out of device.

Conclusione

To reassemble your device, follow these instructions in reverse order.

Altre 2 persone hanno completato questa guida.

0 Commenti

Aggiungi Commento

Visualizza Statistiche:

Ultime 24 Ore: 0

Ultimi 7 Giorni: 0

Ultimi 30 Giorni: 6

Tutti i Tempi: 1,182