Salta al contenuto principale
Unisciti alla Community delle riparazioni - Crea un account
VTech Kidizoom Action Cam LCD Screen Replacement

VTech Kidizoom Action Cam LCD Screen Replacement

Anthony Teresi

Anthony Teresi e 3 altri collaboratori

Ultimo aggiornamento il 3 mag 2016

15 - 20 minuti
Moderato

Introduzione

Vai al passo 1

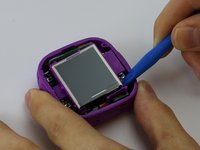
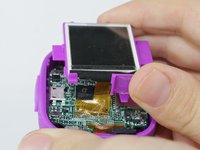
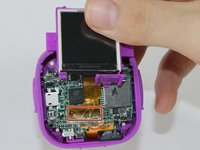
Exercise caution when lifting the LCD screen, as any excessive pulling can damage the motherboard. Otherwise, the LCD screen is one of the easiest parts of the device to replace and only requires a small amount of unscrewing, prying and gluing.

Cosa ti serve

Strumenti

Mostra di più…

  1. VTech Kidizoom Action Cam LCD Screen Replacement, Display Assembly: passo 1, immagine 1 di 1
    • Make sure that the master power switch is set to the (O) position.

  2. VTech Kidizoom Action Cam LCD Screen Replacement: passo 2, immagine 1 di 1
    • Using a plastic opening tool, gently pry off the circular plating over the camera lens.

    • The circular plating is held by a mild adhesive. It will not be necessary to replace this adhesive during the reassembly process.

  3. VTech Kidizoom Action Cam LCD Screen Replacement: passo 3, immagine 1 di 1
    Attrezzo utilizzato in questo passaggio:
    Magnetic Project Mat
    $19.95
    • Use a #0 screwdriver to remove the two 2.5mm Phillips head screws located on the second layer of plating.

    • Remove the second layer of plating previously held down by the screws by gripping it with your fingers and pulling upward.

    • As there will be many screws being removed from the device, we recommend using a magnetic device such as the iFixit Magnetic Project Mat.

  4. VTech Kidizoom Action Cam LCD Screen Replacement: passo 4, immagine 1 di 1
    • Pry off the transparent plating and paper design using a plastic opening tool.

  5. VTech Kidizoom Action Cam LCD Screen Replacement: passo 5, immagine 1 di 1
    • Unscrew the (4) 2.5mm Phillips head screws from the third layer of plating using a #0 screwdriver.

  6. VTech Kidizoom Action Cam LCD Screen Replacement: passo 6, immagine 1 di 1
    • Turn the camera around and gently remove the plating that surrounds the LCD screen by grasping it with your fingers and pulling away from the device.

  7. VTech Kidizoom Action Cam LCD Screen Replacement: passo 7, immagine 1 di 3 VTech Kidizoom Action Cam LCD Screen Replacement: passo 7, immagine 2 di 3 VTech Kidizoom Action Cam LCD Screen Replacement: passo 7, immagine 3 di 3
    • Use the plastic opening tool to lift the LCD screen, including the purple casing and set it aside, revealing the motherboard and connector ribbon.

    • Exercise caution while performing this step, as any excessive pulling may tear the connector ribbon from the motherboard.

  8. VTech Kidizoom Action Cam LCD Screen Replacement, LCD Screen: passo 8, immagine 1 di 3 VTech Kidizoom Action Cam LCD Screen Replacement, LCD Screen: passo 8, immagine 2 di 3 VTech Kidizoom Action Cam LCD Screen Replacement, LCD Screen: passo 8, immagine 3 di 3
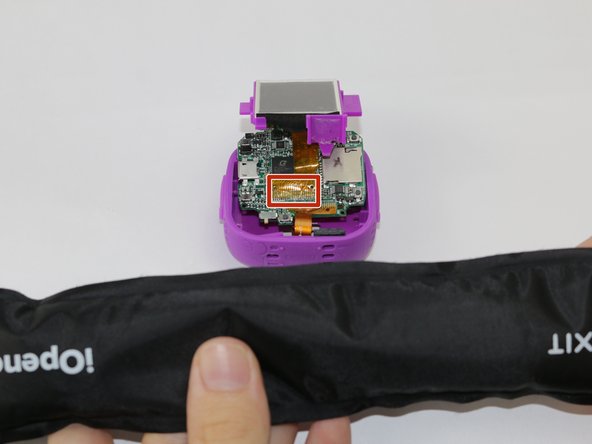
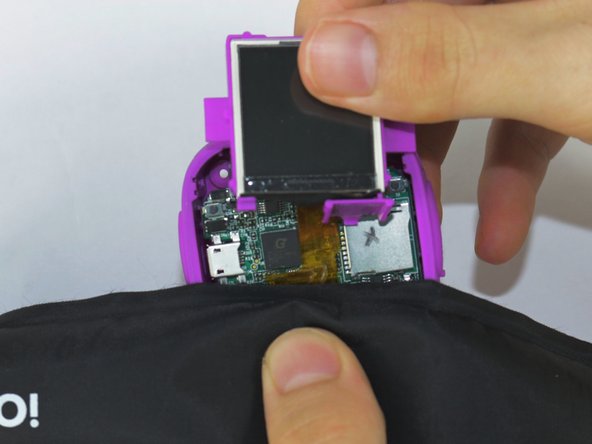
    • Heat the iOpener tool, then press the iOpener tool onto the connectors to heat the glue on the connector ribbon.

    • If the iOpener tool is not available, use a hair dryer to heat the glue on the connector ribbon and then use a Q-tip dabbed in Isopropyl alcohol to dab the heated glue.

  9. VTech Kidizoom Action Cam LCD Screen Replacement: passo 9, immagine 1 di 1
    • Gently peel the connector ribbon being held down by the heated glue until it is completely removed.

    • Be cautious of very hot glue when peeling the connector ribbon off of the motherboard

Conclusione

To reassemble your device, follow these instructions in reverse order.

Altre 4 persone hanno completato questa guida.

Team

USF Tampa, Team 3-5, Sullivan Spring 2016 Membro di USF Tampa, Team 3-5, Sullivan Spring 2016

USFT-SULLIVAN-S16S3G5

3 Membri

6 Guide realizzate

1Commento della guida

Where do I find a new LCD screen replacement part?

Abbie - Replica

Aggiungi Commento

Visualizza Statistiche:

Ultime 24 Ore: 1

Ultimi 7 Giorni: 7

Ultimi 30 Giorni: 20

Tutti i Tempi: 3,639