Salta al contenuto principale

VTech InnoTab 2S Motherboard Removal

Cosa ti serve

  1. VTech InnoTab 2S Motherboard Removal, Back Panel: passo 1, immagine 1 di 1
    • Turn your device to where the back panel is facing you.

  2. VTech InnoTab 2S Motherboard Removal: passo 2, immagine 1 di 2 VTech InnoTab 2S Motherboard Removal: passo 2, immagine 2 di 2
    • Lift the Leg all the way up and twist the bottom to remove.

    • Once the bottom part pops out the whole leg should just come off.

    • Remove any game cartridge from the device.

  3. VTech InnoTab 2S Motherboard Removal: passo 3, immagine 1 di 3 VTech InnoTab 2S Motherboard Removal: passo 3, immagine 2 di 3 VTech InnoTab 2S Motherboard Removal: passo 3, immagine 3 di 3
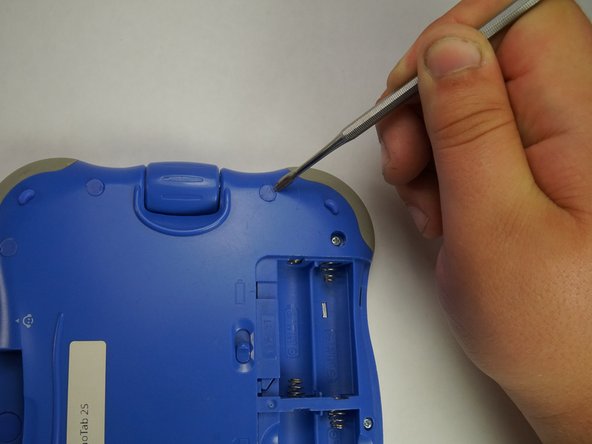
    • Remove all of the plastic tabs on the device. These are covering screws that will need to be removed.

    • These covers are made of hard plastic so they may be difficult to remove.

    • There is a special tab in the cartridge cover that is made of rubber, make sure to not break this tab.

  4. VTech InnoTab 2S Motherboard Removal: passo 4, immagine 1 di 2 VTech InnoTab 2S Motherboard Removal: passo 4, immagine 2 di 2
    • Remove all nine screws from the back of the device using a J0 bit.

    • Remove the small battery.

  5. VTech InnoTab 2S Motherboard Removal: passo 5, immagine 1 di 2 VTech InnoTab 2S Motherboard Removal: passo 5, immagine 2 di 2
    • Using a plastic opening tool, detach the backplate from the front piece.

    • Do not use excessive force. Double check that you removed all the screws if the panel is not coming off easily.

    • Once the backplate has been removed, you will have access to the circuit board.

  6. VTech InnoTab 2S Motherboard Removal, Motherboard: passo 6, immagine 1 di 1
    • First begin by removing the three cross-head screws using a J0 bit.

  7. VTech InnoTab 2S Motherboard Removal: passo 7, immagine 1 di 1
    • First remove the ribbon cables. There are two highlighted by the red squares

    • Do not apply too much pressure and make sure that the black plastic tabs are fully open before you pull the cable out.

  8. VTech InnoTab 2S Motherboard Removal: passo 8, immagine 1 di 1
    • Remove the camera from the assembly and put is a safe place so that it will not get damaged.

  9. VTech InnoTab 2S Motherboard Removal: passo 9, immagine 1 di 1
    • Remove the board from the main assembly.

    • Be careful not to pull too hard so that the cables aren't broken.

  10. VTech InnoTab 2S Motherboard Removal: passo 10, immagine 1 di 1
    • De-solder the points shown to fully remove the cables and free the board.

    • A soldering guide offered by IFIXIT can be found here Soldering Skills.

Linea Traguardo

Team

USF Tampa, Team 5-1, Lacy Fall 2016 Membro di USF Tampa, Team 5-1, Lacy Fall 2016

USFT-LACY-F16S5G1

4 Membri

12 Guide realizzate

0 Commenti

Aggiungi Commento

Visualizza Statistiche:

Ultime 24 Ore: 1

Ultimi 7 Giorni: 5

Ultimi 30 Giorni: 7

Tutti i Tempi: 230