Salta al contenuto principale
VTech Baby's Learning Laptop Volume Switch  Replacement

VTech Baby's Learning Laptop Volume Switch Replacement

Jordan Smith

Jordan Smith e 4 altri collaboratori

Ultimo aggiornamento il December 7, 2023

5 minuti
Facile

Introduzione

Vai al passo 1

Has the sound for your device suddenly stopped working? Unable to adjust the volume? This guide may be the solution to your problem.

Cosa ti serve

Strumenti

Mostra di più…

iFixit guadagna commissioni quando acquisti tramite questi link.
  1. VTech Baby's Learning Laptop Volume Switch  Replacement, Battery and Rear Panel: passo 1, immagine 1 di 1
    • To remove the battery door, loosen the screw shown using a Phillips #2 screwdriver.

    • A coin can also be used to loosen the screw.

  2. VTech Baby's Learning Laptop Volume Switch  Replacement: passo 2, immagine 1 di 1
    • Remove the battery door.

    • Take out the batteries.

  3. VTech Baby's Learning Laptop Volume Switch  Replacement: passo 3, immagine 1 di 1
    • Remove the rear panel screws using a Phillips #2 screwdriver.

    • Two 21.6mm (Long)

    • One 9.8mm (Short)

    • Five 13.8mm (Medium)

  4. VTech Baby's Learning Laptop Volume Switch  Replacement: passo 4, immagine 1 di 2 VTech Baby's Learning Laptop Volume Switch  Replacement: passo 4, immagine 2 di 2
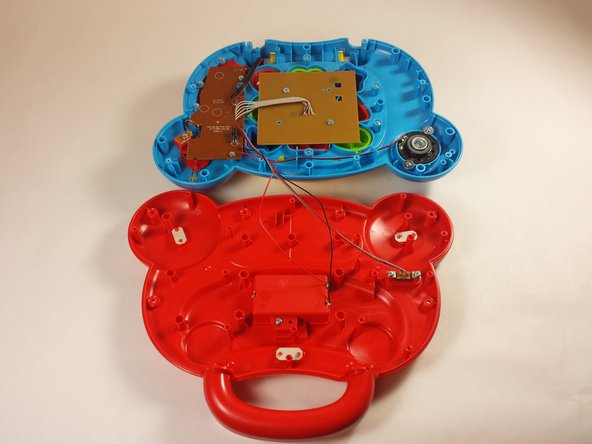
    • Gently pull up on the rear panel.

    • Be careful not to pull on the wire connections.

    • Rest the laptop open on the table.

  5. VTech Baby's Learning Laptop Volume Switch  Replacement, Volume Switch: passo 5, immagine 1 di 1
    • Flip your device so the bottom panel is facing up.

  6. VTech Baby's Learning Laptop Volume Switch  Replacement: passo 6, immagine 1 di 2 VTech Baby's Learning Laptop Volume Switch  Replacement: passo 6, immagine 2 di 2
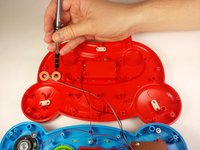
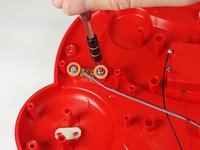
    • Use a Phillips #2 screwdriver to remove the two 7.7mm screws on the volume switch.

  7. VTech Baby's Learning Laptop Volume Switch  Replacement: passo 7, immagine 1 di 2 VTech Baby's Learning Laptop Volume Switch  Replacement: passo 7, immagine 2 di 2
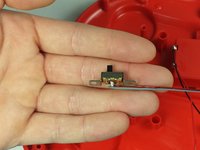
    • Remove the volume switch.

    • Be careful not damage the wiring.

Conclusione

To reassemble your device, follow these instructions in reverse order.

Jordan Smith

Membro da: 09/03/15

210 Reputazione

2 Guide realizzate

Team

USF Tampa, Team 12-2, Blackwell Fall 2015 Membro di USF Tampa, Team 12-2, Blackwell Fall 2015

USFT-BLACKWELL-F15S12G2

4 Membri

14 Guide realizzate

0Commenti sulla guida

Aggiungi Commento

Visualizza Statistiche:

Ultime 24 Ore: 0

Ultimi 7 Giorni: 0

Ultimi 30 Giorni: 15

Tutti i Tempi: 803