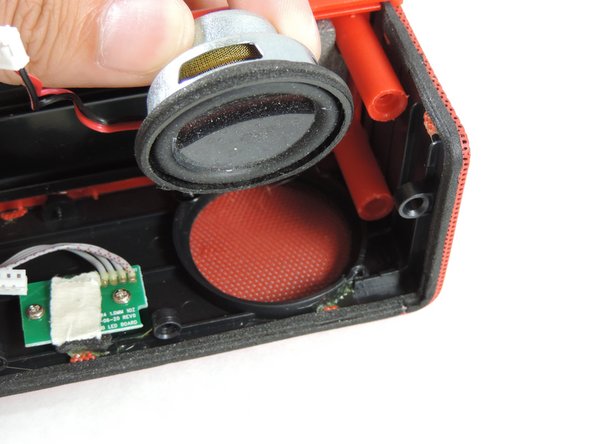
Salta al contenuto principale

Urge Basics Soundbrick Speaker Woofer Replacement

Cosa ti serve

  1. Urge Basics Soundbrick Speaker Woofer Replacement, Speaker Woofer: passo 1, immagine 1 di 3 Urge Basics Soundbrick Speaker Woofer Replacement, Speaker Woofer: passo 1, immagine 2 di 3 Urge Basics Soundbrick Speaker Woofer Replacement, Speaker Woofer: passo 1, immagine 3 di 3
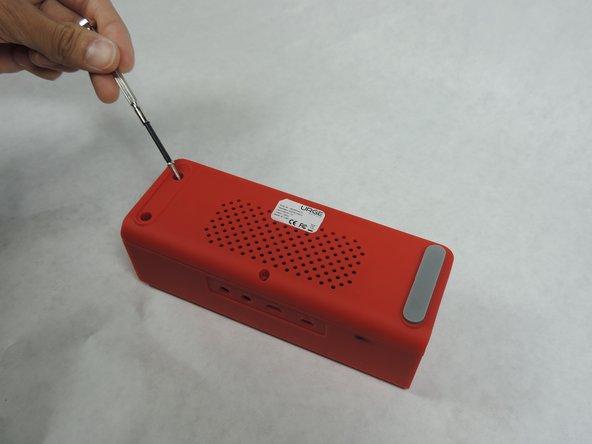
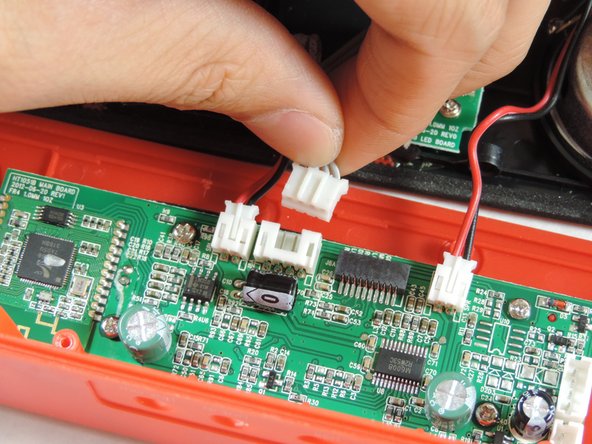
    • Flip the speaker upside down.

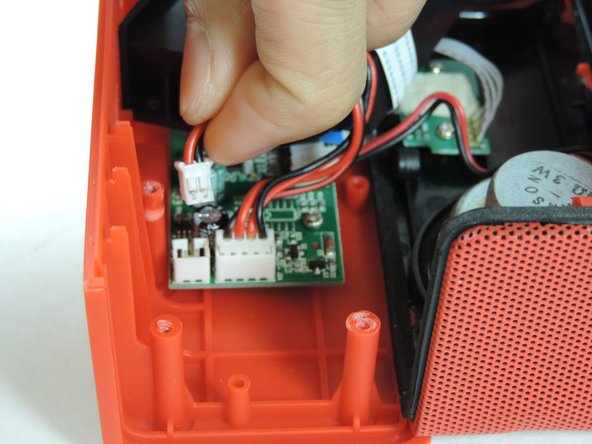
    • Unscrew the middle screw with a Philips #1 screwdriver.

  2. Urge Basics Soundbrick Speaker Woofer Replacement: passo 2, immagine 1 di 2 Urge Basics Soundbrick Speaker Woofer Replacement: passo 2, immagine 2 di 2
    • Peel off the two gray tabs to expose the four inner Philips #1 screws.

  3. Urge Basics Soundbrick Speaker Woofer Replacement: passo 3, immagine 1 di 3 Urge Basics Soundbrick Speaker Woofer Replacement: passo 3, immagine 2 di 3 Urge Basics Soundbrick Speaker Woofer Replacement: passo 3, immagine 3 di 3
    • Unscrew all four screws with a Philips #1 screwdriver.

    • The screws are deep and can be difficult to take out.

  4. Urge Basics Soundbrick Speaker Woofer Replacement: passo 4, immagine 1 di 3 Urge Basics Soundbrick Speaker Woofer Replacement: passo 4, immagine 2 di 3 Urge Basics Soundbrick Speaker Woofer Replacement: passo 4, immagine 3 di 3
    • Flip the speaker so that the ports are facing up.

    • Unfold the speaker's cover away from the body.

  5. Urge Basics Soundbrick Speaker Woofer Replacement: passo 5, immagine 1 di 2 Urge Basics Soundbrick Speaker Woofer Replacement: passo 5, immagine 2 di 2
    • Remove the two Phillips #1 screws found on each side of the battery compartment.

    • Removal of battery compartment is necessary to prevent electric shock when replacing the woofer.

  6. Urge Basics Soundbrick Speaker Woofer Replacement: passo 6, immagine 1 di 3 Urge Basics Soundbrick Speaker Woofer Replacement: passo 6, immagine 2 di 3 Urge Basics Soundbrick Speaker Woofer Replacement: passo 6, immagine 3 di 3
    • Disconnect the battery connectors attached to the circuit board by unplugging them.

  7. Urge Basics Soundbrick Speaker Woofer Replacement: passo 7, immagine 1 di 3 Urge Basics Soundbrick Speaker Woofer Replacement: passo 7, immagine 2 di 3 Urge Basics Soundbrick Speaker Woofer Replacement: passo 7, immagine 3 di 3
    • Disconnect the ribbon cable from the battery by carefully pulling it out.

    • Remove the battery compartment.

  8. Urge Basics Soundbrick Speaker Woofer Replacement: passo 8, immagine 1 di 3 Urge Basics Soundbrick Speaker Woofer Replacement: passo 8, immagine 2 di 3 Urge Basics Soundbrick Speaker Woofer Replacement: passo 8, immagine 3 di 3
    • Disconnect the adjacent connector from the main circuit board.

  9. Urge Basics Soundbrick Speaker Woofer Replacement: passo 9, immagine 1 di 3 Urge Basics Soundbrick Speaker Woofer Replacement: passo 9, immagine 2 di 3 Urge Basics Soundbrick Speaker Woofer Replacement: passo 9, immagine 3 di 3
    • Disconnect the woofer's two connectors from the main circuit board.

  10. Urge Basics Soundbrick Speaker Woofer Replacement: passo 10, immagine 1 di 3 Urge Basics Soundbrick Speaker Woofer Replacement: passo 10, immagine 2 di 3 Urge Basics Soundbrick Speaker Woofer Replacement: passo 10, immagine 3 di 3
    • Remove the two Phillips #1 screws keeping each woofer in place.

    • Carefully remove the woofers and replace them with new ones.

Conclusione

To reassemble your device, follow these instructions in reverse order.

Un'altra persona ha completato questa guida.

Itzel Urueta

Membro da: 04/28/17

125 Reputazione

1 Guida realizzata

Team

UC Davis, Team S2-G4, Cole Spring 2017 Membro di UC Davis, Team S2-G4, Cole Spring 2017

UCD-COLE-S17S2G4

3 Membri

1 Guida realizzata

0 Commenti

Aggiungi Commento

Visualizza Statistiche:

Ultime 24 Ore: 1

Ultimi 7 Giorni: 1

Ultimi 30 Giorni: 1

Tutti i Tempi: 862