Introduzione
This guide outlines the steps to replace the thumb sticks on your REACT-R controller, Worn or drifting thumb sticks can greatly affect your gaming experience, making replacements necessary to maintain accuracy and responsiveness.
For this procedure, you will need a Phillips #00 screwdriver. Follow this guide carefully to replace the thumb sticks to your REACT-R controller.
Cosa ti serve
-
-
Position the controller face down so that you're viewing its underside.
-
Use a Phillips #00 screwdriver to remove the seven 9.2 mm Phillips screws that secure the rear case.
-
Use both hands to lift the backplate away from the controller.
-
-
-
-
Use a Phillips #00 to remove the four 9.2 mm screws that secure the motherboard.
-
Gently lift the motherboard up and out of the chassis.
-
-
-
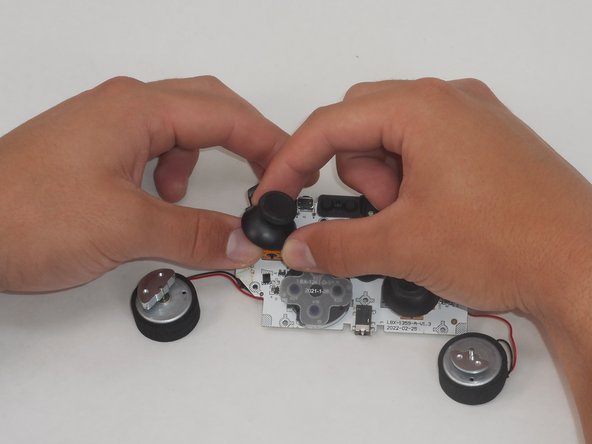
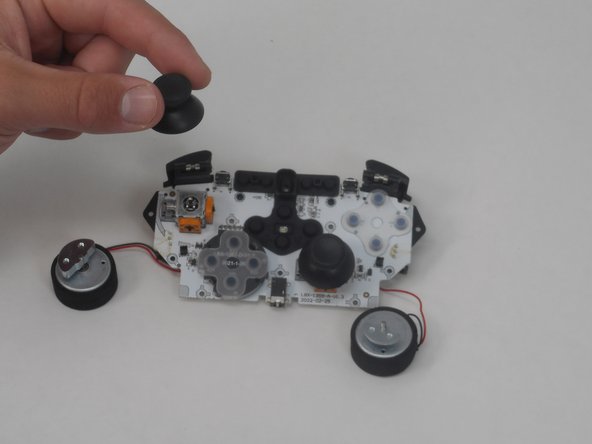
Gently twist off each thumb stick, using one hand to secure the base, and the other to twist off the thumb stick.
-
To reassemble your device, follow these instructions in reverse order.
To reassemble your device, follow these instructions in reverse order.
Annulla: non ho completato questa guida.
Altre 2 persone hanno completato questa guida.


