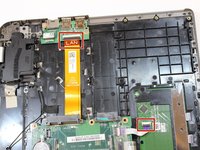
Salta al contenuto principale

Toshiba Satellite P75-A7100 Motherboard Replacement

Cosa ti serve

  1. Toshiba Satellite P75-A7100 Motherboard Replacement, Fan: passo 1, immagine 1 di 2 Toshiba Satellite P75-A7100 Motherboard Replacement, Fan: passo 1, immagine 2 di 2
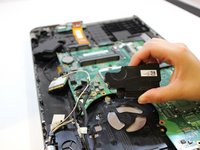
    • Using a Phillips #1 screwdriver, unscrew the 6 remaining screws attached to the fan.

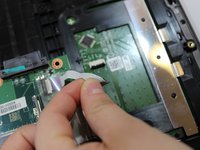
    • Unplug the connector connecting the fan to the motherboard.

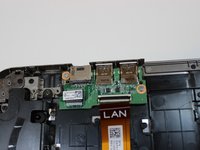
    • Remove the fan from the device.

  2. Toshiba Satellite P75-A7100 Motherboard Replacement, Motherboard: passo 2, immagine 1 di 1
    • Take out all remaining screws in the motherboard.

  3. Toshiba Satellite P75-A7100 Motherboard Replacement: passo 3, immagine 1 di 3 Toshiba Satellite P75-A7100 Motherboard Replacement: passo 3, immagine 2 di 3 Toshiba Satellite P75-A7100 Motherboard Replacement: passo 3, immagine 3 di 3
    • Disconnect the purple and orange ZIF connectors from the motherboard.

  4. Toshiba Satellite P75-A7100 Motherboard Replacement: passo 4, immagine 1 di 2 Toshiba Satellite P75-A7100 Motherboard Replacement: passo 4, immagine 2 di 2
    • Remove cartridges from laptop by lifting them up.

  5. Toshiba Satellite P75-A7100 Motherboard Replacement: passo 5, immagine 1 di 1
    • Disconnect all wires from the motherboard and replace motherboard.

Conclusione

To reassemble your device, follow these instructions in reverse order.

Altre 3 persone hanno completato questa guida.

2 Commenti

Thanks you very much. Have a nice day

janavas10 - Replica

Gracias. Pero no veo que al remover la placa madre pueda acceder a las 2 ranuras de RAM que están justo debajo del teclado o debajo de los buffers de sonido. Entiendo que debo quitar la placa que cubre el teclado que es una pieza.

janavas10 - Replica

Aggiungi Commento

Visualizza Statistiche:

Ultime 24 Ore: 0

Ultimi 7 Giorni: 4

Ultimi 30 Giorni: 18

Tutti i Tempi: 3,483