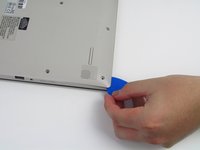
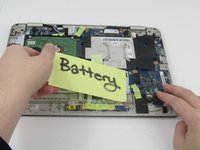
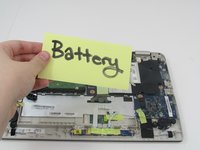
Salta al contenuto principale

Toshiba Satellite L15W-B1208X Hard Drive Replacement

Cosa ti serve

  1. Toshiba Satellite L15W-B1208X Hard Drive Replacement, Battery: passo 1, immagine 1 di 2 Toshiba Satellite L15W-B1208X Hard Drive Replacement, Battery: passo 1, immagine 2 di 2
    • Turn off your laptop before starting.

    • Flip the laptop over so that the model number stickers face the ceiling.

  2. Toshiba Satellite L15W-B1208X Hard Drive Replacement: passo 2, immagine 1 di 3 Toshiba Satellite L15W-B1208X Hard Drive Replacement: passo 2, immagine 2 di 3 Toshiba Satellite L15W-B1208X Hard Drive Replacement: passo 2, immagine 3 di 3
    • Use a Phillips #1 screwdriver (PH1 bit) to remove the ten 5mm screws that secure the bottom cover.

  3. Toshiba Satellite L15W-B1208X Hard Drive Replacement: passo 3, immagine 1 di 3 Toshiba Satellite L15W-B1208X Hard Drive Replacement: passo 3, immagine 2 di 3 Toshiba Satellite L15W-B1208X Hard Drive Replacement: passo 3, immagine 3 di 3
    • Use an opening pick by sliding it in the seam between the bottom casing and the main body of the laptop. Separate the bottom casing from the main body.

    • It is recommended that you start on a corner and work your way along the edge of the cover.

    • Use a plastic opening tool to separate the remainder of the back cover from the laptop.

    • Be careful not to bend or crack the plastic back cover.

  4. Toshiba Satellite L15W-B1208X Hard Drive Replacement: passo 4, immagine 1 di 3 Toshiba Satellite L15W-B1208X Hard Drive Replacement: passo 4, immagine 2 di 3 Toshiba Satellite L15W-B1208X Hard Drive Replacement: passo 4, immagine 3 di 3
    • Disconnect the battery from the motherboard by gently pulling on wiring connecting to the motherboard.

    • Carefully lift the battery out of the laptop.

  5. Toshiba Satellite L15W-B1208X Hard Drive Replacement, Sound Board: passo 5, immagine 1 di 2 Toshiba Satellite L15W-B1208X Hard Drive Replacement, Sound Board: passo 5, immagine 2 di 2
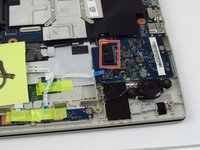
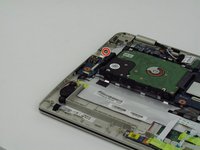
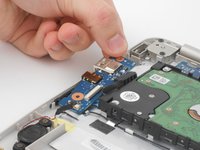
    • Use Phillips #1 screwdriver (PH1 bit) to remove the 2mm screw that secures the sound board.

  6. Toshiba Satellite L15W-B1208X Hard Drive Replacement: passo 6, immagine 1 di 3 Toshiba Satellite L15W-B1208X Hard Drive Replacement: passo 6, immagine 2 di 3 Toshiba Satellite L15W-B1208X Hard Drive Replacement: passo 6, immagine 3 di 3
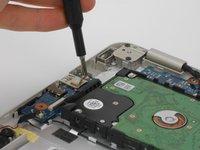
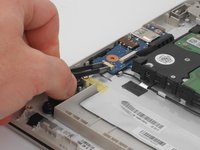
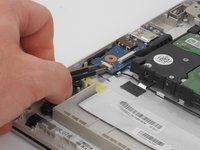
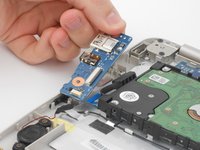
    • Using the ESD Safe Tweezers Blunt Nose gently pull on the plastic connector that attaches the speaker wiring to the soundboard to disconnect the soundboard from the laptop.

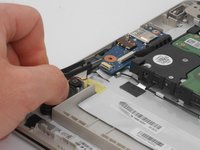
    • Gently pull the wire away from the soundboard using the ESD Safe Tweezers Blunt Nose.

  7. Toshiba Satellite L15W-B1208X Hard Drive Replacement: passo 7, immagine 1 di 3 Toshiba Satellite L15W-B1208X Hard Drive Replacement: passo 7, immagine 2 di 3 Toshiba Satellite L15W-B1208X Hard Drive Replacement: passo 7, immagine 3 di 3
    • Gently lift the soundboard out of the laptop.

  8. Toshiba Satellite L15W-B1208X Hard Drive Replacement, Hard Drive: passo 8, immagine 1 di 3 Toshiba Satellite L15W-B1208X Hard Drive Replacement, Hard Drive: passo 8, immagine 2 di 3 Toshiba Satellite L15W-B1208X Hard Drive Replacement, Hard Drive: passo 8, immagine 3 di 3
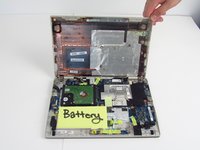
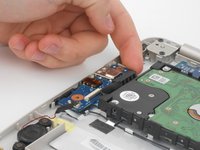
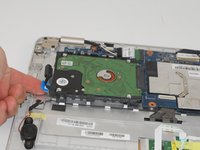
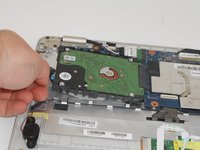
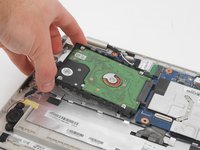
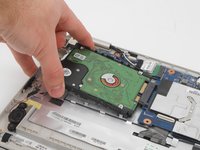
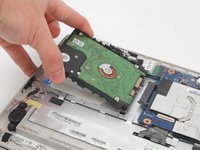
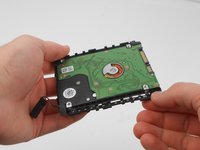
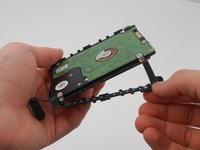
    • Pull up on the ribbon beneath the hard drive to lift the hard drive upwards.

  9. Toshiba Satellite L15W-B1208X Hard Drive Replacement: passo 9, immagine 1 di 3 Toshiba Satellite L15W-B1208X Hard Drive Replacement: passo 9, immagine 2 di 3 Toshiba Satellite L15W-B1208X Hard Drive Replacement: passo 9, immagine 3 di 3
    • Gently pull the hard drive towards the edge of the laptop to disconnect the hard drive from the laptop circuitry.

  10. Toshiba Satellite L15W-B1208X Hard Drive Replacement: passo 10, immagine 1 di 3 Toshiba Satellite L15W-B1208X Hard Drive Replacement: passo 10, immagine 2 di 3 Toshiba Satellite L15W-B1208X Hard Drive Replacement: passo 10, immagine 3 di 3
    • Remove the hard drive from black rubber mount by pulling the corner of the rubber mount away from the hard drive.

    • Continue pulling the rubber mount away from the hard drive until all four corners have been taken off.

    • Pull the remainder of the rubber mount away from the hard drive.

Conclusione

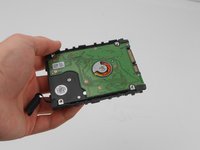
To reassemble your device, follow these instructions in reverse order.

Un'altra persona ha completato questa guida.

0 Commenti

Aggiungi Commento

Visualizza Statistiche:

Ultime 24 Ore: 0

Ultimi 7 Giorni: 0

Ultimi 30 Giorni: 9

Tutti i Tempi: 403