Questa versione può contenere modifiche errate. Passa all'ultima istantanea verificata.
Cosa ti serve
-
Questo passaggio è privo di traduzione. Aiuta a tradurlo
-
Remove all 14 of the 4 mm screws on the back side of the laptop with a Phillips #1 screwdriver.
-
-
-
Questo passaggio è privo di traduzione. Aiuta a tradurlo
-
Lift up in the spaces left by the battery to create a gap between the back case and the laptop body.
-
Run a spudger along both sides of the laptop to widen the separation and release the clips holding the back case on.
-
Remove the back case.
-
-
Questo passaggio è privo di traduzione. Aiuta a tradurlo
-
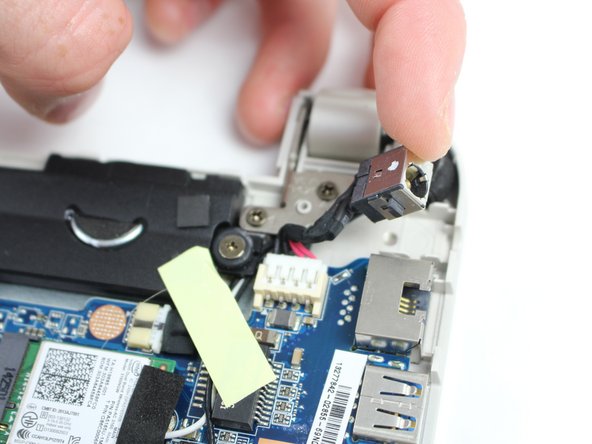
Unplug the charging plug housing from the motherboard.
-


Team

Sam Houston State, Team S17-G4, Blackburne Spring 2018 Membro di Sam Houston State, Team S17-G4, Blackburne Spring 2018
SHSU-BLACKBURNE-S18S17G4
4 Membri
10 Guide realizzate
Un commento
You didn’t complete the instructions. It ended after you said unplug the charging port housing. The pictures are not clear. Please add red lines or arrows, etc. to show what you are trying to do. It doesn’t show or spell out the next steps to replace it.