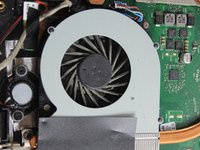
Salta al contenuto principale

Toshiba Satellite C855D-S5303 Fan Replacement

Cosa ti serve

  1. Toshiba Satellite C855D-S5303 Fan Replacement, Battery: passo 1, immagine 1 di 1
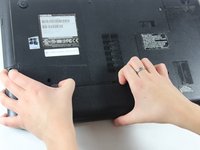
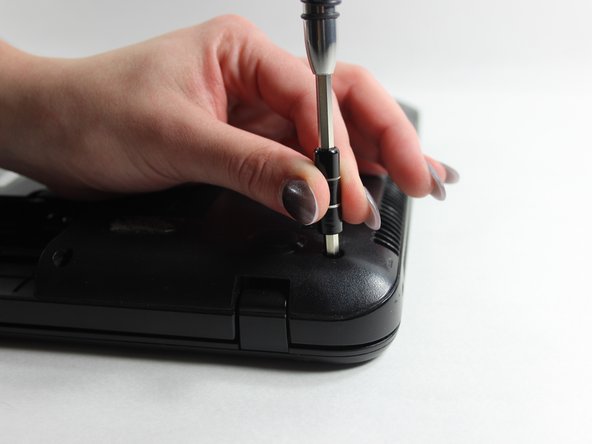
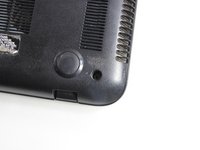
    • Lay your laptop upside down on a flat surface.

    • Power off your laptop and unplug the charger.

    • Make sure you allow the laptop time to cool so that you aren't removing a hot battery.

  2. Toshiba Satellite C855D-S5303 Fan Replacement: passo 2, immagine 1 di 2 Toshiba Satellite C855D-S5303 Fan Replacement: passo 2, immagine 2 di 2
    • Locate the right eject switch, labeled "1".

    • Slide the switch all the way to the right and it should stay in place.

  3. Toshiba Satellite C855D-S5303 Fan Replacement: passo 3, immagine 1 di 1
    • The second eject switch is on the left and it is numbered "2".

    • Slide the switch to the left and remain pushing on it, because unlike switch "1" it will not stay in place on it's own.

  4. Toshiba Satellite C855D-S5303 Fan Replacement: passo 4, immagine 1 di 2 Toshiba Satellite C855D-S5303 Fan Replacement: passo 4, immagine 2 di 2
    • With hand still pushing the left switch, grab onto notch at the center of the two switches.

    • Pull up and towards you. The battery will begin to lift out of the device.

  5. Toshiba Satellite C855D-S5303 Fan Replacement: passo 5, immagine 1 di 1
    • The battery can now be pulled out entirely. You are ready to replace it.

  6. Toshiba Satellite C855D-S5303 Fan Replacement, Hard Drive: passo 6, immagine 1 di 1
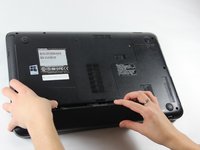
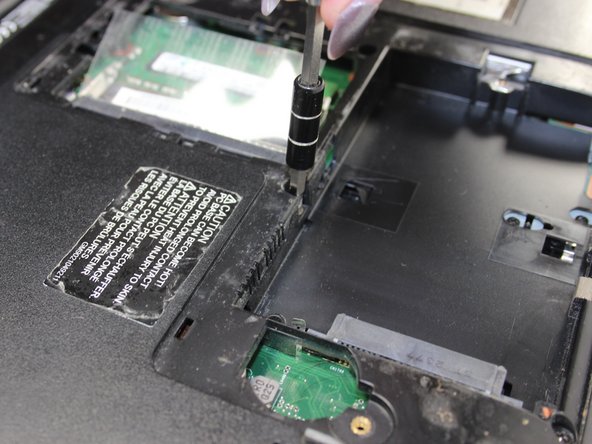
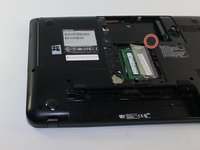
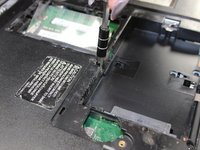
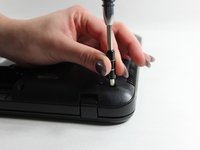
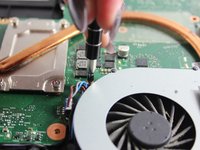
    • Using a small Phillip's head screwdriver, unscrew the single 7 mm screw (5 mm head) on the L-shaped panel on the backside of the laptop.

  7. Toshiba Satellite C855D-S5303 Fan Replacement: passo 7, immagine 1 di 2 Toshiba Satellite C855D-S5303 Fan Replacement: passo 7, immagine 2 di 2
    • Once the screw is removed, pry the panel upwards by gripping the groove pictured.

    • Be careful while removing the panel. Don't apply too much force when lifting as you may crack the plastic.

  8. Toshiba Satellite C855D-S5303 Fan Replacement: passo 8, immagine 1 di 3 Toshiba Satellite C855D-S5303 Fan Replacement: passo 8, immagine 2 di 3 Toshiba Satellite C855D-S5303 Fan Replacement: passo 8, immagine 3 di 3
    • Locate the hard drive. It is in a metal casing as pictured.

    • To remove, grab the right side of the piece and slide leftwards.

    • Lift up and out.

  9. Toshiba Satellite C855D-S5303 Fan Replacement, Fan: passo 9, immagine 1 di 2 Toshiba Satellite C855D-S5303 Fan Replacement, Fan: passo 9, immagine 2 di 2
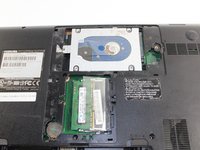
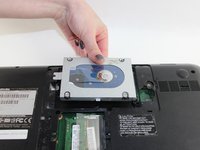
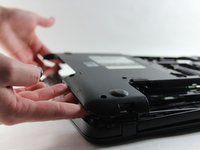
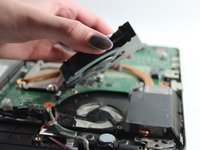
    • Now that you have your battery and hard drive removed, it's time to begin unscrewing the back panel.

    • Taking a Phillip's head screwdriver, remove the two 7 mm (5 mm head) screws located around the spot where the hard drive once was.

  10. Toshiba Satellite C855D-S5303 Fan Replacement: passo 10, immagine 1 di 2 Toshiba Satellite C855D-S5303 Fan Replacement: passo 10, immagine 2 di 2
    • There are nine 7 mm (5 mm head) screws located around the perimeter of the laptops back panel. Unscrew them all.

    • Be sure you put all the screws in a safe spot so you do not lose them.

  11. Toshiba Satellite C855D-S5303 Fan Replacement: passo 11, immagine 1 di 3 Toshiba Satellite C855D-S5303 Fan Replacement: passo 11, immagine 2 di 3 Toshiba Satellite C855D-S5303 Fan Replacement: passo 11, immagine 3 di 3
    • Get a grip on one edge of the back panel that is now unscrewed and lift its entirety up and away from the device.

    • Be gentle when lifting the panel. Do not forcefully pull it off.

  12. Toshiba Satellite C855D-S5303 Fan Replacement: passo 12, immagine 1 di 3 Toshiba Satellite C855D-S5303 Fan Replacement: passo 12, immagine 2 di 3 Toshiba Satellite C855D-S5303 Fan Replacement: passo 12, immagine 3 di 3
    • Upon locating your device's fan, look to see if it is dirty or clogged with dust before continuing with the removal process. That may be your only issue.

    • To remove the fan, unscrew the two 4 mm (3 mm head) screws that are around the fan.

  13. Toshiba Satellite C855D-S5303 Fan Replacement: passo 13, immagine 1 di 2 Toshiba Satellite C855D-S5303 Fan Replacement: passo 13, immagine 2 di 2
    • Unplug the wire located to the left of the fan by pulling gently upwards.

    • Remember which way you pulled it out. You will want to replace the fan with the colors on the wire in the same orientation.

    • Now that the fan is unplugged, you can lift it up and out of the device.

Conclusione

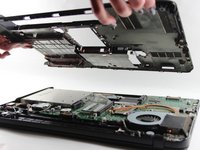
To reassemble your device, follow these instructions in reverse order.

Un'altra persona ha completato questa guida.

Team

UMass Dartmouth, Team 2-5, Isaacson Fall 2016 Membro di UMass Dartmouth, Team 2-5, Isaacson Fall 2016

UMASSD-ISAACSON-F16S2G5

3 Membri

10 Guide realizzate

0 Commenti

Aggiungi Commento

Visualizza Statistiche:

Ultime 24 Ore: 0

Ultimi 7 Giorni: 1

Ultimi 30 Giorni: 1

Tutti i Tempi: 1,453