Introduzione
This guide provides step-by-step instructions for safely removing the back panel of the Toshiba Satellite C55D-B5206 to access and replace a malfunctioning CD drive. If your CD-ROM drive fails to load or boot disc content, it may need replacement. Common reasons for replacing the CD or optical drive include disk incompatibility issues, faulty discs, corrupt registry entries, or hardware failure of the drive.
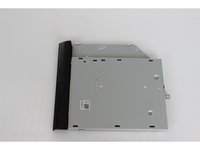
The CD-ROM drive allows you to use CDs, DVDs, and Blu-ray discs to listen to music, watch a movie, or access files. It is usually used to consume media stored in discs.
Before beginning, make sure the laptop is powered off and disconnected from any power sources. You are going to be required to use a spudger, we highly recommend to use a plastic spudger as a metal one can damage your laptop's internal hardware or the exterior. Throughout the repair process, you may hear slight clicking noises or a bit of resistance when removing parts such as the battery, these are usually normal. Once you’ve completed the process, simply follow the steps in reverse to reassemble your laptop.
Cosa ti serve
-
-
Turn the laptop upside down so the battery faces upwards.
-
Use a Phillips #1 screwdriver to remove the two, 7 mm screws that secure the battery.
-
-
-
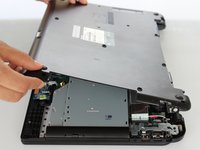
Use the screwdriver to remove the thirteen, 7 mm Phillips#1 screws from the bottom of the chassis.
-
-
-
-
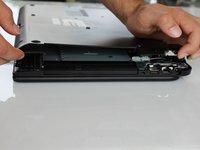
Remove the 7 mm Philips#1 screw in the back casing removal.
-
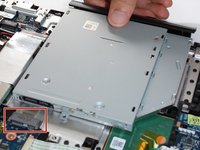
Place thumb on the edge of the CD-ROM drive and gently slide the CD-ROM drive towards your palm.
-


To reassemble your device, follow these instructions in reverse order.
To reassemble your device, follow these instructions in reverse order.
Annulla: non ho completato questa guida.
Altre 5 persone hanno completato questa guida.
Team

CSU Fullerton, Team 2-5, Bruce Fall 2015 Membro di CSU Fullerton, Team 2-5, Bruce Fall 2015
CSUF-BRUCE-F15S2G5
4 Membri
18 Guide realizzate