Questa versione può contenere modifiche errate. Passa all'ultima istantanea verificata.
Cosa ti serve
-
Questo passaggio è privo di traduzione. Aiuta a tradurlo
-
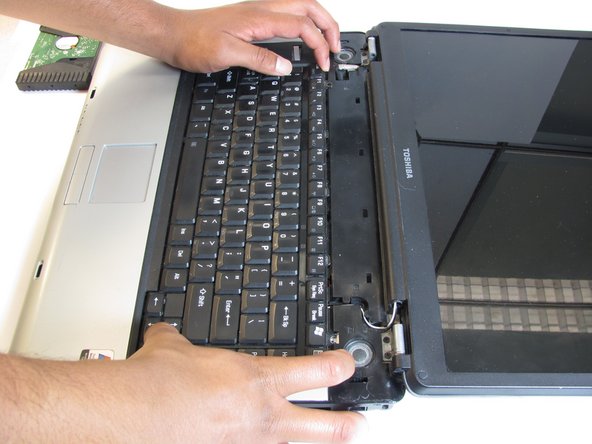
Using the plastic opening tool, pry off the panel above the keyboard, starting near the right front speaker.
-
Use the plastic opening tool to pop off tabs along the length of this panel.
-
-
Questo passaggio è privo di traduzione. Aiuta a tradurlo
-
Unscrew the two 4.5 mm screws holding the keyboard on with the Phillips #1 screwdriver.
-
-
-
Questo passaggio è privo di traduzione. Aiuta a tradurlo
-
Lift the keyboard gently from the side closest the screen.
-
Pull out the ribbon connecting the keyboard to the laptop.
-
-
Questo passaggio è privo di traduzione. Aiuta a tradurlo
-
Turn your laptop upside down, and slide the right release tab outward.
-
Using you left hand, hold the left release tab towards the left side and then pull the battery out.
-
-
Questo passaggio è privo di traduzione. Aiuta a tradurlo
-
Remove the black and white wires. they simply lift off the posts.
-
Remove the cable attaching the LCD to the motherboard, on the left side of the laptop.
-
-
Questo passaggio è privo di traduzione. Aiuta a tradurlo
-
Using the Phillips screwdriver remove the two 4.0mm screws from each hinge above speakers.
-
Partially close the lid and remove the last two 4.0mm screws from the back of the laptop.
-
-
Questo passaggio è privo di traduzione. Aiuta a tradurlo
-
Peel off the rubber circles from the four corners.
-
Remove the four 4.0mm phillips screws.
-
-
Questo passaggio è privo di traduzione. Aiuta a tradurlo
-
Using the plastic prying tools separate the plastic surrounding the screen
-
Lift out the broken LCD to be replaced.
-


Team

UMass Dartmouth, Team 1-6, Cichon Spring 2014 Membro di UMass Dartmouth, Team 1-6, Cichon Spring 2014
UMASSD-CICHON-S14S1G6
3 Membri
6 Guide realizzate