Questa versione può contenere modifiche errate. Passa all'ultima istantanea verificata.
Cosa ti serve
-
Questo passaggio è privo di traduzione. Aiuta a tradurlo
-
Using a plastic opening tool, remove all stickers covering the screws.
-
-
Questo passaggio è privo di traduzione. Aiuta a tradurlo
-
Remove all six 3.8mm screws from the screen using a #1 Phillips screwdriver.
-
-
Questo passaggio è privo di traduzione. Aiuta a tradurlo
-
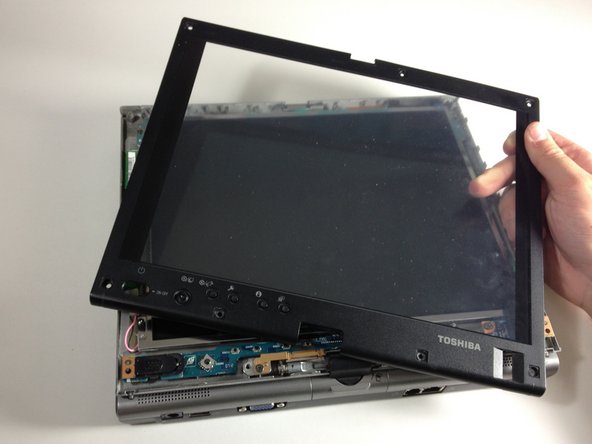
With a plastic opening tool, prop the plastic panel up to separate it from the rest of the laptop.
-
Slowly pull the plastic panel from the entire laptop.
-
-
-
Questo passaggio è privo di traduzione. Aiuta a tradurlo
-
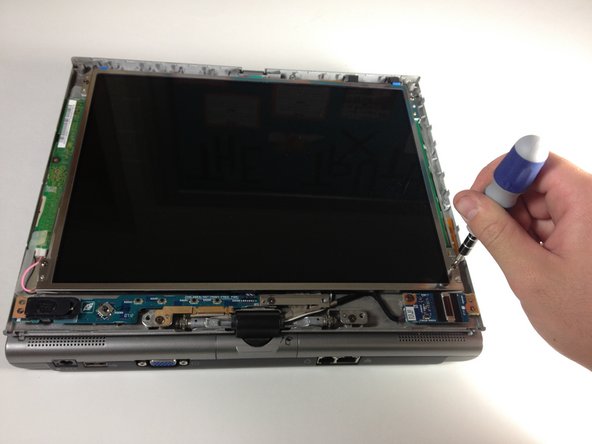
Remove the four 5 mm screws with a Phillips #1 screwdriver, each located at the four corners of the screen.
-
-
Questo passaggio è privo di traduzione. Aiuta a tradurlo
-
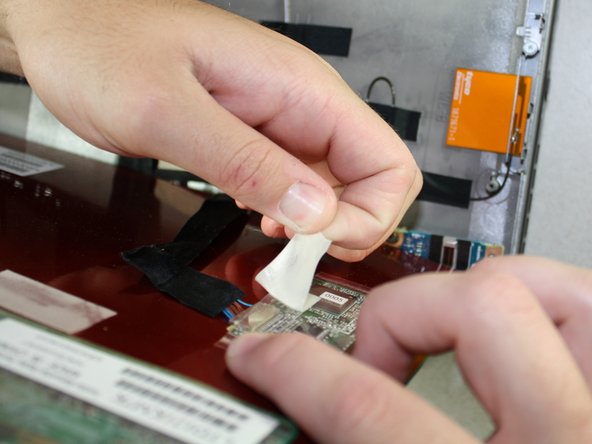
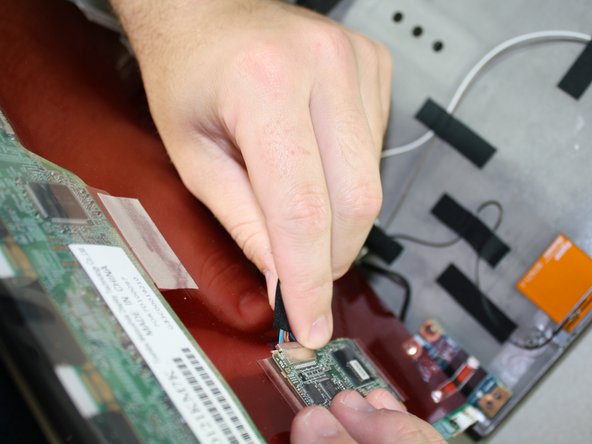
Remove all white tape that hold the cords and wirings together.
-
-
Questo passaggio è privo di traduzione. Aiuta a tradurlo
-
At this point, the screen should be completely disconnected from the rest of the laptop.
-


Annulla: non ho completato questa guida.
Un'altra persona ha completato questa guida.
Team

Cal Poly, Team 4-17, Maness Spring 2013 Membro di Cal Poly, Team 4-17, Maness Spring 2013
CPSU-MANESS-S13S4G17
3 Membri
12 Guide realizzate
Un commento
Be careful with this procedure, as there are at least 2 different part numbers for the M400, LTD121KM7K has a 32 pin connector, and a different one, LTD121KC6K has a shorter connector for the display which is not compatible. When ordering from Ebay they do not distinguish between them. I would also like a procedure for replacing the complete screen and lid assembly. I can't find it on the net at the moment. Also, be aware that there may be compatibility issues there too.