Salta al contenuto principale

Questa guida ha delle modifiche più recenti. Passa all'ultima versione non verificata.

Toshiba Portege M400 CD/DVD Drive Replacement

Cosa ti serve

  1. Toshiba Portege M400 CD/DVD Drive Replacement, CD/DVD Drive: passo 1, immagine 1 di 1
    • Make sure your computer is securely latched and closed.

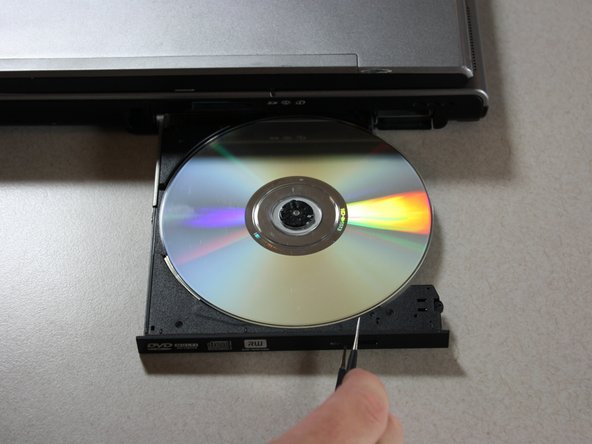
    • Locate the CD drive on the right side of your Toshiba Portege M400 laptop and find a small hole right next to the CD drive button.

  2. Toshiba Portege M400 CD/DVD Drive Replacement: passo 2, immagine 1 di 2 Toshiba Portege M400 CD/DVD Drive Replacement: passo 2, immagine 2 di 2
    • Using the tweezers, insert them into the small hole next to the CD drive button.

  3. Toshiba Portege M400 CD/DVD Drive Replacement: passo 3, immagine 1 di 2 Toshiba Portege M400 CD/DVD Drive Replacement: passo 3, immagine 2 di 2
    • Push the tweezers back into the hole and grab the CD drive door with the other tweezers' appendage.

    • Pull the CD door out carefully to remove the broken or jammed disk.

    • Note: If the CD door still does not open, move on to the next step to see how to remove the CD drive entirely.

  4. Toshiba Portege M400 CD/DVD Drive Replacement: passo 4, immagine 1 di 1
    • Flip the laptop over so its on its face.

  5. Toshiba Portege M400 CD/DVD Drive Replacement: passo 5, immagine 1 di 3 Toshiba Portege M400 CD/DVD Drive Replacement: passo 5, immagine 2 di 3 Toshiba Portege M400 CD/DVD Drive Replacement: passo 5, immagine 3 di 3
    • Locate screw as seen on picture

    • Using #1 Philips head screwdriver remove the 3.8mm screw.

  6. Toshiba Portege M400 CD/DVD Drive Replacement: passo 6, immagine 1 di 2 Toshiba Portege M400 CD/DVD Drive Replacement: passo 6, immagine 2 di 2
    • Locate the lock switch in the center of the laptop.

    • Locate the tab on the end of the end of the CD Drive.

  7. Toshiba Portege M400 CD/DVD Drive Replacement: passo 7, immagine 1 di 3 Toshiba Portege M400 CD/DVD Drive Replacement: passo 7, immagine 2 di 3 Toshiba Portege M400 CD/DVD Drive Replacement: passo 7, immagine 3 di 3
    • Push down on the lock tab and pull on the CD tab simultaneously.

    • Keep pulling on the CD drive tab until the CD drive comes all the way out.

Conclusione

To reassemble your device, follow these instructions in reverse order.

Team

Cal Poly, Team 4-17, Maness Fall 2012 Membro di Cal Poly, Team 4-17, Maness Fall 2012

CPSU-MANESS-F12S4G17

1 Membro

3 Guide realizzate

0 Commenti

Aggiungi Commento

Visualizza Statistiche:

Ultime 24 Ore: 0

Ultimi 7 Giorni: 4

Ultimi 30 Giorni: 8

Tutti i Tempi: 1,098