Questa versione può contenere modifiche errate. Passa all'ultima istantanea verificata.
Cosa ti serve
-
Questo passaggio è privo di traduzione. Aiuta a tradurlo
-
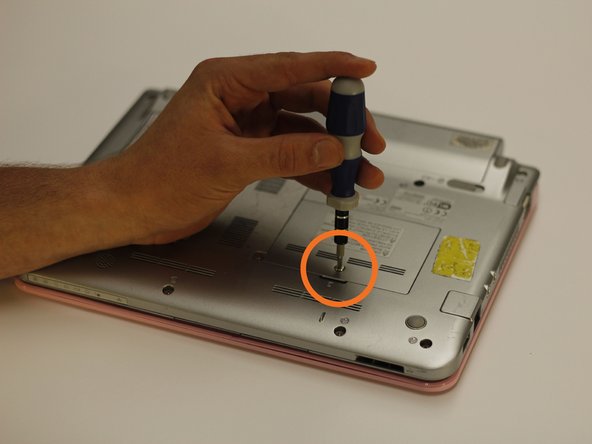
Use a bit driver and a Phillips #0 bit to remove the one 5 mm retaining screw.
-
Lift the panel up and out of the way.
-
-
Questo passaggio è privo di traduzione. Aiuta a tradurlo
-
The RAM chip is secured by two retaining arms that run parallel with the chip. Gently pull these arms in opposite directions off of the chip.
-
After the retainer arms are free, push the chip towards the top of the netbook. This will free the chip for removal.
-
-
-
Questo passaggio è privo di traduzione. Aiuta a tradurlo
-
Push the replacement RAM into the original position.
-
Reattach both securing arms onto the sides of the RAM chip.
-
-
Questo passaggio è privo di traduzione. Aiuta a tradurlo
-
Place the panel back into the securing slots and let it rest in its original position.
-
With the bit driver and Phillips #0 bit, secure the panel down with one screw.
-


Annulla: non ho completato questa guida.
Un'altra persona ha completato questa guida.
Team

Clemson, Team 14-2, Benson Fall 2013 Membro di Clemson, Team 14-2, Benson Fall 2013
CLEM-BENSON-F13S14G2
3 Membri
27 Guide realizzate