Salta al contenuto principale

Toshiba Encore WT8-A Screen Replacement

Cosa ti serve

  1. Toshiba Encore WT8-A  Screen Replacement, Battery: passo 1, immagine 1 di 1
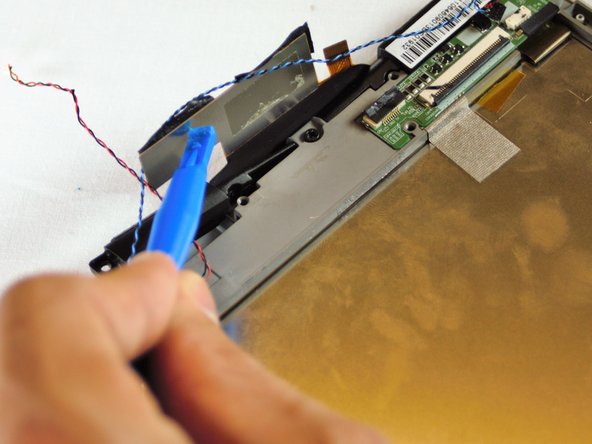
    • Use the metal spudger to create a gap between the back cover and the device.

    • Be gentle when using the metal spudger so that the casing is not damaged.

  2. Toshiba Encore WT8-A  Screen Replacement: passo 2, immagine 1 di 2 Toshiba Encore WT8-A  Screen Replacement: passo 2, immagine 2 di 2
    • Use the nylon spudger to completely separate the back of the device.

    • Take the nylon spudger around the outside of the device cover until it comes free.

  3. Toshiba Encore WT8-A  Screen Replacement: passo 3, immagine 1 di 2 Toshiba Encore WT8-A  Screen Replacement: passo 3, immagine 2 di 2
    • Use the Phillips head PH0 to remove the 7 battery screws.

    • The 5 side screws measure 3.5mm.

    • The 2 top and bottom screws measure 4.5 mm.

  4. Toshiba Encore WT8-A  Screen Replacement: passo 4, immagine 1 di 2 Toshiba Encore WT8-A  Screen Replacement: passo 4, immagine 2 di 2
    • To disconnect the cable, use the fine tweezers to flip up the small retaining flap. Then, you can safely pull the ribbon cable out.

    • Be sure you are prying up on the hinged retaining flap, not the connector itself.

    • The zero insertion force (ZIF) connector is used to secure delicate ribbon cables, such as this trackpad cable.

  5. Toshiba Encore WT8-A  Screen Replacement: passo 5, immagine 1 di 1
    • Remove the colored power cable from its connector.

    • To disconnect it safely, use the pointed tip of a spudger to carefully push on each side of the connector.

    • Alternating from one side to the other, gently “walk” the connector out of its socket.

    • Be sure to be very gentle when prying colored wires from motherboard to ensure that there is no damage.

  6. Toshiba Encore WT8-A  Screen Replacement: passo 6, immagine 1 di 1
    • Battery will lift out of the device.

  7. Toshiba Encore WT8-A  Screen Replacement, Motherboard: passo 7, immagine 1 di 1
    • Remove the 4 – 4.5 mm screws from the motherboard assembly.

  8. Toshiba Encore WT8-A  Screen Replacement: passo 8, immagine 1 di 1
    • Remove the 2 – 3.5 mm screws from the motherboard assembly.

  9. Toshiba Encore WT8-A  Screen Replacement: passo 9, immagine 1 di 1
    • The motherboard should come free at this point.

  10. Toshiba Encore WT8-A  Screen Replacement, LCD Screen: passo 10, immagine 1 di 2 Toshiba Encore WT8-A  Screen Replacement, LCD Screen: passo 10, immagine 2 di 2
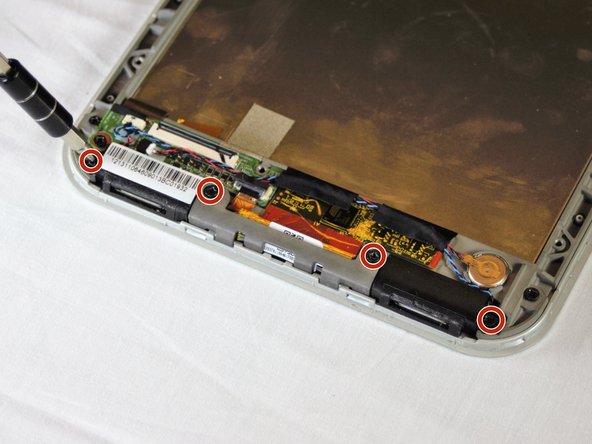
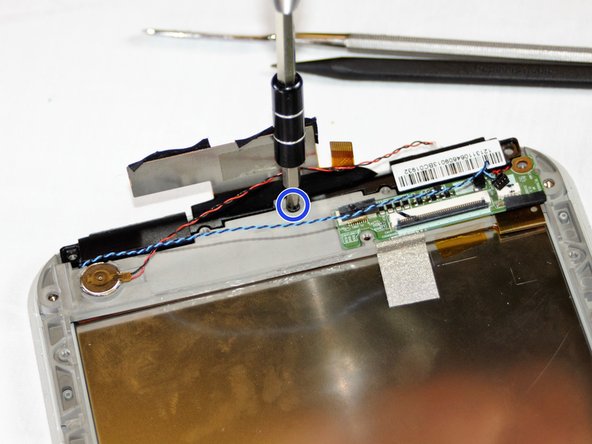
    • Use the screwdriver to remove the 4-3.5mm screws on the two lower speakers.

  11. Toshiba Encore WT8-A  Screen Replacement: passo 11, immagine 1 di 1
    • Using the spudger, gently pry up on the reinforcement bar and remove from the frame.

  12. Toshiba Encore WT8-A  Screen Replacement: passo 12, immagine 1 di 2 Toshiba Encore WT8-A  Screen Replacement: passo 12, immagine 2 di 2
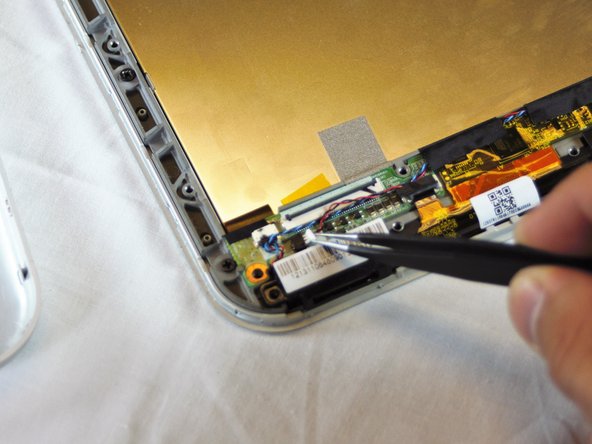
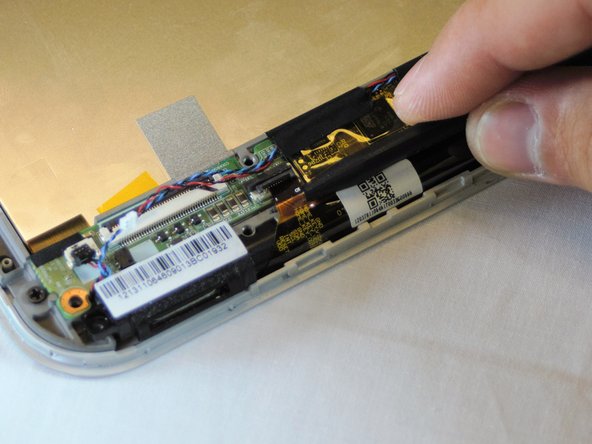
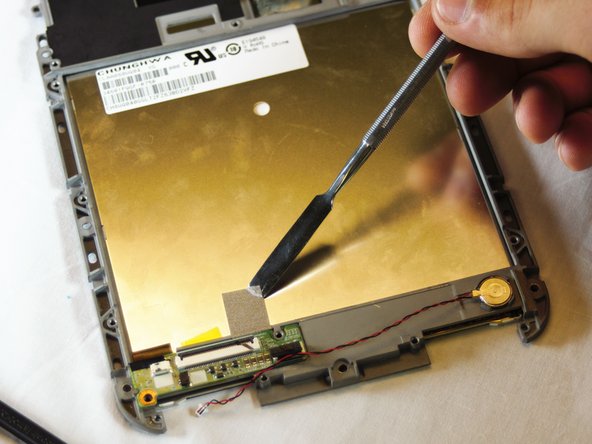
    • Use the fine pointed tweezers to carefully remove the 2 no-fuss speaker connections.

  13. Toshiba Encore WT8-A  Screen Replacement: passo 13, immagine 1 di 2 Toshiba Encore WT8-A  Screen Replacement: passo 13, immagine 2 di 2
    • Lift the black ZIF connector holding down the ribbon cable with the plastic opening tool.

    • Gently use the spudger to remove the ribbon cable.

  14. Toshiba Encore WT8-A  Screen Replacement: passo 14, immagine 1 di 2 Toshiba Encore WT8-A  Screen Replacement: passo 14, immagine 2 di 2
    • Use the fine pointed tweezers to pull the 2 pieces of fabric tape from the lower board.

    • Move the speaker wires out of the way.

  15. Toshiba Encore WT8-A  Screen Replacement: passo 15, immagine 1 di 2 Toshiba Encore WT8-A  Screen Replacement: passo 15, immagine 2 di 2
    • Use the plastic opening tool or spudger to gently lift up on the middle logic board and remove it from the frame.

    • This board controls the touch sensors on the front glass.

    • This may require some extra force to loosen up the glue under the board. Make sure to apply force evenly around the edges.

    • The Touch control board has fragile ribbon cables. Make sure to not twist or rip these cables while separating it from the frame and working around the board.

  16. Toshiba Encore WT8-A  Screen Replacement: passo 16, immagine 1 di 3 Toshiba Encore WT8-A  Screen Replacement: passo 16, immagine 2 di 3 Toshiba Encore WT8-A  Screen Replacement: passo 16, immagine 3 di 3
    • There are now 7-3.5mm Phillips head screws holding the frame to the front glass of the tablet.

    • Use the Phillips head screwdriver to remove the 7 screws.

    • The 7th screw is under the touch control board in the bottom middle that we just pried up.

  17. Toshiba Encore WT8-A  Screen Replacement: passo 17, immagine 1 di 3 Toshiba Encore WT8-A  Screen Replacement: passo 17, immagine 2 di 3 Toshiba Encore WT8-A  Screen Replacement: passo 17, immagine 3 di 3
    • Use the spudger to pry your way around the frame and separate it from the front glass.

    • Be gentle when prying. There are fragile plastic clips and parts that could easily snap with too much pressure.

  18. Toshiba Encore WT8-A  Screen Replacement: passo 18, immagine 1 di 2 Toshiba Encore WT8-A  Screen Replacement: passo 18, immagine 2 di 2
    • When the frame is separated and loose, Lift from the top and pull the frame off the front glass, setting the glass aside.

  19. Toshiba Encore WT8-A  Screen Replacement: passo 19, immagine 1 di 1
    • Remove the lower speakers and set them aside.

  20. Toshiba Encore WT8-A  Screen Replacement: passo 20, immagine 1 di 2 Toshiba Encore WT8-A  Screen Replacement: passo 20, immagine 2 di 2
    • The screen is held to the frame with metal fabric tape at the top and bottom of the frame.

    • Use the metal spudger to peel the tape off the back of the screen.

  21. Toshiba Encore WT8-A  Screen Replacement: passo 21, immagine 1 di 2 Toshiba Encore WT8-A  Screen Replacement: passo 21, immagine 2 di 2
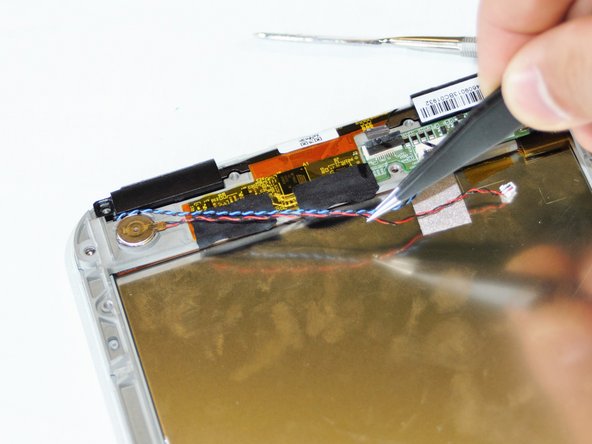
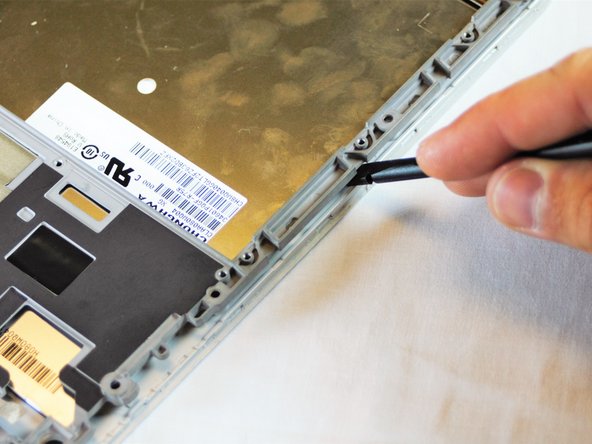
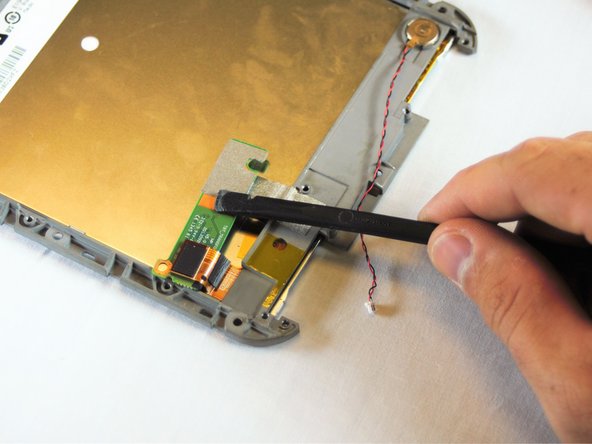
    • The last board we have to worry about is the board that holds the ribbon cable connector (from the battery removal step) and the screen connector.

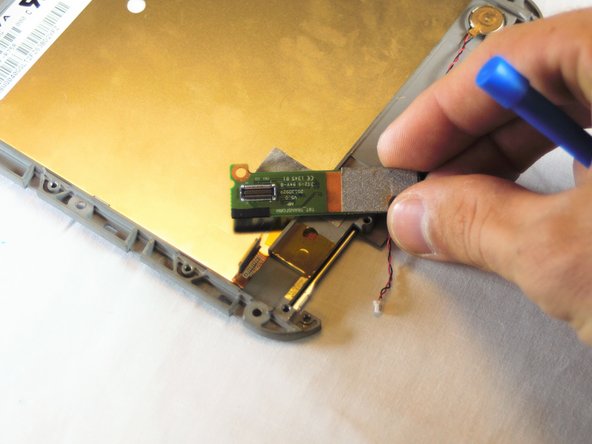
    • Use the spudger to gently pry up on the bottom side of the board, as you did when removing the touch screen control board.

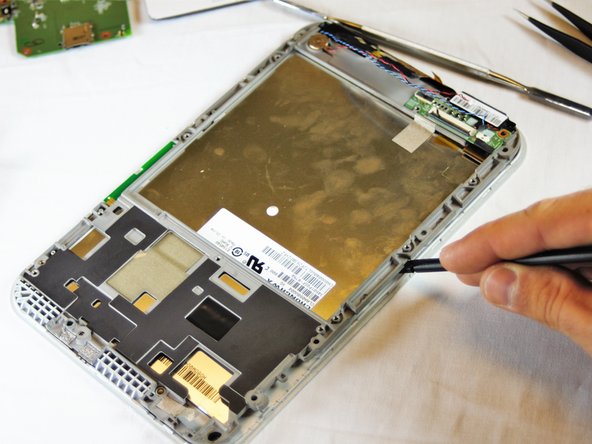
    • You have to make sure to loosen up the glue underneath and the board should come free from the frame.

  22. Toshiba Encore WT8-A  Screen Replacement: passo 22, immagine 1 di 2 Toshiba Encore WT8-A  Screen Replacement: passo 22, immagine 2 di 2
    • Use the plastic opening tool to disconnect the screens ribbon cable from the board by prying up on the flat topped connector.

    • The board will come free and you can set it aside.

  23. Toshiba Encore WT8-A  Screen Replacement: passo 23, immagine 1 di 2 Toshiba Encore WT8-A  Screen Replacement: passo 23, immagine 2 di 2
    • With the tape peeled back, and the board disconnected and removed, you can take the frame off of the back of the screen.

    • Your screen is now ready to be replaced with a new one.

Conclusione

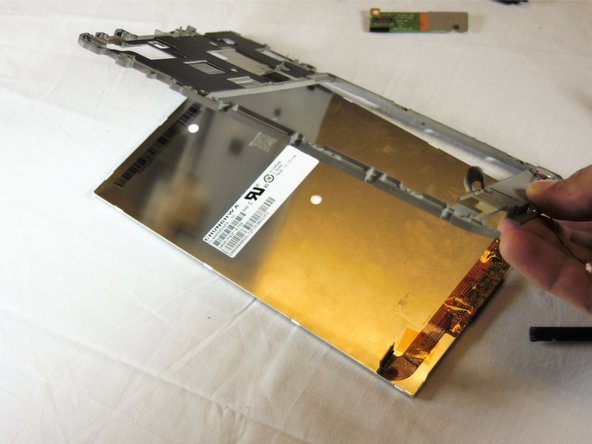
To reassemble your device, follow these instructions in reverse order.

Zach Cossey

Membro da: 09/20/16

360 Reputazione

2 Guide realizzate

Team

USF Tampa, Team S2-G6, Nance Spring 2017 Membro di USF Tampa, Team S2-G6, Nance Spring 2017

USFT-NANCE-S17S2G6

3 Membri

15 Guide realizzate

Un commento

How many pins does the screen have? because im planning to replace mine with a new one

johneilasi.ece - Replica

Aggiungi Commento

Visualizza Statistiche:

Ultime 24 Ore: 2

Ultimi 7 Giorni: 4

Ultimi 30 Giorni: 16

Tutti i Tempi: 2,301