Salta al contenuto principale

Top Shell

Cosa ti serve

  1. Top Shell, Engage Wired Optical Mouse Top and Outer Shell Removal: passo 1, immagine 1 di 1
    • Flip the mouse over and peel off the stickers on the perimeter of the bottom of the mouse.

  2. Top Shell: passo 2, immagine 1 di 1
    • Use the Phillips #1 screwdriver to remove four 5 mm screws from the bottom of the mouse.

    • Use the Phillips #1 screwdriver to remove the two 9 mm screws from the bottom of the mouse.

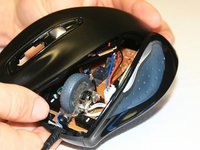
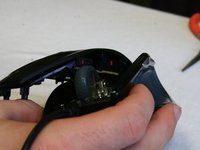
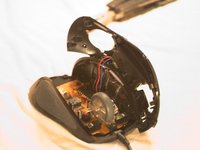
  3. Top Shell: passo 3, immagine 1 di 3 Top Shell: passo 3, immagine 2 di 3 Top Shell: passo 3, immagine 3 di 3
    • Grab the top shell of the mouse and lift up to remove.

  4. Top Shell: passo 4, immagine 1 di 1
    • The capacitors on this board can release stored electrical energy if touched.

    • Touch your capacitor discharge tool to the capacitor leads on the board to release the stored energy. If leads are inaccessible, wait until you've removed the board from the mouse body.

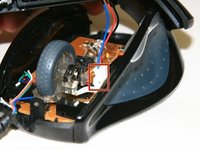
  5. Top Shell: passo 5, immagine 1 di 2 Top Shell: passo 5, immagine 2 di 2
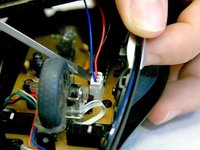
    • Use a spudger to pry underneath the white plug and pop it out to disconnect the upper board from the lower board.

  6. Top Shell, Top Shell: passo 6, immagine 1 di 1
    • Remove the 5 mm round head screw holding the middle piece to the top piece.

    • The outermost shell will now separate from the middle structure.

Conclusione

To reassemble your device, follow these instructions in reverse order.

Altre 3 persone hanno completato questa guida.

David

Membro da: 01/16/13

1.171 Reputazione

4 Guide realizzate

Team

Cal Poly, Team 18-36, Regan Winter 2013 Membro di Cal Poly, Team 18-36, Regan Winter 2013

CPSU-REGAN-W13S18G36

3 Membri

30 Guide realizzate

0 Commenti

Aggiungi Commento

Visualizza Statistiche:

Ultime 24 Ore: 0

Ultimi 7 Giorni: 1

Ultimi 30 Giorni: 9

Tutti i Tempi: 1,683