Salta al contenuto principale

Questa versione può contenere modifiche errate. Passa all'ultima istantanea verificata.

Cosa ti serve

  1. , Cinturino: passo 1, immagine 1 di 1
    • Per prima cosa, solleva la parte inferiore del cinturino per rimuoverlo.

  2. : passo 2, immagine 1 di 2 : passo 2, immagine 2 di 2
    • Continua a sollegare il cinturino fino a quando non sentirai che lo smartwatch si staccherà dall'involucro che lo contiene.

    • Potresti dover applicare un po' di forza verso il basso facendo leva sul vetro dell'orologio.

    • Continua a tirare verso l'alto il cinturino finché non sarà completamente staccato dall'orologio.

  3. , Pannello posteriore: passo 3, immagine 1 di 1
    • Afferrare l'orologio una volta separato dal braccialetto.

  4. : passo 4, immagine 1 di 1
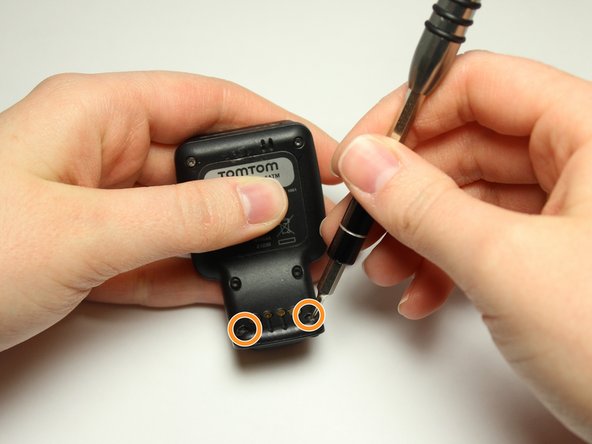
    • Capovolgere l'orologio e rimuovere le quattro viti da 3 mm con un cacciavite per testa Torx T4.

  5. : passo 5, immagine 1 di 2 : passo 5, immagine 2 di 2
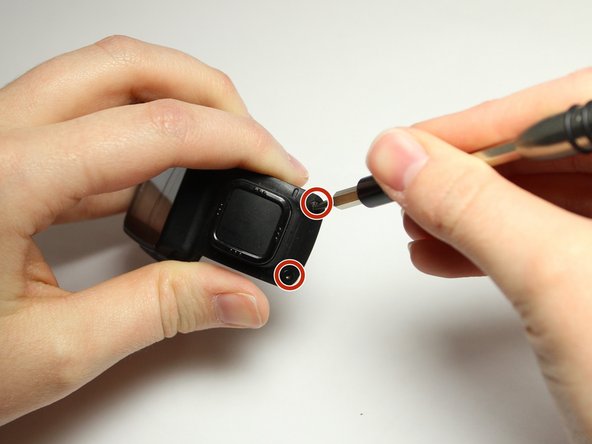
    • Rimuovere le due viti Torx da 3 mm dalla parte anteriore utilizzando un cacciavite Torx T4.

    • Le due viti Torx da 3 mm sono dipinte di blu alla fine. Queste viti hanno un dado intorno a loro che dovrà essere rimosso.

    • Svita le viti dalla parte frontale dell'involucro dell'orologio e i dadi cadono dalla parte posteriore.

  6. : passo 6, immagine 1 di 2 : passo 6, immagine 2 di 2
    • Tira delicatamente il pannello posteriore da pannello frontale.

    • Non tirare troppo velocemente o troppo forte. Ci sono due fili rosso e nero, collegati al componente del vibratore, che non devono essere strappati.

  7. : passo 7, immagine 1 di 2 : passo 7, immagine 2 di 2
    • Allontana delicatamente il componente del vibratore di colore nero dal pannello posteriore con le dita o utilizzando uno strumento Spudger.

    • Sii delicato con i fili rosso e nero. Non vuoi che strappano.

    • Il componente vibratore è la piccola scatola nera con la parte in metallo argento alla fine. La scatola nera è incollata verso il basso, quindi ci vuole un po' di forza per liberarla e sarà appiccicosa.

  8. Questo passaggio è privo di traduzione. Aiuta a tradurlo

    : passo 8, immagine 1 di 2 : passo 8, immagine 2 di 2
    Attrezzo utilizzato in questo passaggio:
    Tweezers
    $4.99
    Compra
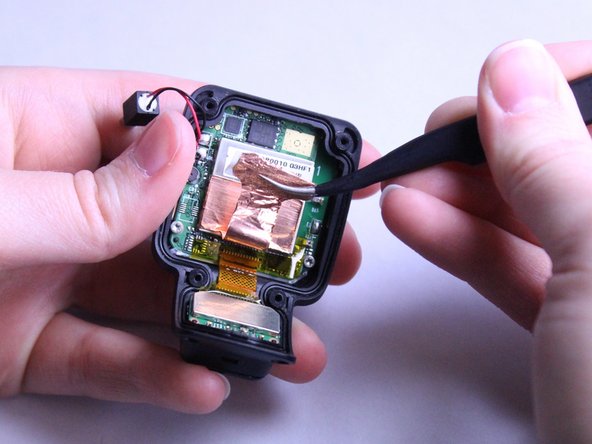
    • Now lift the smaller square of copper off the Front Panel. Use the bent, metal precision tweezers and slide it under the smaller square of copper lining then gently lift it up.

    • You will need to be gentle and pull the copper slowly so that it does not rip.

  9. Questo passaggio è privo di traduzione. Aiuta a tradurlo

    : passo 9, immagine 1 di 2 : passo 9, immagine 2 di 2
    • Use the bent, metal precision tweezers to remove the thin copper piece from large square silver piece in the Front Casing.

    • You will need to be gentle and pull the copper slowly so that it does not rip.

  10. Questo passaggio è privo di traduzione. Aiuta a tradurlo

    : passo 10, immagine 1 di 1
    • Remove the two 2.0 mm Torx Head screws with the T5 Torx screwdriver.

  11. Questo passaggio è privo di traduzione. Aiuta a tradurlo

    : passo 11, immagine 1 di 3 : passo 11, immagine 2 di 3 : passo 11, immagine 3 di 3
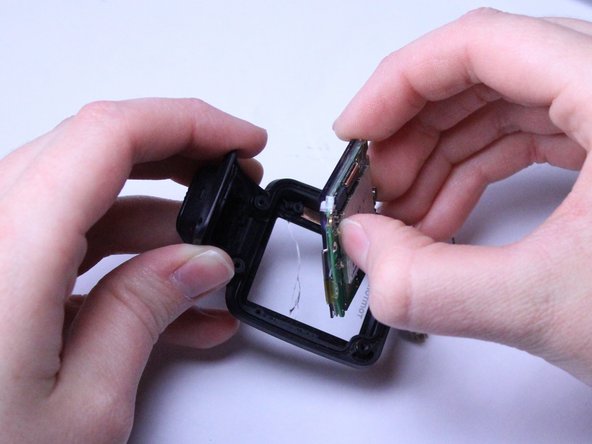
    • Use your fingers to gently pull the whole green motherboard out of the Front Casing.

    • If you have trouble using your fingers, then use the black Spudger tool.

  12. Questo passaggio è privo di traduzione. Aiuta a tradurlo

    : passo 12, immagine 1 di 1
    • Grab the screen attached to the green motherboard.

  13. Questo passaggio è privo di traduzione. Aiuta a tradurlo

    : passo 13, immagine 1 di 3 : passo 13, immagine 2 di 3 : passo 13, immagine 3 di 3
    • Using the pointed end of the black Spudger tool, gently pry the motherboard away from the screen.

    • The motherboard and screen are very fragile, but the motherboard should pop right off.

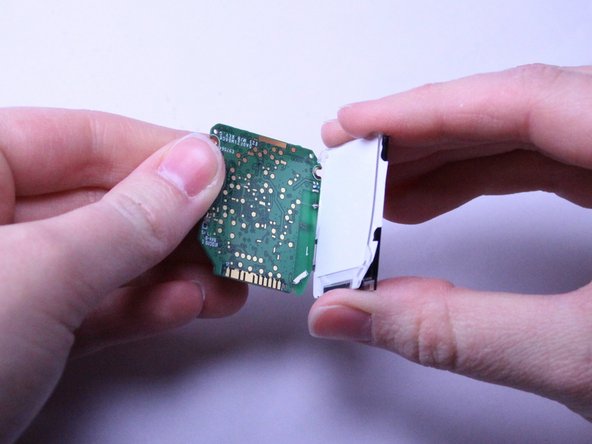
    • Once you have the motherboard partially pried off, use your fingers to gently pop it out of the clear, plastic clips holding it in place.

    • Continue to pull the motherboard away from the screen to fully expose the white backing of the screen.

  14. Questo passaggio è privo di traduzione. Aiuta a tradurlo

    : passo 14, immagine 1 di 3 : passo 14, immagine 2 di 3 : passo 14, immagine 3 di 3
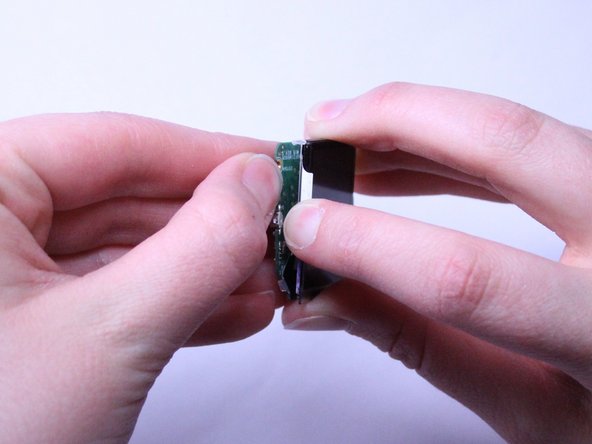
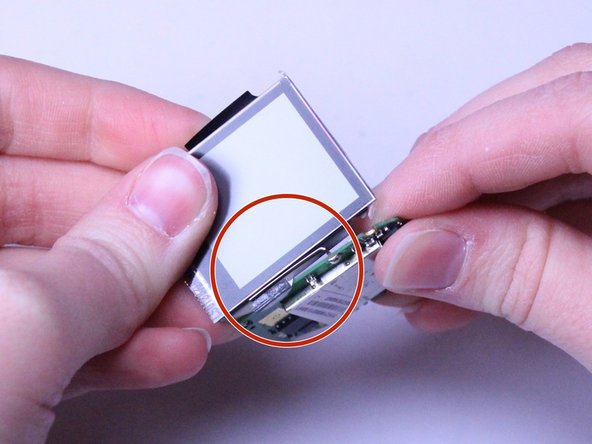
    • Once the white backing of the screen is exposed, carefully flip the two pieces, the motherboard and the screen, over while they are still connected.

    • Look for the small metal piece attached to the motherboard that is wrapped around the front of the screen.

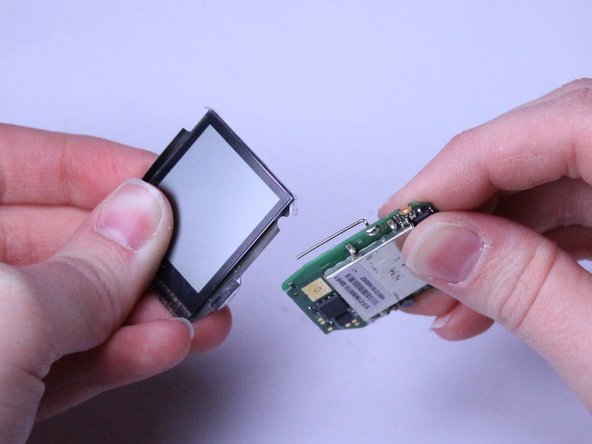
    • Gently slide the screen under and back to free it from the metal piece.

  15. Questo passaggio è privo di traduzione. Aiuta a tradurlo

    : passo 15, immagine 1 di 1
    • Once free from the Front Casing and the motherboard, you are ready to replace the screen.

Linea Traguardo

Altre 2 persone hanno completato questa guida.

Team

8 Commenti

Who sells the replacement screens? I can’t find them anywhere online. Do I need to contact TomTom directly?

Erin Espinoza - Replica

Who sells the replacement screens? I can’t find them anywhere online.

Erin Espinoza - Replica

Please help where can i buy the lcd

hjcouto - Replica

This article is useless unless you know where to buy the replacement screen!!!!

Kel Needham - Replica

this tutorial is without function because there is no sale of replacement screens. unfortunately

fielbicolor - Replica

Aggiungi Commento

Visualizza Statistiche:

Ultime 24 Ore: 1

Ultimi 7 Giorni: 5

Ultimi 30 Giorni: 36

Tutti i Tempi: 9,775