Questa versione può contenere modifiche errate. Passa all'ultima istantanea verificata.
Cosa ti serve
-
-
-
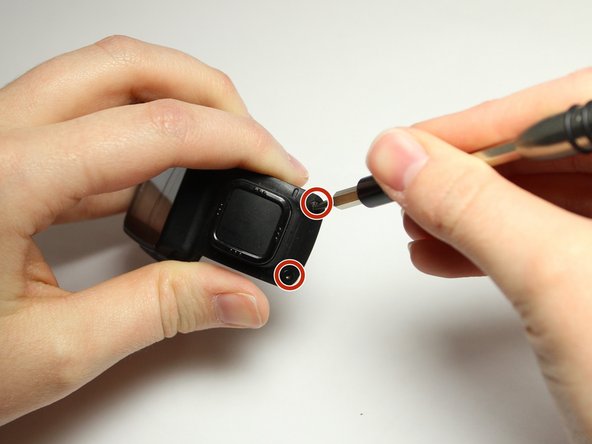
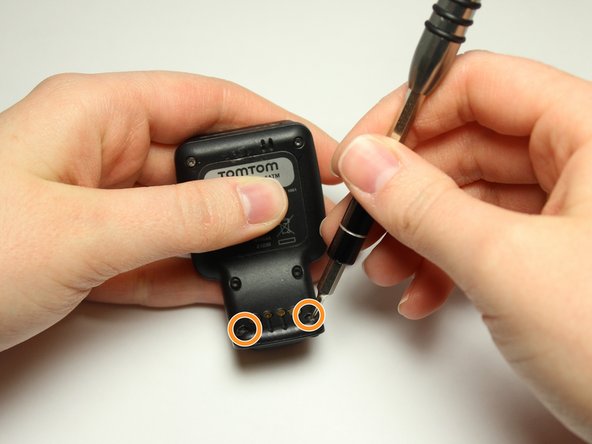
Rimuovere le due viti Torx da 3 mm dalla parte anteriore utilizzando un cacciavite Torx T4.
-
Le due viti Torx da 3 mm sono dipinte di blu alla fine. Queste viti hanno un dado intorno a loro che dovrà essere rimosso.
-
Svita le viti dalla parte frontale dell'involucro dell'orologio e i dadi cadono dalla parte posteriore.
-
-
Questo passaggio è privo di traduzione. Aiuta a tradurlo
-
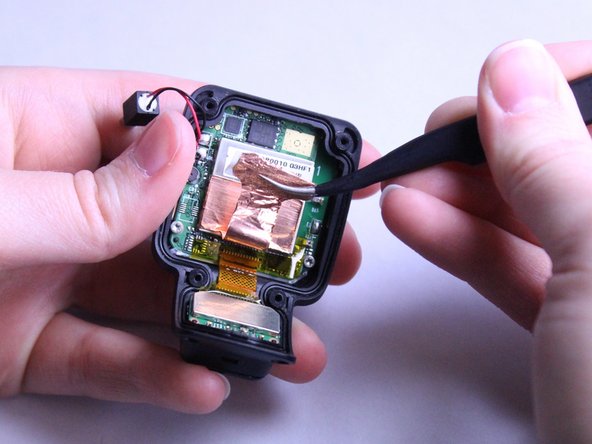
Now lift the smaller square of copper off the Front Panel. Use the bent, metal precision tweezers and slide it under the smaller square of copper lining then gently lift it up.
-
-
Questo passaggio è privo di traduzione. Aiuta a tradurlo
-
Use the bent, metal precision tweezers to remove the thin copper piece from large square silver piece in the Front Casing.
-
-
Questo passaggio è privo di traduzione. Aiuta a tradurlo
-
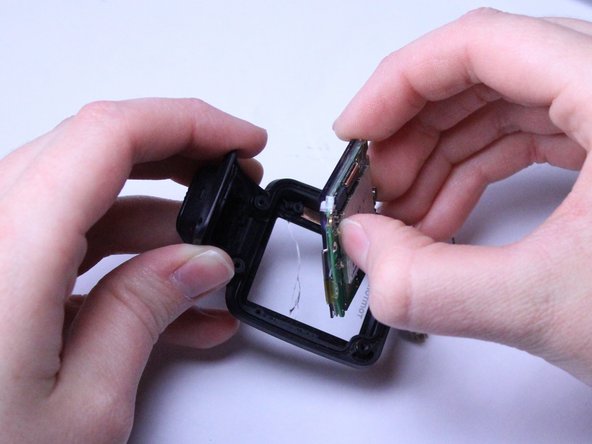
Remove the two 2.0 mm Torx Head screws with the T5 Torx screwdriver.
-
-
Questo passaggio è privo di traduzione. Aiuta a tradurlo
-
Use your fingers to gently pull the whole green motherboard out of the Front Casing.
-


Annulla: non ho completato questa guida.
Altre 2 persone hanno completato questa guida.
Team

Texas Tech, Team S8-G6, Bennett Spring 2017 Membro di Texas Tech, Team S8-G6, Bennett Spring 2017
TTU-BENNETT-S17S8G6
4 Membri
15 Guide realizzate
9 Commenti
Great explaination, though you mention you don't replacement parts...? Can you share a link where you found the new front cover assembly?
Hello if the control button is tight can the button be removed and cleaned underneath
Imran