Salta al contenuto principale

TomTom Runner Back Panel Replacement Guide

Solo Prerequisita
Questa guida è destinata a essere usata solo come prerequisito per altre guide. Da sola è incompleta.

Cosa ti serve

  1. TomTom Runner Back Panel Replacement Guide, Wristband: passo 1, immagine 1 di 1
    • First, lift the bottom part of the band to start removing the wristband from the button area of the watch.

  2. TomTom Runner Back Panel Replacement Guide: passo 2, immagine 1 di 2 TomTom Runner Back Panel Replacement Guide: passo 2, immagine 2 di 2
    • Continue to lift up on the band until the screen of the watch becomes loose from the band.

    • You may need to apply a small amount of force downward on the face of the screen.

    • Continue to pull up on the wristband until it is completely off the watch.

  3. TomTom Runner Back Panel Replacement Guide, Back Panel: passo 3, immagine 1 di 1
    • Grab the watch once it is separated from the wristband.

  4. TomTom Runner Back Panel Replacement Guide: passo 4, immagine 1 di 1
    • Flip over the watch and remove the four 3.0 mm Torx head screws with a T4 Torx head screwdriver.

  5. TomTom Runner Back Panel Replacement Guide: passo 5, immagine 1 di 2 TomTom Runner Back Panel Replacement Guide: passo 5, immagine 2 di 2
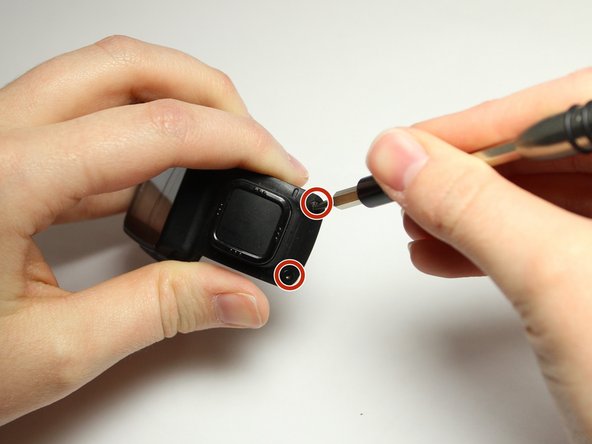
    • Remove the two 3.0 mm Torx screws from the front. Use a T4 Torx screwdriver to remove the screws.

    • The two 3.0 mm Torx screws are painted blue at the end. These screws have screw holders around them that will also need to be removed.

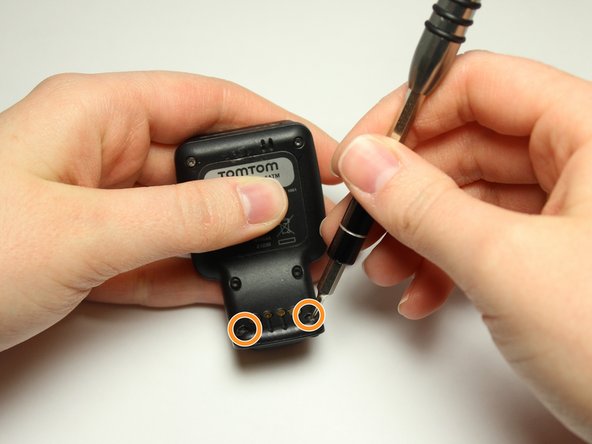
    • Unscrew the screws from the front of the watch casing and the screw holders fall out from the back of the watch casing.

  6. TomTom Runner Back Panel Replacement Guide: passo 6, immagine 1 di 2 TomTom Runner Back Panel Replacement Guide: passo 6, immagine 2 di 2
    • Gently pull the back panel away from the front panel.

    • Do not to pull too fast or too hard. There are red and black wires connected to the vibrator component that should not be ripped.

  7. TomTom Runner Back Panel Replacement Guide: passo 7, immagine 1 di 2 TomTom Runner Back Panel Replacement Guide: passo 7, immagine 2 di 2
    • Gently wiggle the black box vibrator component away from the back panel with your fingers or a Spudger tool.

    • Be gentle with the red and black wires. You do not want them to rip or pop out.

    • The vibrator component is the small black box with the silver metal part at end. The black box is glued down, so it will take a little force to free it and it will be sticky.

Conclusione

This step is complete once the back and front panels are separated from each other. To reassemble your device, follow these instructions in reverse order.

Team

0 Commenti

Aggiungi Commento

Visualizza Statistiche:

Ultime 24 Ore: 0

Ultimi 7 Giorni: 0

Ultimi 30 Giorni: 0

Tutti i Tempi: 142