Salta al contenuto principale

TomTom ONE Battery Replacement

Cosa ti serve

  1. TomTom ONE Battery Replacement, Battery: passo 1, immagine 1 di 1
    • Use a T-9 Torx screwdriver to unscrew the four screws on the back cover.

  2. TomTom ONE Battery Replacement: passo 2, immagine 1 di 2 TomTom ONE Battery Replacement: passo 2, immagine 2 di 2
    • Using a spudger, gently pry apart the back case from the front case. It is easier to start on a side and work your way around the device.

  3. TomTom ONE Battery Replacement: passo 3, immagine 1 di 1
    • Carefully pull the back cover apart from the front cover. Be careful not to pull too hard because there are two sets of wires connecting the device.

  4. TomTom ONE Battery Replacement: passo 4, immagine 1 di 1
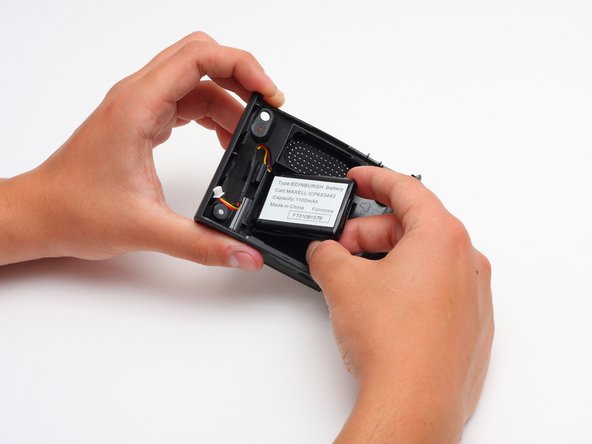
    • Once the two covers are separated, use the tweezers, or even your fingers, to gently disconnect the two sets of wires that are connected to the motherboard from the back cover. You may have to wiggle the wires a little bit to get them to disconnect.

  5. TomTom ONE Battery Replacement: passo 5, immagine 1 di 2 TomTom ONE Battery Replacement: passo 5, immagine 2 di 2
    • Using the spudger, gently pry out the battery.

    • The battery may seem tough to get out due to the adhesive used to secure it. Just slowly work at it and do not force anything.

Conclusione

To reassemble your device, follow these instructions in reverse order.

Altre 3 persone hanno completato questa guida.

Team

Cal Poly, Team 7-7, Maness Spring 2010 Membro di Cal Poly, Team 7-7, Maness Spring 2010

CPSU-MANESS-S10S7G7

4 Membri

6 Guide realizzate

0 Commenti

Aggiungi Commento

Visualizza Statistiche:

Ultime 24 Ore: 0

Ultimi 7 Giorni: 3

Ultimi 30 Giorni: 10

Tutti i Tempi: 10,614