Salta al contenuto principale

Tivax MiTraveler 10Q-8 Rear Case Replacement

Cosa ti serve

  1. Tivax MiTraveler 10Q-8 Rear Case Replacement, Rear Case: passo 1, immagine 1 di 2 Tivax MiTraveler 10Q-8 Rear Case Replacement, Rear Case: passo 1, immagine 2 di 2
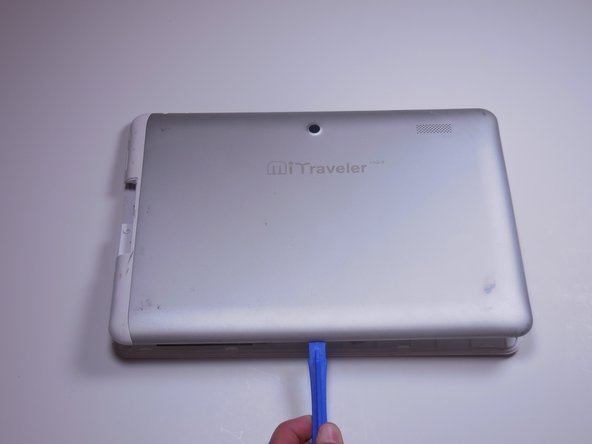
    • With the device face down, slide the charging port cover off on the left side of device.

  2. Tivax MiTraveler 10Q-8 Rear Case Replacement: passo 2, immagine 1 di 1
    • Locate a Phillips 2.88mm screw at the charging port.

  3. Tivax MiTraveler 10Q-8 Rear Case Replacement: passo 3, immagine 1 di 1
    • Use a PH000 Philips head screwdriver to remove screw.

    • Remember lefty loosey, righty tighty

  4. Tivax MiTraveler 10Q-8 Rear Case Replacement: passo 4, immagine 1 di 1
    • To pry the back plate off, use the plastic opening tool between the back plate and front plate; start at the headphone jack.

    • Make sure the lip of the plastic opening tool is face up.

  5. Tivax MiTraveler 10Q-8 Rear Case Replacement: passo 5, immagine 1 di 2 Tivax MiTraveler 10Q-8 Rear Case Replacement: passo 5, immagine 2 di 2
    • Move around the device with the plastic opening tool, pushing down to release the back plate from clips.

    • You will hear popping sounds when you work around the device.

  6. Tivax MiTraveler 10Q-8 Rear Case Replacement: passo 6, immagine 1 di 2 Tivax MiTraveler 10Q-8 Rear Case Replacement: passo 6, immagine 2 di 2
    • Once you’ve moved around the whole device with the plastic opening tool, the back plate will completely release from the rest of the device.

Conclusione

To reassemble your device, simply slide the back plate back in to place and press down until you hear several clicks.

Maria

Membro da: 03/16/15

210 Reputazione

2 Guide realizzate

Team

0 Commenti

Aggiungi Commento

Visualizza Statistiche:

Ultime 24 Ore: 0

Ultimi 7 Giorni: 1

Ultimi 30 Giorni: 3

Tutti i Tempi: 286