Salta al contenuto principale
Unisciti alla Community delle riparazioni - Crea un account
Tengda S5 Plus Home Button Replacement

Tengda S5 Plus Home Button Replacement

Kenny Levy

Kenny Levy e 4 altri collaboratori

Ultimo aggiornamento il 7 mag 2024

20 - 30 minuti
Moderato

Introduzione

Vai al passo 1

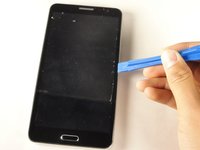
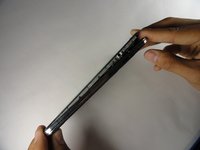
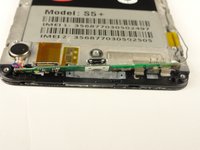
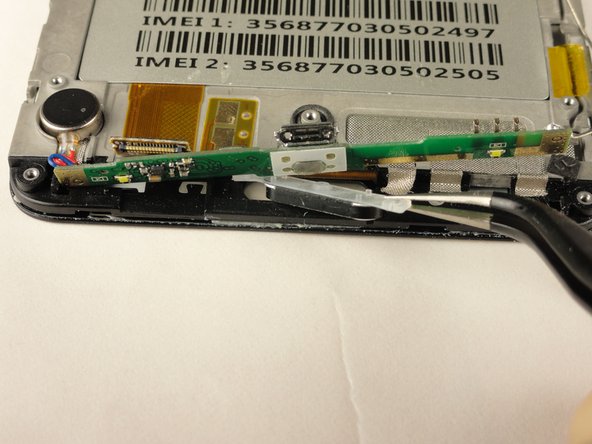
Problems may occur with the home button if there is dirt or something that is damaged underneath the button. In this guide, you will learn the steps to remove the back panel and lower motherboard of the phone to isolate the home button, clean the area around the home button, and replace the home button. When removing the back panel use the proper tools to avoid cracking the screen or damaging any other part of the device.

Cosa ti serve

Strumenti

Mostra di più…

  1. Tengda S5 Plus Home Button Replacement, Back Panel: passo 1, immagine 1 di 1
    • Place the phone screen-side down.

  2. Tengda S5 Plus Home Button Replacement: passo 2, immagine 1 di 2 Tengda S5 Plus Home Button Replacement: passo 2, immagine 2 di 2
    • Using your fingernail or any prying tool (we used the Metal Spudger), begin to pry away the back panel starting at the bottom of the phone.

    • Continue to work your way around the phone counterclockwise until you can pull the back cover off.

  3. Tengda S5 Plus Home Button Replacement, Battery: passo 3, immagine 1 di 1
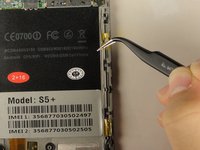
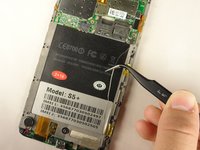
    • Remove the battery by placing your thumb in the slot, pushing the battery up and pulling it out.

  4. Tengda S5 Plus Home Button Replacement, Home Button: passo 4, immagine 1 di 1
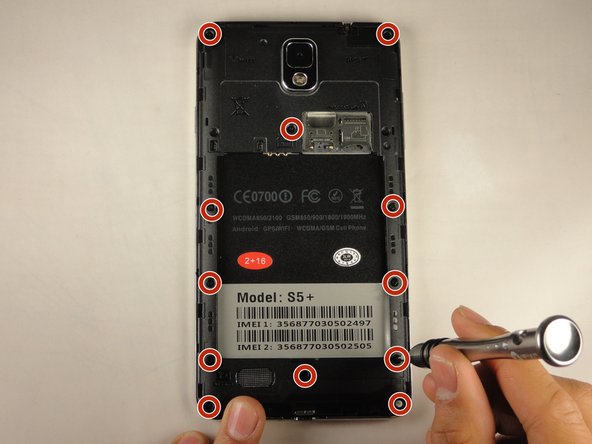
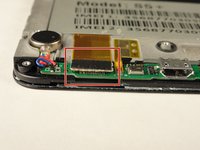
    • Unscrew the twelve 3 mm screws from the back panel using a Phillips #00 screwdriver.

    • Keep these screws in a safe place. They are very small and easy to lose.

  5. Tengda S5 Plus Home Button Replacement: passo 5, immagine 1 di 2 Tengda S5 Plus Home Button Replacement: passo 5, immagine 2 di 2
    • Using the plastic opening tool, create a small gap between the front screen and the metal casing. Slide the plastic opening tool around the phone counterclockwise to make this gap around the entire phone.

    • Once the screen is separated from the back panel, pull the two pieces apart.

  6. Tengda S5 Plus Home Button Replacement: passo 6, immagine 1 di 1
    Attrezzo utilizzato in questo passaggio:
    Tweezers
    $4.99
    • Lay your device with the screen faced down.

    • Using tweezers, lift the two pieces of yellow tape holding the wire in place.

  7. Tengda S5 Plus Home Button Replacement: passo 7, immagine 1 di 2 Tengda S5 Plus Home Button Replacement: passo 7, immagine 2 di 2
    • Using the tweezers again, grasp the wire and free it from the crevice.

    • This will provide slack for you to work with the lower motherboard.

  8. Tengda S5 Plus Home Button Replacement: passo 8, immagine 1 di 3 Tengda S5 Plus Home Button Replacement: passo 8, immagine 2 di 3 Tengda S5 Plus Home Button Replacement: passo 8, immagine 3 di 3
    • Remove the silver tape that holds the lower motherboard to the front panel of the phone.

  9. Tengda S5 Plus Home Button Replacement: passo 9, immagine 1 di 2 Tengda S5 Plus Home Button Replacement: passo 9, immagine 2 di 2
    • Using your fingers, or the Metal Spudger, disconnect the black cable connector.

    • The cable connector should easy snap out with little force.

  10. Tengda S5 Plus Home Button Replacement: passo 10, immagine 1 di 3 Tengda S5 Plus Home Button Replacement: passo 10, immagine 2 di 3 Tengda S5 Plus Home Button Replacement: passo 10, immagine 3 di 3
    • Using your fingers, slide the lower motherboard towards you.

    • The lower motherboard will still be attached to the front panel by a red and blue cable on the left side and a long silver wire on the right side, but you should now have visibility of the home button.

  11. Tengda S5 Plus Home Button Replacement: passo 11, immagine 1 di 2 Tengda S5 Plus Home Button Replacement: passo 11, immagine 2 di 2
    • Clean away any dirt from the back side of the lower motherboard, underneath the charging port.

    • Using tweezers, grasp and remove the home button.

Conclusione

To reassemble your device, follow these instructions in reverse order.

Kenny Levy

Membro da: 04/20/15

122 Reputazione

1 Guida realizzata

Team

Cal Poly, Team 14-9, Amido Spring 2015 Membro di Cal Poly, Team 14-9, Amido Spring 2015

CPSU-AMIDO-S15S14G9

4 Membri

10 Guide realizzate

0Commenti sulla guida

Aggiungi Commento

Visualizza Statistiche:

Ultime 24 Ore: 0

Ultimi 7 Giorni: 0

Ultimi 30 Giorni: 3

Tutti i Tempi: 389