Salta al contenuto principale

Tagital T7X Camera Replacement

Cosa ti serve

  1. Tagital T7X Camera  Replacement, Case: passo 1, immagine 1 di 3 Tagital T7X Camera  Replacement, Case: passo 1, immagine 2 di 3 Tagital T7X Camera  Replacement, Case: passo 1, immagine 3 di 3
    • Place the Tagital T7X on a sturdy surface.

    • Insert the plastic opening tool into the crack and pry open the tablet. Move the tool along the edge, while continuing to pry up the casing.

  2. Tagital T7X Camera  Replacement, Camera: passo 2, immagine 1 di 3 Tagital T7X Camera  Replacement, Camera: passo 2, immagine 2 di 3 Tagital T7X Camera  Replacement, Camera: passo 2, immagine 3 di 3
    • Use a spudger to hold the cameras in place.

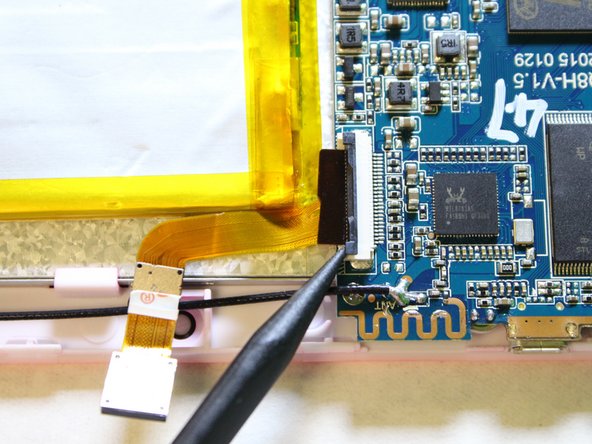
    • Gently pull the black tape away using your finger.

  3. Tagital T7X Camera  Replacement: passo 3, immagine 1 di 3 Tagital T7X Camera  Replacement: passo 3, immagine 2 di 3 Tagital T7X Camera  Replacement: passo 3, immagine 3 di 3
    • Remove the ribbon cable from the motherboard.

    • Use a spudger to lift the two tabs, freeing the ribbon cable from the socket.

  4. Tagital T7X Camera  Replacement: passo 4, immagine 1 di 3 Tagital T7X Camera  Replacement: passo 4, immagine 2 di 3 Tagital T7X Camera  Replacement: passo 4, immagine 3 di 3
    • Gently pull the ribbon cable away from the motherboard.

    • Don't be afraid to use some force to pull the ribbon cable.

Conclusione

To reassemble your device, follow these instructions in reverse order.

Un'altra persona ha completato questa guida.

Hanlong Chen

Membro da: 02/10/16

265 Reputazione

2 Guide realizzate

Team

USF Tampa, Team 2-1, Sullivan Spring 2016 Membro di USF Tampa, Team 2-1, Sullivan Spring 2016

USFT-SULLIVAN-S16S2G1

4 Membri

12 Guide realizzate

0 Commenti

Aggiungi Commento

Visualizza Statistiche:

Ultime 24 Ore: 0

Ultimi 7 Giorni: 0

Ultimi 30 Giorni: 0

Tutti i Tempi: 170