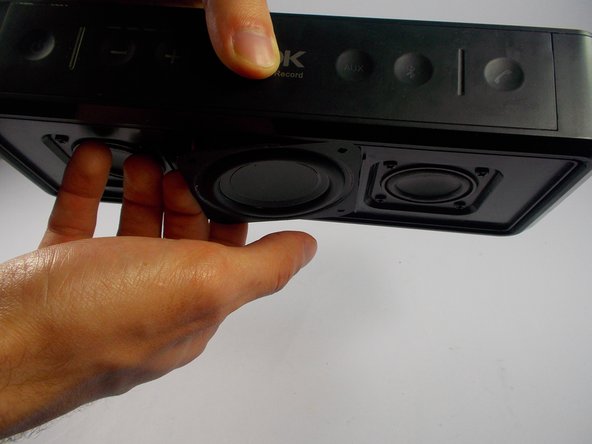
Salta al contenuto principale
Unisciti alla Community delle riparazioni - Crea un account

TDK Life on Record A33 Speaker Replacement

Cosa ti serve

  1. TDK Life on Record A33 Speaker Replacement, Speaker Guard: passo 1, immagine 1 di 1
    • Push the nylon or metal spudger in the corner of the speaker guard.

    Chiedi a FixBot

    Aggiungi Commento

  2. TDK Life on Record A33 Speaker Replacement: passo 2, immagine 1 di 1
    • Slowly lift the speaker up enough so that you can slide around the speaker guard.

    Chiedi a FixBot

    Aggiungi Commento

  3. TDK Life on Record A33 Speaker Replacement: passo 3, immagine 1 di 2 TDK Life on Record A33 Speaker Replacement: passo 3, immagine 2 di 2
    • Slide the nylon or metal spudger all around the speaker guard.

    Chiedi a FixBot

    Aggiungi Commento

  4. TDK Life on Record A33 Speaker Replacement: passo 4, immagine 1 di 1
    • Remove the speaker guard. You can now replace the speaker guard on your TDK Life on Record A33.

    Chiedi a FixBot

    Aggiungi Commento

  5. TDK Life on Record A33 Speaker Replacement, Speaker: passo 5, immagine 1 di 2 TDK Life on Record A33 Speaker Replacement, Speaker: passo 5, immagine 2 di 2
    • Remove all (4) 3mm screws in the middle speaker using a Phillip's head screwdriver.

    • You can also remove the speakers on the left and right.

    Chiedi a FixBot

    Aggiungi Commento

  6. TDK Life on Record A33 Speaker Replacement: passo 6, immagine 1 di 2 TDK Life on Record A33 Speaker Replacement: passo 6, immagine 2 di 2
    • Do not rip the wires inside the speaker when trying to open the middle speaker on the device.

    • Create an opening in the speaker by holding the device up and carefully grabbing the side of the speaker that pops out.

    Chiedi a FixBot

    Aggiungi Commento

  7. TDK Life on Record A33 Speaker Replacement: passo 7, immagine 1 di 2 TDK Life on Record A33 Speaker Replacement: passo 7, immagine 2 di 2
    • Wear safety goggles and have something to absorb the smoke from the soldering iron just in case.

    • Do not burn the wires of the speaker.

    • Remove the solder that connects the wires to the speaker. You should be able to now remove the speaker and replace it.

    Chiedi a FixBot

    Aggiungi Commento

Conclusione

To reassemble your device, follow these instructions in reverse order.

Annulla: non ho completato questa guida.

Altre 2 persone hanno completato questa guida.

Team

UMass Dartmouth, Team 4-2, Catania Fall 2015 Membro di UMass Dartmouth, Team 4-2, Catania Fall 2015

UMASSD-CATANIA-F15S4G2

4 Membri

5 guide realizzate

3Commenti sulla guida

Where can I buy the woofer?

stevealvarado54 - Rispondi Condividi

Really, stevealvarado! What's The point of taking this all apart if you don't have a replacement to put in?

Van Moon - Rispondi Condividi

If l need a second opinion about which speaker is blown, who or where can can l get it diagnosed?

Tony - Rispondi Condividi

Aggiungi Commento

Visualizza statistiche:

Ultime 24 ore: 1

Ultimi 7 giorni: 15

Ultimi 30 giorni: 41

Tutti i Tempi: 5,058