Salta al contenuto principale

Syma X12S Motor Replacement

Cosa ti serve

  1. Syma X12S Motor Replacement, Syma X12S Motor: passo 1, immagine 1 di 2 Syma X12S Motor Replacement, Syma X12S Motor: passo 1, immagine 2 di 2
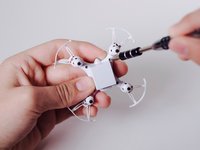
    • Before disassembling the quadcopter, find out which motor(s) need to be replaced.

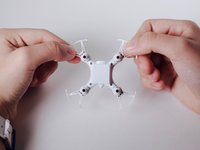
    • Rotate your quadcopter until the front of the quadcopter is facing you, or the side opposite of the charger hole.

    • Remember where the motor(s) that needs replacement in relativity to the charger port.

  2. Syma X12S Motor Replacement: passo 2, immagine 1 di 3 Syma X12S Motor Replacement: passo 2, immagine 2 di 3 Syma X12S Motor Replacement: passo 2, immagine 3 di 3
    • Once you have designated broken motor take of all propellers in a pulling twisting motion.

    • Keep in mind you need to know at all times which motor is broken. You will need to know the position of the broken motor at various times during this project.

  3. Syma X12S Motor Replacement: passo 3, immagine 1 di 3 Syma X12S Motor Replacement: passo 3, immagine 2 di 3 Syma X12S Motor Replacement: passo 3, immagine 3 di 3
    • After all propellers are off the quadcopter flip the quadcopter over and unscrew the undercarriage from the body to reveal circuitboard and motors.

    • For this step you will need to have a small Phillips head screwdriver.

    • Remove the motor shell and body cover from the four motors revealing circuitboard and the motors compleatly.

    • After separate these parts this makes it easier to reconstruct the quadcopter.

Conclusione

To reassemble your device, follow these instructions in reverse order.

Altre 2 persone hanno completato questa guida.

0 Commenti

Aggiungi Commento

Visualizza Statistiche:

Ultime 24 Ore: 0

Ultimi 7 Giorni: 0

Ultimi 30 Giorni: 4

Tutti i Tempi: 399