Salta al contenuto principale

Sylvania SDVD9004 Screen Replacement

Cosa ti serve

  1. Sylvania SDVD9004 Screen Replacement, Back cover: passo 1, immagine 1 di 1
    • Remove ten 7mm Phillips #0 screws.

    • Remove four 5mm Phillips #0 screws.

  2. Sylvania SDVD9004 Screen Replacement: passo 2, immagine 1 di 2 Sylvania SDVD9004 Screen Replacement: passo 2, immagine 2 di 2
    • Flip the device over.

    • Lift the top.

  3. Sylvania SDVD9004 Screen Replacement: passo 3, immagine 1 di 1
    • This guide uses incorrect tools. Use an ESD safe tool, such as a nylon spudger, to complete this step.

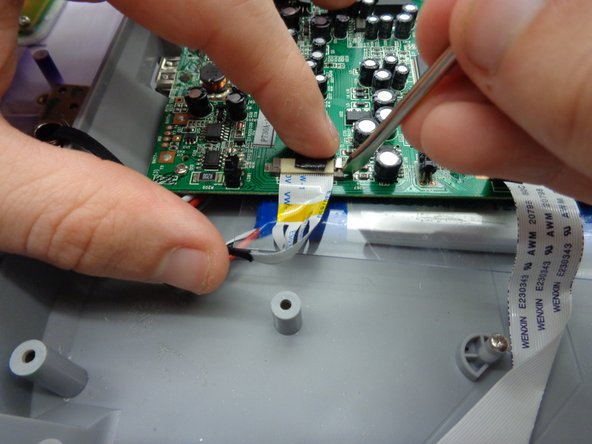
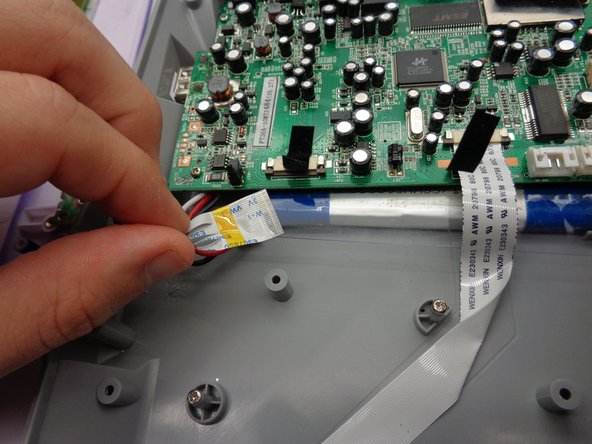
  4. Sylvania SDVD9004 Screen Replacement, Screen: passo 4, immagine 1 di 3 Sylvania SDVD9004 Screen Replacement, Screen: passo 4, immagine 2 di 3 Sylvania SDVD9004 Screen Replacement, Screen: passo 4, immagine 3 di 3
    • Disconnect ribbon

    • This guide uses incorrect tools. Use an ESD safe tool, such as a nylon spudger, to complete this step.

    • Rotate screwdriver to peel sticker from ribbon.

    • Place spudger head behind gray tabs on port.

    • Press outward to disengage tab.

    • Repeat on other side.

    • Slide out ribbon.

  5. Sylvania SDVD9004 Screen Replacement: passo 5, immagine 1 di 2 Sylvania SDVD9004 Screen Replacement: passo 5, immagine 2 di 2
    • Using Philips head screwdriver, remove the two 7 mm screws.

    • Slide off top panel.

Conclusione

To reassemble your device, follow these instructions in reverse order.

Sarah Henry

Membro da: 10/31/16

417 Reputazione

4 Guide realizzate

Team

Baylor, Team 5-10, Williams Fall 2016 Membro di Baylor, Team 5-10, Williams Fall 2016

BU-WILLIAMS-F16S5G10

2 Membri

5 Guide realizzate

0 Commenti

Aggiungi Commento

Visualizza Statistiche:

Ultime 24 Ore: 2

Ultimi 7 Giorni: 4

Ultimi 30 Giorni: 11

Tutti i Tempi: 627