Cosa ti serve
-
-
-
Rimuovi le sei viti situate sulla parte inferiore del sistema usando il cacciavite Gamebit da 4,5 mm.
 Chiedi a FixBot
-
-
-
Capovolgi con attenzione l'unità.
-
Individua la giuntura. Solleva e separa la metà superiore del case dalla metà inferiore.
-
-
-
-
-
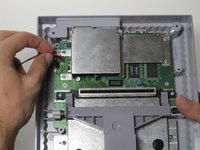
Rimuovi le due viti a croce Phillips #2 da 11,7 mm che collegano l'interruttore di accensione alla scheda madre.
-
-
-
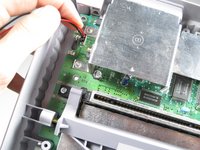
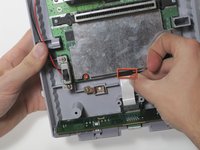
Scollega con attenzione il connettore dalla sua presa sulla scheda madre. Potrebbe essere necessario muoverlo leggermente mentre lo tiri.
-
-
-
-
-
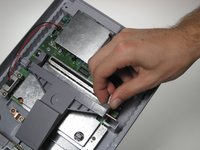
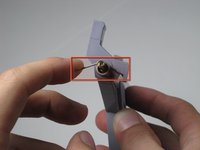
Solleva il lato destro della leva di espulsione dall'alloggiamento.
-
-
-
-
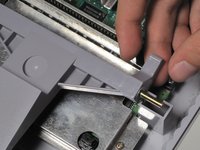
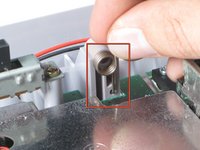
Estrai la barra metallica facendola scorrere verso il lato destro della leva di espulsione.
-
-
-
-
-
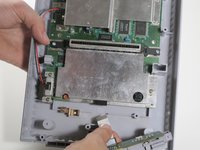
Solleva le porte del controller dall'alloggiamento, dovresti riuscirci senza usare molta forza. Prendi nota della posizione del collegamento del cavo a nastro.
-
-
-
-
-
Rimuovi le due viti a croce Phillips da 11,6 mm che collegano la protezione anteriore alla scheda madre.
-
-
-
Solleva lo schermo frontale dritto verso l'alto per rimuoverlo dalla scheda madre.
-
-
-
Rimuovi le due viti a croce Phillips #2 argentate da 15,6 mm su entrambi i lati del connettore a 62 pin.
-
-
-
Rimuovi la vite a croce Phillips #2 da 11,8 mm vicino alla parte posteriore del SNES.
-
-


Per rimontare il dispositivo, segui queste istruzioni in ordine inverso.
Annulla: non ho completato questa guida.
Altre 47 persone hanno completato questa guida.
Un ringraziamento speciale a questi traduttori:
100%

Translation Bot ci sta aiutando ad aggiustare il mondo! Vuoi partecipare?
Inizia a tradurre ›
Team

Cal Poly, Team 4-47, Amido Fall 2010 Membro di Cal Poly, Team 4-47, Amido Fall 2010
CPSU-AMIDO-F10S4G47
4 Membri
55 guide realizzate
4Commenti sulla guida
There are several versions of the Super Nintendo. Steps for my version are a bit different.
This seems to be a newer super nintendo. If you have one of the older ones, there will be a bit more screws but still basically the same steps.
There are two versions of the Super Nintendo- the one pictured here, and one with a sound chip board behind the game cartridge reader. These two models have different shells that are not interchangeable (important to know if you're looking to buy a replacement housing for your SNES)
It’s possible they may be referring to the European/Japanese version of the Super Nintendo/Super Famicom. Either that, or it’s one of the weird, misshapen “reskins”.