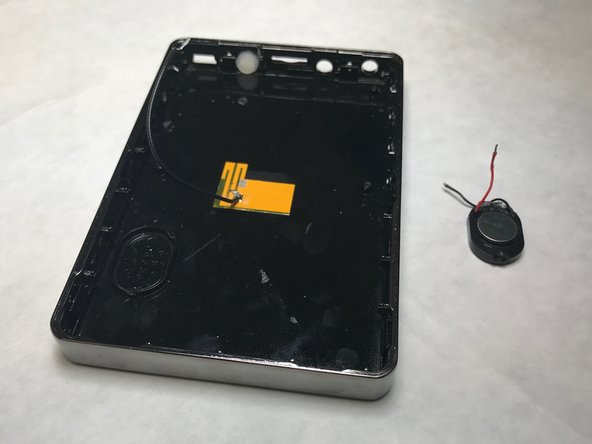
Salta al contenuto principale

Sungale CyberUs Speaker Replacement

Cosa ti serve

  1. Sungale CyberUs Speaker Replacement, Screen: passo 1, immagine 1 di 1
    • Make sure to have the device turned off to prevent any minor electric shock.

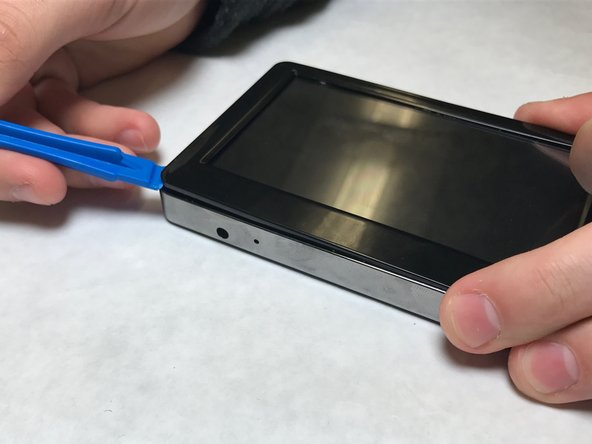
    • Hold the device so the left side is facing towards you (like in the picture shown) so the two 4mm PH001 screws are exposed and easier to access.

  2. Sungale CyberUs Speaker Replacement: passo 2, immagine 1 di 1
    • Remove both 4mm PH001 screws from the side panel.

  3. Sungale CyberUs Speaker Replacement: passo 3, immagine 1 di 2 Sungale CyberUs Speaker Replacement: passo 3, immagine 2 di 2
    • Carefully pry up one of the top corners of the screen with a plastic spudger (prying tool). Slide the tool along the edges to release it from the housing.

    • The screen may make some cracking noises as you pry it from the casing. This is expected.

    • The screen is still connected to the motherboard. Use force with caution.

  4. Sungale CyberUs Speaker Replacement: passo 4, immagine 1 di 1
    • Gently turn screen over, to the side, to reveal the ZIF connector attached to the motherboard.

  5. Sungale CyberUs Speaker Replacement: passo 5, immagine 1 di 1
    • Gently using tweezers, flip the black clip up. Pull the ZIF connector out.

    • You screen is still not completely detached from the device.

  6. Sungale CyberUs Speaker Replacement: passo 6, immagine 1 di 2 Sungale CyberUs Speaker Replacement: passo 6, immagine 2 di 2
    • Using the prying tool, slide the black clip out. Pull the ZIF connector out and to the left, the screen is now detached from the motherboard.

  7. Sungale CyberUs Speaker Replacement, Battery: passo 7, immagine 1 di 1
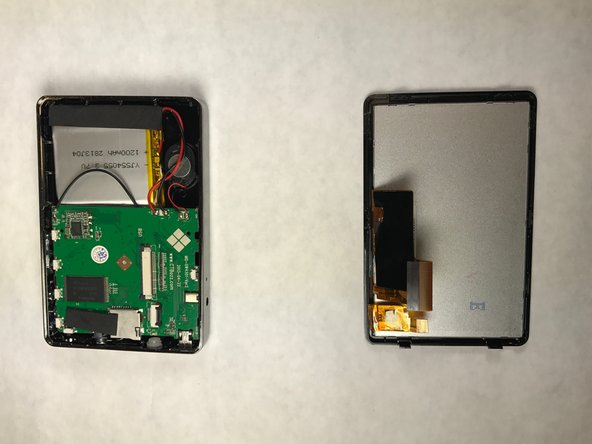
    • Now, carefully we will remove the battery. Find the leads, or the red and black wires going to the battery from the motherboard. To free the wires you must cut the wire near the battery leads. Make sure both ends are clean and have enough exposed wire.

  8. Sungale CyberUs Speaker Replacement: passo 8, immagine 1 di 1
    • You will have to clean the connections and solder the new battery back into place. Just as before, you want to reconnect the new battery to the motherboard.

  9. Sungale CyberUs Speaker Replacement, Mother Board: passo 9, immagine 1 di 1
    • In case of a burned out mother board, take the cables from the battery and the speaker (black and red cables) and detach them from the motherboard (you could only cut them and weld them when replacing with new motherboard).

    • Gently tug on wires to remove the connection from the logic board.

  10. Sungale CyberUs Speaker Replacement: passo 10, immagine 1 di 1
    • To remove mother board gently pull away from the top of the device to make sure the earphone jack it our of the slot.

  11. Sungale CyberUs Speaker Replacement: passo 11, immagine 1 di 1
    • Your mother board is now completely removed from the device.

  12. Sungale CyberUs Speaker Replacement, Speaker: passo 12, immagine 1 di 1
    • Disconnect cables from the mother board with tweezers.

  13. Sungale CyberUs Speaker Replacement: passo 13, immagine 1 di 1
    • Use plastic spudger (prying tool) to remove speaker from casing mold. The speaker is now completely detached from device shell.

Conclusione

To reassemble your device, follow these instructions in reverse order.

Un'altra persona ha completato questa guida.

Team

IUPUI, Team 1-4, Harley Fall 2016 Membro di IUPUI, Team 1-4, Harley Fall 2016

IUPUI-HARLEY-F16S1G4

3 Membri

8 Guide realizzate

0 Commenti

Aggiungi Commento

Visualizza Statistiche:

Ultime 24 Ore: 0

Ultimi 7 Giorni: 0

Ultimi 30 Giorni: 0

Tutti i Tempi: 100