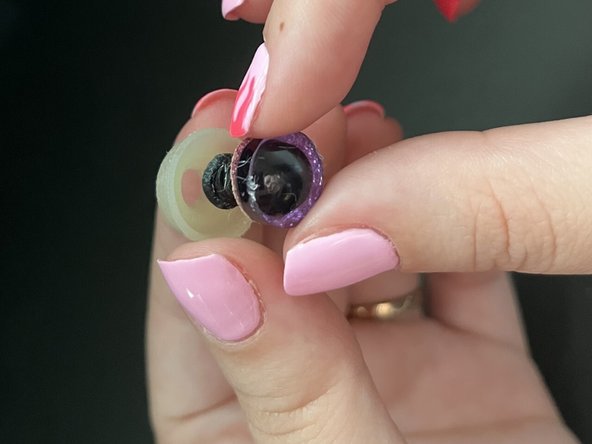
Salta al contenuto principale

Stuffed Animal Safety Eye Replacement

Cosa ti serve

  1. Stuffed Animal Safety Eye Replacement, Safety Eye: passo 1, immagine 1 di 1
    • Be sure to keep the eye that fell out and the backing or buy a new one.

    • New safety eyes are pretty inexpensive and easy to find.

    • Do not put the backing on the eye until it's in place.

  2. Stuffed Animal Safety Eye Replacement: passo 2, immagine 1 di 1
    • The eyes on the face are located in or close to a seam that holds it in place.

    • Use your scissors to open the seam. Be very careful to cut the thread and not the fabric.

    • Make the opening of the seam so it fits the replacement eye.

  3. Stuffed Animal Safety Eye Replacement: passo 3, immagine 1 di 1
    • Use this new hole to put the eye back in its original position.

  4. Stuffed Animal Safety Eye Replacement: passo 4, immagine 1 di 2 Stuffed Animal Safety Eye Replacement: passo 4, immagine 2 di 2
    • Insert the safety eye in the original position.

    • Before putting on the backing make sure it's symmetrical to the other eye.

  5. Stuffed Animal Safety Eye Replacement: passo 5, immagine 1 di 3 Stuffed Animal Safety Eye Replacement: passo 5, immagine 2 di 3 Stuffed Animal Safety Eye Replacement: passo 5, immagine 3 di 3
    • When the eye is in place put the backer on the eye from the inside of the plushie.

    • Use the hole of the seam we opened to do that.

    • Press very hard until the eye and the back click together.

  6. Stuffed Animal Safety Eye Replacement: passo 6, immagine 1 di 1
    • Sew the seam back up using a simple stitch.

    • Begin the stitches from the inside out so they are not visible, then fasten off the thread at the end of the seam.

    • The thread should be the same color as your plushie.

  7. Stuffed Animal Safety Eye Replacement: passo 7, immagine 1 di 1
    • Take a pin and poke at the fur carefully to make it fluffy again.

    • Doing this will ensure the eye doesn't look like it's popping out.

  8. Stuffed Animal Safety Eye Replacement: passo 8, immagine 1 di 1
    • Repeat the previous step all around the eye until it looks seamless.

    • And your done!

Conclusione

To reassemble your device, follow these instructions in the order suggested.

0 Commenti

Aggiungi Commento

Visualizza Statistiche:

Ultime 24 Ore: 3

Ultimi 7 Giorni: 26

Ultimi 30 Giorni: 86

Tutti i Tempi: 2,325