Questa traduzione potrebbe non riflettere gli aggiornamenti più recenti dalla guida originale. Aiuta ad aggiornare la traduzione o visualizza la guida d'origine.
Introduzione
Usa questa guida per sostituire lo schermo del tuo Moto G6, compreso il midframe, il telaietto intermedio che è incollato allo schermo.
Accertati che la tua parte di ricambio comprenda sia lo schermo sia il midframe: questa guida non copre l'operazione di separazione dello schermo dal midframe.
Questa procedura comprende la rimozione della batteria, che potrebbe danneggiarsi nel corso della sua rimozione. Noi raccomandiamo fortemente di non riutilizzare la batteria per evitare rischi per la sicurezza. Sostituiscila con una batteria nuova.
Cosa ti serve
-
-
Inserisci uno strumento di espulsione SIM, una punta specifica per cacciavite o una graffetta raddrizzata nel piccolo foro del vassoio della scheda SIM sul lato destro del bordo superiore del telefono.
-
Premi l'attrezzo nel foro per espellere il vassoio.
-
-
-
Se possibile, scarica la batteria prima dello smontaggio. Se la batteria è carica, un eventuale surriscaldamento o danneggiamento diventa maggiormente pericoloso.
-
Prepara un iOpener e scalda il retro del telefono lungo il bordo inferiore per circa due minuti o fino a quando diventa leggermente troppo caldo da poter essere toccato. In questo modo si ammorbidisce l'adesivo che fissa il pannello posteriore.
At what temperature shold the glass be heated to? My heat gun goes from 250 up to 1350.
START LOW.
These plastics can be almost endlessly remelted, held at temp, etc., if done gently.
With a heat gun, I'd hesitate to go too far past 250°F/115°C too quickly until I was comfortable with the material.
Plastic WILL begin to burn and permanently deteriorate at 350-400°F or so.
Silicone can handle up to 400-500°F.
(Get a cast iron pot or pan to roughly 250°F/110°C, then invert and put a silicone cookie sheet on it to make a work surface that will make life waaaaaay easier. Preheat the device along with the pan for a few minutes, too.)
-
-
-
Applica una ventosa sulla parte bassa del vetro posteriore.
-
Tira la ventosa esercitando una trazione forte e costante per creare una piccola fessura tra il pannello di vetro posteriore e la scocca.
-
Se incontri dei problemi, applica dell'altro calore per ammorbidire ancora l'adesivo e prova di nuovo. La colla si raffredda rapidamente, quindi può essere necessario riscaldarla più volte.
-
Inserisci un plettro di apertura nella fessura che hai creato sotto il vetro posteriore.
My back delaminated at this point. That is, the clear plastic started to come away leaving the paint layer behind. Mine is (was) the indigo blue one.
-
-
-
Se il vetro rimane comunque attaccato, scalda di nuovo e taglia ancora l'adesivo finché il pannello non si stacca.
-
Solleva con cautela il vetro posteriore, accertandoti che la colla sia completamente staccata.
-
Rimuovi il vetro posteriore.
When cleaning old adhesive off the back glass, be careful not to scratch the inner coating of the glass. If you scratch this coating with tweezers, it will leave visible “nicks” on the back glass.
-
-
-
-
Usa delle pinzette per staccare con cautela il nastro adesivo nero che ricopre la batteria.
-
Rimuovi il nastro.
Yes, there's the NFC tag that isn't mentioned, with its connection to the left. Thanks for the tip, Stuart; I gently lifted mine to the left and it seems to be intact. I guess I won't know until I try to pay for something.
-
-
-
Usa un cacciavite a croce Phillips per rimuovere le 17 viti che fissano la cover di plastica:
-
Undici viti grigie lunghe 3 mm
-
Cinque viti nere lunghe 3 mm
-
Una vite cromata lunga 3,5 mm
The holes for the black screws are marked with a small triangle to differentiate them from the holes for the gray ones. I found this super helpful when reassembling!
-
-
-
Inserisci l'estremità a punta di uno spudger nell'incavo nel bordo superiore sinistro della cover di plastica.
-
Fai leva con lo spudger per sollevare il bordo superiore della cover e sganciare le clip che tengono attaccata la cover stessa.
-
Rimuovi la cover di plastica.
When reinstalling plastic cover, alignment is critical for underlying contacts to line up. Test all functions before sealing up the phone. If camera or speaker don’t work, recheck plastic cover installation and correct until all phone functions operate.
-
-
-
Usa l'estremità a punta di uno spudger per staccare il connettore della batteria e scollegarlo.
What is the black part the battery is connects to called? The black part connected to the body of the phone.
Be very careful on this step! If you pry it out too roughly the connector will break. If you aren't very precise when putting the plug back in you will smash either the tiny tabs on the plug or the connector itself.
-
-
-
Prepara un iOpener e applicalo sulla metà di destra dello schermo per almeno due minuti in modo da ammorbidire l'adesivo della batteria sottostante. Scalda e applica nuovamente l'iOpener ogni volta che si rende necessario.
-
-
-
Usa un plettro di apertura per sollevare e staccare la batteria, iniziando dal suo bordo più esterno.
-
Rimuovi la batteria.
I found it easier to remove the battery after I removed the mother board.
It’s much easier to remove the battery after the motherboard is removed from the opposite side
Merci. La batterie est difficile À décoller Mais tout été parfait.
-
-
-
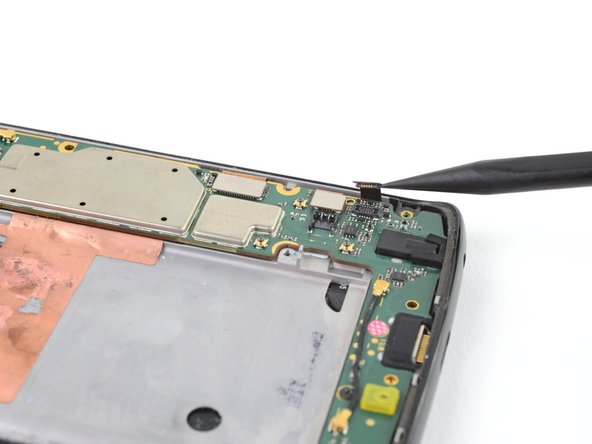
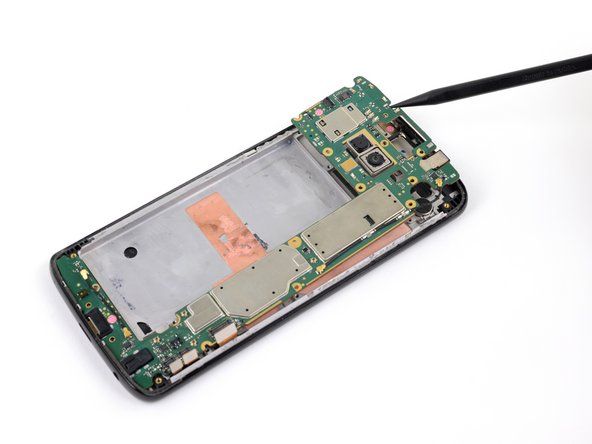
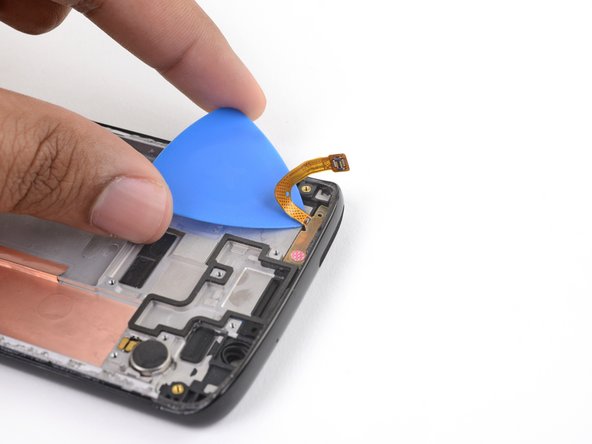
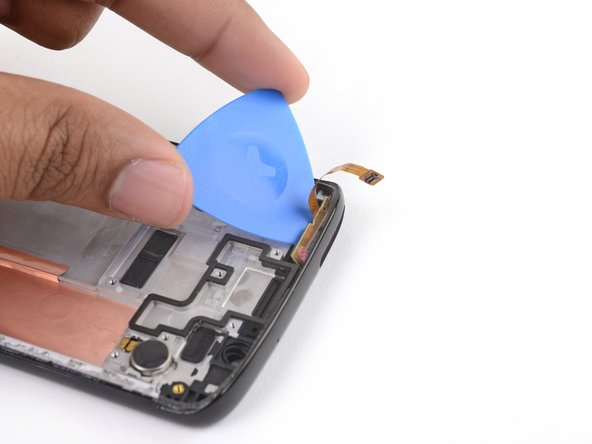
Usa l'estremità a punta di uno spudger per sollevare e disconnettere i tre cavi a nastro sul bordo inferiore destro della scheda madre.
-
-
-
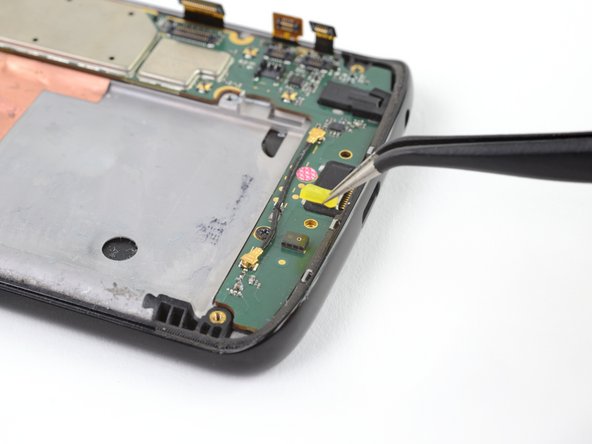
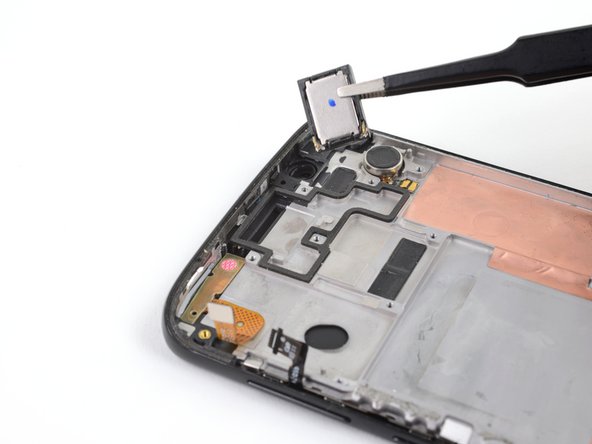
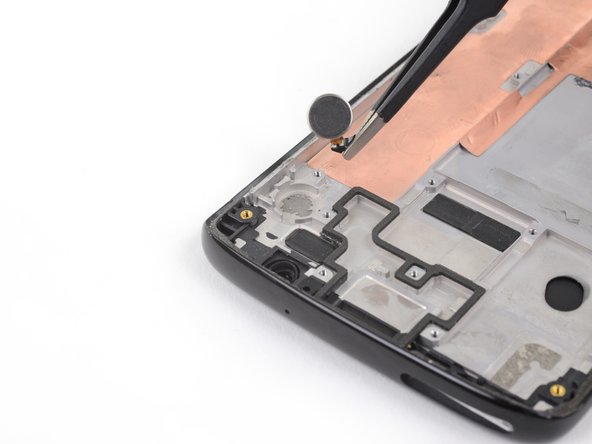
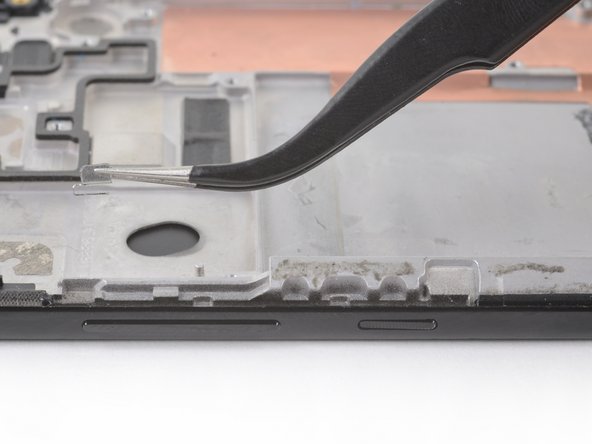
Usa delle pinzette per rimuovere la guarnizione gialla del microfono.
It's not entirely necessary to remove this gasket if you're replacing the screen, as the motherboard will lift out just fine with it attached. The important part is to make sure it doesn't fall off and get lost!
-
-
-
Usa l'estremità a punta di uno spudger per sollevare l'aletta di sblocco sul connettore ZIF del cavo del pulsante.
-
Usa delle pinzette per far scorrere fuori dal suo zoccolo il cavo del pulsante.
-
-
-
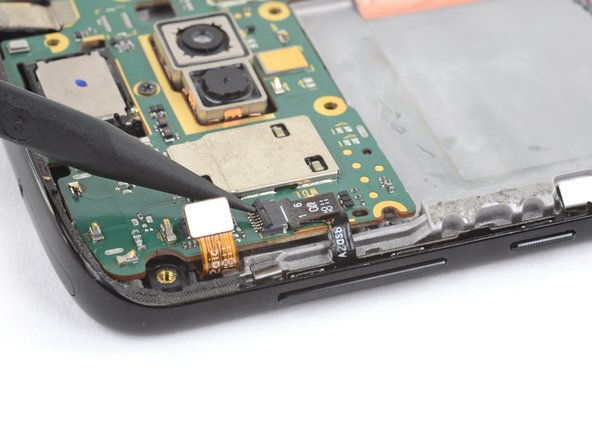
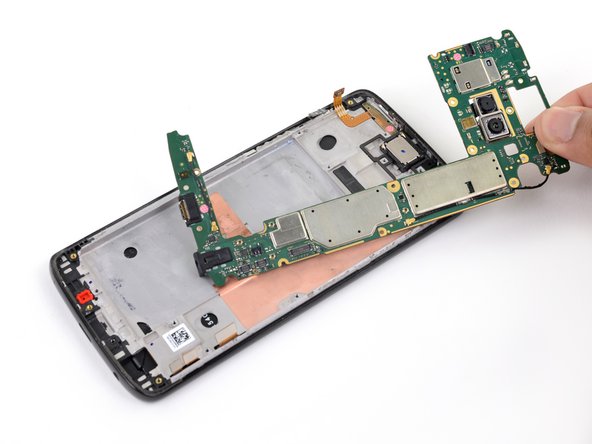
Usa un cacciavite a croce Phillips #000 per rimuovere le due viti lunghe 2,5 mm che bloccano la scheda madre.
-
-
-
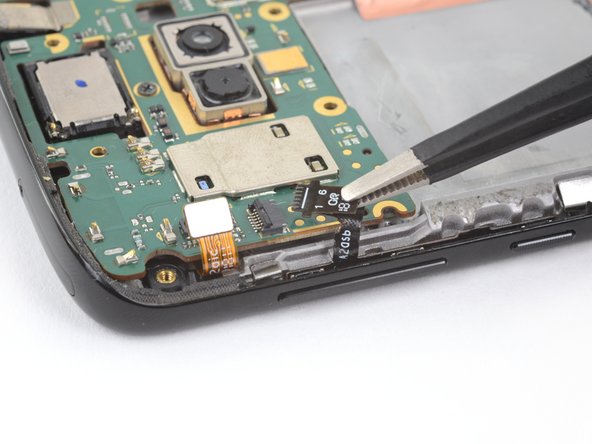
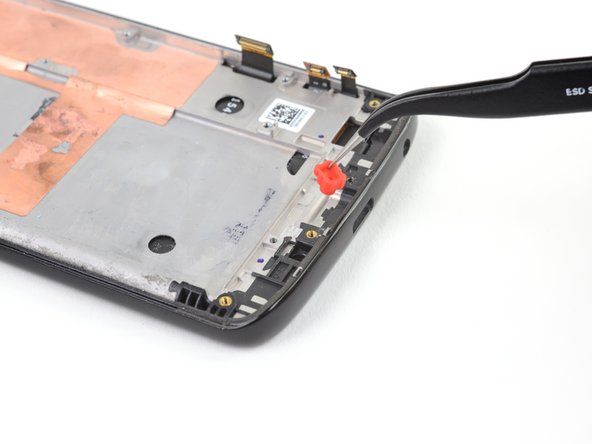
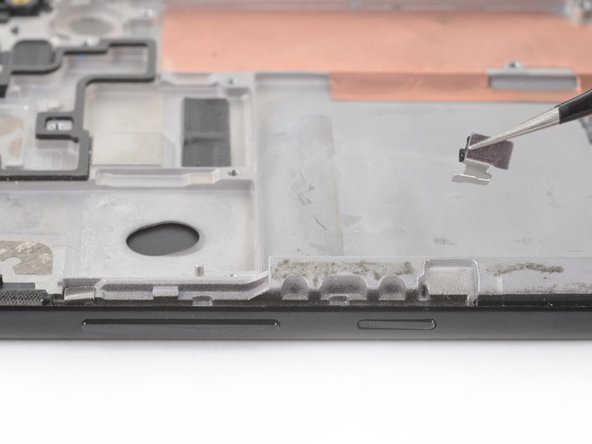
Usa delle pinzette per sollevare e far uscire la guarnizione rossa del microfono dal suo alloggiamento nella scocca.
-
-
-
Usa delle pinzette per sollevare le due staffe di bloccaggio presenti su ciascun lato dei pulsanti del volume e dell'accensione e rimuovile dal telefono.
In my phone these were adhered to the frame. I thought I was doing something wrong at first when they didn't lift as I expected, but they just needed a bit of prying to lift!
-
-
-
Usa l'estremità a punta di uno spudger per spingere il retro del pulsante del volume, dietro la sua estremità superiore, in modo che l'estremità superiore del pulsante venga fuori dal telefono.
-
Usa delle pinzette per rimuovere delicatamente il pulsante del volume, tirandolo dalla sua estremità superiore.
-
-
-
Usa la punta di uno spudger per spingere fuori il pulsante di accensione, da dietro la sua estremità inferiore, in modo che l'estremità inferiore del pulsante venga fuori dal telefono.
-
Usa delle pinzette per rimuovere delicatamente il pulsante di accensione, tirandolo per la sua estremità inferiore.
I thought this button was symmetrical when I removed it. It's not. The slightly larger hook goes towards the bottom to hook around the retaining bracket
-


Per riassemblare il tuo dispositivo, segui i passi descritti in ordine inverso.
Porta i tuoi rifiuti elettronici a un riciclatore certificato R2 o e-Stewards.
Per prestazioni ottimali, dopo aver completato questa guida calibra la batteria appena installata.
La riparazione non è andata come previsto? Prova delle soluzioni di base ai problemi, oppure rivolgiti alla nostra comunità Risposte Motorola Moto G6 per trovare aiuto.
Annulla: non ho completato questa guida.
Altre 28 persone hanno completato questa guida.
Un ringraziamento speciale a questi traduttori:
95%

albertob ci sta aiutando ad aggiustare il mondo! Vuoi partecipare?
Inizia a tradurre ›

8 Commenti
Nice instructions. I suggest adding that around step 24 or 25 removal of the rubber gasket/boot around the selfie camera be included. I didn’t see this anywhere in the instructions but found the part rolling around my table shortly after these steps. Also, as a general suggestion, and ice cube tray make organizing all the screws and little parts pretty easy.
Thanks for identifying the selfie gasket.
This can be done more quickly and easier by removing the front glass too. Then unplugging the 3 cables from the motherboard, and feeding your new screen cables through the front into the back.
I followed this guide and it worked like a charm to replace my broken screen. However, now the phone won’t get a cell signal. Does anyone have any ideas what might have happened?
Very helpful, thanks!
I found it helpful to remove the motherboard first, then the battery, as it gave me more room to work when loosening the battery adhesive, and then reinstall the motherboard first to help with positioning the battery during reassembly.
The sim card eject tool has snapped inside the ejector hole,is there another way to get the sim card out ?.
Amanda Ashley - Replica
You can try to carefully push the snapped pin with another ejector tool to eject the tray. Otherwise, lightly tap the phone edge to try to get the snapped pin out.
Arthur Shi -