Introduzione
Usa questa guida per sostituire la sottile scheda di plastica e il suo telaio di plastica. La nuova scheda di input fornirà dei nuovi contatti per tutti i tasti, ma non per gli stick analogici.
Cosa ti serve
-
-
Svita le cinque viti a croce Phillips da 7,2 mm che tengono ferma la copertura posteriore.
-
-
-
Solleva la batteria dalla scheda madre per avere accesso al suo connettore.
-
-
-
-
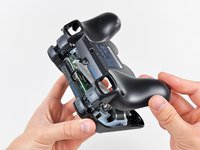
Rimuovi l'unica vite a croce Phillips da 7,2 mm che fissa la scheda madre al case anteriore.
-
-
-
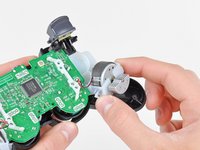
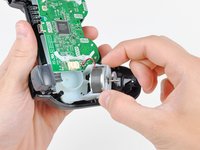
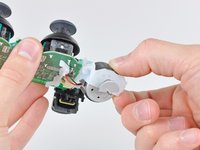
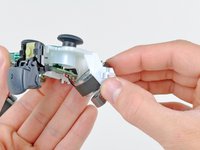
Spingi fuori con delicatezza i due motori di vibrazione dal telaio di plastica della scheda di input.
-


Per riassemblare il dispositivo, segui queste istruzioni in ordine inverso.
Per riassemblare il dispositivo, segui queste istruzioni in ordine inverso.
Annulla: non ho completato questa guida.
Altre 25 persone hanno completato questa guida.
Un ringraziamento speciale a questi traduttori:
100%

Questi traduttori ci stanno aiutando ad aggiustare il mondo! Vuoi partecipare?
Inizia a tradurre ›

2 Commenti
Will a repair guide be available for the newer Dualshock 3 controllers? Because they are vastly different and look to be cheaply made. The CECHZC2U A2 is the one I'm thinking of. I ask becase it's near impossible to find the older better made controllers like the one featured here.
I took my controller apart, which is the same model as the one in the pictures, to clean it because my shoulder buttons would go haywire.
When I separated the input board from the mobo, a little piece of gray foam fell from the input board, specifically from where all the contacts meet the mobo. I thought nothing of it so I cleaned the contacts and put it back together. When I went to use it, none of the buttons did anything, not even the PS button.
This is because the function that black piece of foam, which had disintegrated thus making all the insides of the controller really nasty, is to push the contacts of the input board against the ones on the mobo. So the controller wont work without it.
What I did was I cut a piece of tape and wedged it on the part of the input board that is behind the contacts of the input board. This pushed up against the input board’s contacts and made sure it was always making contact with the mobo. Then it worked just fine!
Sharing this in case someone else runs into this problem.