Introduzione
Se il Rug Doctor non sta spruzzando correttamente, potresti dover sostituire la pompa.
I modelli Mighty Pro ed X3 hanno una pompa, mentre il modello Wide Track (WT) ha due pompe identiche in parallelo. Questa guida è scritta per il modello Wide Track, ma può essere usata per ognuno dei tre modelli.
Strumenti opzionali:
- forbice per lamiera/tenaglie invece delle pinze a morsa per il tubo
- Taglia morsa/strumento di rimozione
- Asciugacapelli/pistola termica
Cosa ti serve
-
-
Per i modelli a singola pompa (Mighty Pro, X3), se il Rug Doctor non spruzza, la pompa deve essere sostituita.
-
Per il modello Wide Track, se il Rug Doctor non spruzza del tutto, devi sostituire entrambe le pompe.
-
Se l'acqua fuoriesce dal beccucci nel modello Wide Track ma non spruzza adeguatamente, controlla il beccucci per delle ostruzioni.
-
Se i beccucci sono puliti, una pompa può essere difettosa, non fornendo abbastanza pressione ai beccucci. Se possibile, sostituisci entrambe le pompe.
-
Se devi determinare quale delle due pompe deve essere sostituita, gira il Rug Doctor sulla modalità tappezzeria. Non scollegare il connettore rapido per gli accessori. Se l'acqua esce dai beccucci come nella modalità tappeto, sostituisci la pompa anteriore.
-
Se l'acqua non esce dai beccucci nella modalità accessori, sostituisci la pompa posteriore.
-
-
-
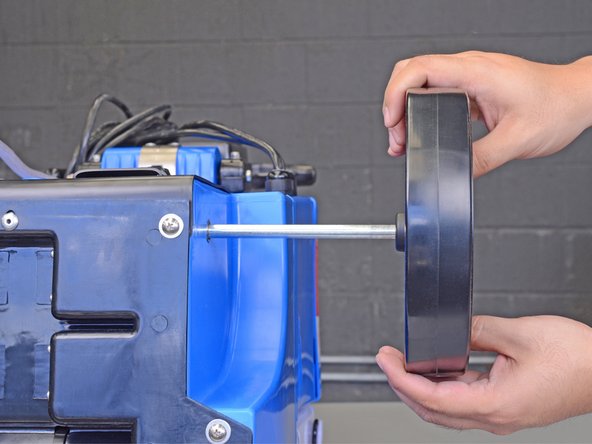
Usa delle pinze per prendere e far ondeggiare la boccola per liberarla.
-
Rimuovi la boccola.
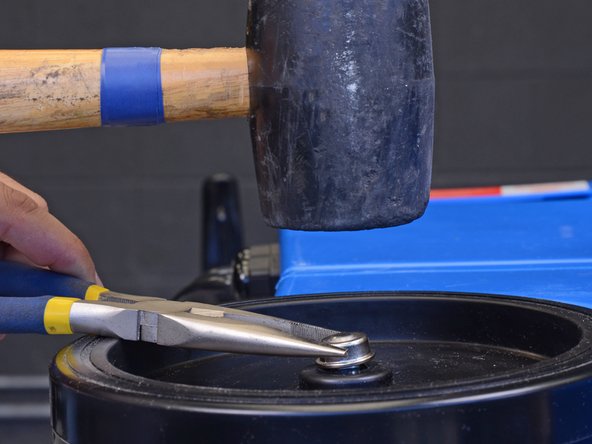
I had a lot of trouble with this step. I started by grabbing each cap with a pair of pliers and wiggling in opposite directions; they would twist but wouldn’t come off. Then I used a screwdriver to try prying one cap off (be sure to put a putty knife or other thin and stiff piece of metal between your prying tool and the wheel to avoid damage). I managed to move the cap off somewhat, but whenever I pried up one side of the cap, the other would go down. I eventually managed it by crushing the cap using a pair of adjustable pliers.
It was a little difficult but i kept moving it side to side and it finally let go
-
-
-
-
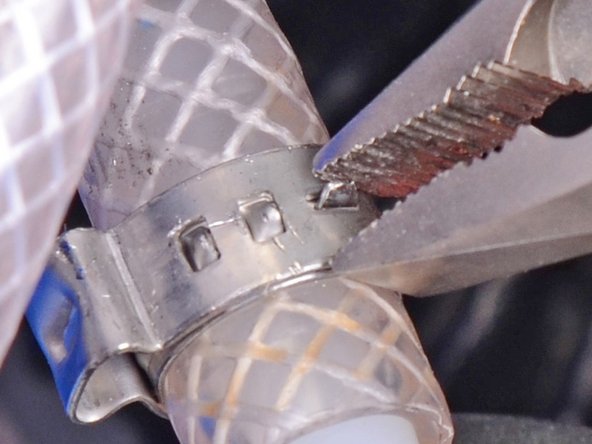
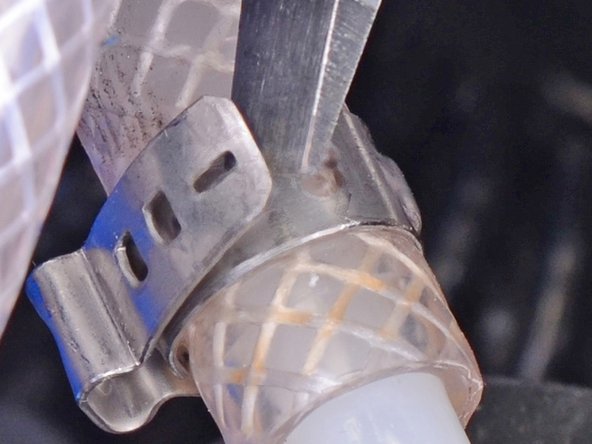
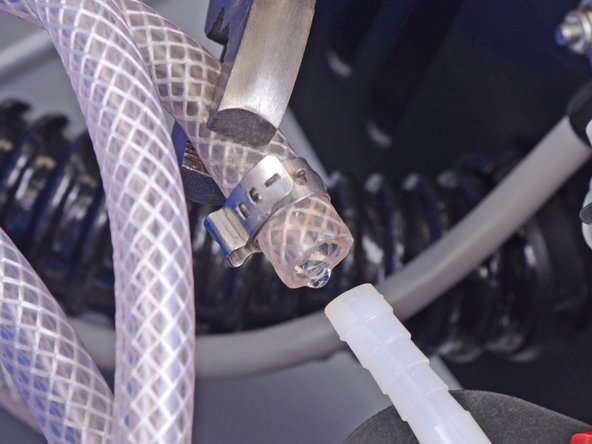
Rimuovi le morse crimpate del tubo che lo fissano ad entrambe le estremità della pompa che stai sostituendo.
-
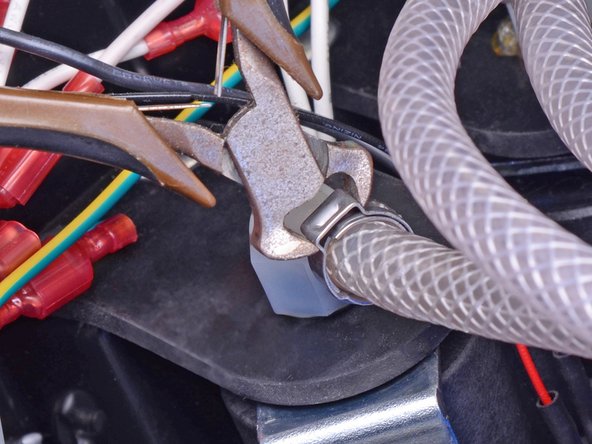
Puoi usare uno strumento per la rimozione delle morse per tagliarle.
-
In alternativa, usa delle pinze per sganciare le piccole alette di bloccaggio sulle morse.
-
Fai leva sulla morsa per liberarla.
-
Usa le dita o le pinze per tirare via le morse dai beccucci della pompa.
-
-
-
Taglia le fascette che tengono insieme il fascio di cavi.
-
Segui attentamente i due cavi che escono dalla pompa che stai sostituendo.
-
I cavi della pompa dovrebbero collegarsi ad un cavo nero ed ad uno bianco.
-
Ci potrebbe essere un diodo in serie con il cavo rosso.
-
Scollega la pompa staccando i terminali del cavo. Questo può richiedere abbastanza forza. Tira i terminali, non i cavi.
The wires did not come apart easily for me. I had to cut into some of the plastic shielding and then I used a small, thin flathead to work them apart. Decided to shrink wrap the connectors with new plastic shrink tubes.
-
-
-
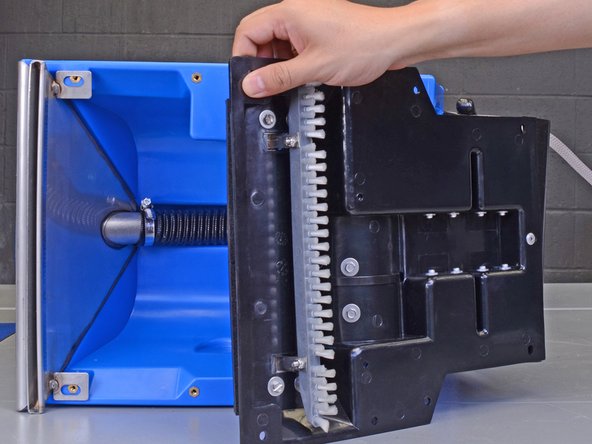
Rimuovi la pompa.
-
Rimuovi i cappucci arancioni dai beccucci.
-
Assicurati che la pompa sia installata nella direzione corretta.
-
Controlla che i beccucci siano puntati verso il retro del dispositivo.
-


Per rimontare il tuo dispositivo, segui le istruzioni in ordine inverso, leggendo i consigli per il rimontaggio.
Per rimontare il tuo dispositivo, segui le istruzioni in ordine inverso, leggendo i consigli per il rimontaggio.
Annulla: non ho completato questa guida.
Altre 28 persone hanno completato questa guida.
Un ringraziamento speciale a questi traduttori:
100%

Questi traduttori ci stanno aiutando ad aggiustare il mondo! Vuoi partecipare?
Inizia a tradurre ›


15 Commenti
I would like to view how to open the housing & replace the pump on the Rug Doctor model DC 1.
My X3 model rug doctor continuously sprays Until it runs out of water doesn't matter if the red button is pressed or not when you turn on the machine, it starts sprain. Any thoughts?
Hi Mike,
Does it full-on spray, or just leak? It could be that the red button is broken. Look through this guide. You may be able to disconnect the spray button wires through the black cutout. If the Rug Doctor still sprays with the button disconnected, then the problem is elsewhere.
We replaced our pump but still does spray. We have the doctor deep carpet cleaner model with single pump.
Do you know which way for sure the pump nozzles should be facing on our model? Maybe they’re in wrong though we are hundred percent sure it’s in how old one came out.
Hi Jerri,
I unfortunately don’t. When you press the spray button, does it sound like the pump revs up? If not, it may be a switch problem.
Hello. mightily pro X3. I pushed red button but very little water comes out…. I am assuming I need to replace the pump? please advise. tank is full of water.
Dede
Hi Dede,
I would check the nozzles to make sure they are not clogged first. If possible, take the device apart and check the hoses to make sure they’re not clogged.
Do you have any tips on how to open up, split apart or remove the hard plastic piece on the waste water tank for the Rug Doctor Deep Cleaner? It's the top piece where the tools plug into. There is so much gunk underneath there that you cannot get to it by regular cleaning.
My rug doctor x3 is putting out water really fast and refill every 3 minutes. Single pump I took the pump apart to the clean and flush dog hair and dirt from previous owner. Just gave to me. Would cut it on and nothing and nothing I could see water in hose. But now its all just going fast can't find any things on the pump if I used it right
Some of these comments, I am hoping English is their second language. Some of them, it is obvious English is their primary language, and the review is equally as difficult to understand. Maybe they are bots and the comments are auto generated. I hope it’s that….lol
Anyways… you’re a legend for doing this tear- down. Thank you. One of the best most straightforward tear-downs I’ve ever read… and I fix a lot of stuff. I just wanted to thank you for taking the time to help others. You probably saved me an entire day. I thought the pump was in a different section of the vacuum.
My god is this thing gross on the inside. The repair only took 20mins. I spend another 3 hours removing that brush and soaking it, and chiseling off solid hockey puck sized clumps of hair. The smell is almost unbearable. I debated just tossing it. I will never let someone borrow my rug doctor again. lol.
Seriously tho… thank you. Quality work speaks for itself.