Introduzione
Le levette analogiche del controller Xbox (Modello 1708) potrebbero danneggiarsi, diventare poco reattive o appiccicose. In tal caso, potrebbe essere necessario rimuovere i cappucci dei Joystick per sostituirli o pulirli. Questa guida spiega come accedere e sostituire le levette del controller.
Cosa ti serve
-
-
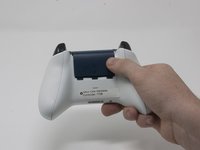
Fai scorrere il coperchio della batteria verso la parte superiore del controller per rimuoverlo.
-
Rimuovi le batterie o il pacco batterie dal vano batterie.
-
-
-
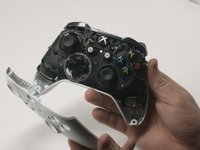
Inserisci uno strumento di apertura in plastica nella parte superiore della giuntura della scocca posteriore del controller, e spostati delicatamente verso la parte inferiore.
-
Utilizza lo stesso strumento per rimuovere anche la plastica laterale dell'impugnatura.
-
Ripeti il processo per il lato opposto.
-
-
-
-
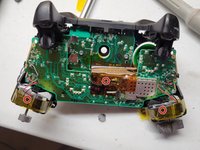
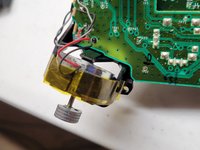
Fissa in posizione i motori per la vibrazione del controller.
-
Questo eviterà che questi ultimi cadano dall'alloggio.
-


Per riassemblare il dispositivo, seguire le istruzioni in ordine inverso.
Per riassemblare il dispositivo, seguire le istruzioni in ordine inverso.
Annulla: non ho completato questa guida.
Altre 143 persone hanno completato questa guida.
Un ringraziamento speciale a questi traduttori:
100%

Stefano Spinelli ci sta aiutando ad aggiustare il mondo! Vuoi partecipare?
Inizia a tradurre ›
Team

Cal Poly, Team S18-G3, Forte Fall 2017 Membro di Cal Poly, Team S18-G3, Forte Fall 2017
CPSU-FORTE-F17S18G3
4 Membri
34 Guide realizzate
9 Commenti
How about the square thing with the stick and hinges that the joystick is attached to? I think it’s called the Module. I have a joystick drift / drifting problem and that may help me out. Thanks.
Agreed. That’s actually the part I need to replace too. The module.
followed this guide to take the controller apart because I had a joystick that was sticking, my solution was to put some 3in1 oil on the module that was sticking and it seems to be working a lot better now.
@corytc and @tomchak I did replace the module, in general, you buy (Amazon or eBay) you will receive a module of 6 modules you need a multimeter and test each module interface, measure both resistances and subtract them, the one nearest zero is the module you will use since is the one with least drift from the factory.
Just disassemble it, turn upside down uses a solder remover and unsolder the old one, place the new one solder back, boom you are done.
Like you will need an iron solder with medium and thin tips, I used lead-free solder, so is a patience test, be careful with the wires from the rumbles, try not to unsolder them since is a thin wire and is difficult, like I have big hands so took me a while to solder back.
Just want to say the hardest part is carefully prying off the plastic covers on the handles. It’s also not necessary to remove the back cover for simply replacing the joysticks. Other than that, it’s very easy. I would guess this is rated at moderate difficulty simply due to the plastic covers.