Introduzione
Usa questa guida per ridare la vita al tuo iPhone 8 Plus con una nuova batteria. Se la tua batteria è gonfia, prendi le dovute precauzioni.
Questa guida ti spiega come rimuovere completamente il gruppo display allo scopo di evitare danni accidentali ai cavi del display stesso. Se pensi di essere in grado di rimuovere la batteria senza dover forzare troppo sui cavi del display, puoi evitare i passi sulla rimozione del display. Inoltre, anche se è possibile rimuovere le strisce adesive che fissano la batteria non appena hai aperto il telefono, questa guida raccomanda la preventiva rimozione del Taptic Engine. Questa operazione riduce i rischi di rompere accidentalmente le strisce adesive inferiori, sia perché si possono impigliare nel Taptic Engine sia perché la trazione sulle strisce è esercitata secondo un angolo eccessivo.
Per ottimizzare le prestazioni dopo aver completato questa procedura, calibra la tua batteria appena installata: caricala al 100% e continua a caricarla per almeno altre due ore. Quindi, utilizza il telefono finché non si spegne a causa della batteria scarica. Infine, caricalo senza interruzioni al 100%.
Cosa ti serve
Panoramica Video
-
-
Spegni il tuo iPhone prima di iniziare lo smontaggio.
-
Rimuovi le due viti pentalobe da 3,4 mm sul lato inferiore dell'iPhone.
-
-
-
Misura 3 mm dalla punta del plettro e segna questa distanza con un pennarello indelebile.
-
-
-
Posiziona strisce sovrapposte di nastro trasparente da pacchi sullo schermo dell'iPhone finché non l'hai coperto tutto.
-
Se non riesci a far aderire la ventosa nei prossimi passi, applica del nastro adesivo resistente (come del nastro americano telato) come una maniglia e alza lo schermo con quello.
-
-
-
Tira la maniglia blu indietro per sbloccare i bracci dell'Anti-Clamp.
-
Fai scorrere i bracci oltre il bordo sinistro o destro del tuo iPhone.
-
Posiziona le ventose vicino al bordo inferiore dell'iPhone, una di fronte e una sul retro.
-
Premi le ventose insieme per farle aderire sull'area desiderata.
-
-
-
Scalda un iOpener e fallo passare tra i bracci dell'Anti-Clamp.
-
Piega l'iOpener così che sia appoggiato sul bordo inferiore dell'iPhone.
-
Attendi un minuto per dare all'adesivo la possibilità di staccarsi e creare una fessura d'apertura.
-
Inserisci un plettro sotto lo schermo quando l'Anti-Clamp avrà creato una fessura abbastanza grande.
-
Salta i prossimi tre passaggi.
-
-
-
Usa un asciugacapelli oppure prepara un iOpener e applicalo per circa 90 secondi al bordo inferiore dell'iPhone per ammorbidire l'adesivo sottostante.
6/14/23 I did this repair but used a heat gun on low for 60 seconds. This allowed me to open the case as the instructions say, but in the end the Home button failed. I probably over heated it. I used this "go around" for a virtual Home button. I don't care about touch ID:
-
-
-
Applica una ventosa nella metà inferiore del pannello frontale, appena sopra il pulsante home.
Using just the single suction cup that is included in the battery replacement kit probably wouldn’t open the device. An iOpener and an iSlack should be the recommended method. However, you can get it open with just the single suction cup and iOpener, but does take a lot of time.
Get an iOpener and iSlack with the battery replacement kit.
I used a flat x-acto (#18) blade knife tool to gently pry back the screen enough to allow me to insert the pick near the bottom corner. I then worked the pick under the screen as mentioned in steps 5 & 6 below then. This worked really well for me.
I used the suction cup without heating the phone - the adhesive came away quite easily without applying any heat. Maybe due to age of phone (nearly 4 years old). Worth trying.
My screen was very shattered, and was quite hard to get suction, as my tape was very low quality. However, after pulling it up a little bit, I was able to insert a regular razor blade into the very small gap and used that as a lever.
Oh my goodness! Don't do that again. You can definitely damage something in the phone if you use a sharp metal razor blade..
cytur -
-
-
-
Tira la ventosa applicando una tensione forte e costante fino a creare una piccola fessura tra il gruppo display e il case posteriore.
-
Inserisci nella fessura un plettro di apertura o un altro attrezzo fine per una profondità di qualche millimetro.
After multiple tries and using a very hot iOpener, it will not open.
In sheer frustration, I pulled out my trusty pocket knife and managed to lift the bottom of the screen slightly, but in the process, cracked the glass from the bottom to the home button. The case is open now.
-
-
-
Fai scorrere il tuo attrezzo attorno all'angolo e lungo il bordo sinistro del telefono, spostandoti verso i pulsanti del controllo volume e l'interruttore della modalità silenziosa, per rompere l'adesivo che tiene in posizione il display.
-
Fermati vicino all'angolo superiore sinistro del display.
Do not go over the top otherwise you can crack the screen. Sadly happened to me :(
The instruction should be:
“Stop near BUT BEFORE REACHING the top left corner of the display”
-
-
-
Inserisci nuovamente il tuo attrezzo nell'angolo inferiore destro dell'iPhone e fallo scorrere attorno all'angolo e lungo il lato destro del telefono per separare l'adesivo.
I had really good luck using a hairdryer on some of the more stubborn portions of adhesive.
-
-
-
-
Fai scorrere uno strumento di apertura sotto il display lungo il bordo superiore del telefono per allentare l'adesivo rimasto.
Be very careful at this step. The glass at the top will break very easy when the display is lifted too much.
-
-
-
Apri l'iPhone sollevando il display dal lato sinistro, come per sollevare la copertina posteriore di un libro.
-
Appoggia il display contro qualche tipo di supporto per mantenerlo aperto mentre lavori sul telefono.
Das “links” ist auf dem Foto rechts.
-
-
-
Rimuovi le quattro viti Phillips (JIS) che fissano la staffa del cavo inferiore del display alla scheda logica:
-
Due viti da 1,3 mm
-
Una vite da 1,4 mm
-
Una vite da 2,7 mm
The Phillips screwdriver bit is the PH000. The measurement refers to the screw length.
-
-
-
Usa la punta di uno spudger per staccare il connettore della batteria sollevandolo dal suo zoccolo sulla scheda logica.
-
Piega lievemente da un lato il cavo del connettore per evitare che questo possa fare contatto con lo zoccolo e quindi alimentare il telefono nel corso della tua riparazione.
When I reassembled the iPhone 8 Plus, I had to plug it into a Lightning cable to wake it up (just pushing power button wasn’t sufficient).
-
-
-
Usa la punta di uno spudger oppure un'unghia per staccare il grande connettore inferiore del display tirandolo dritto verso l'alto dal suo alloggiamento.
I got hold of a iPhone 8 Plus with cracked screen that I am planning to fix.
Here is my problem:
When I tried to take out the screen from my phone, (step 15-18) I was curious about the new screen, so I tried to connect it. It was completely dead! Then I tried the old cracked one, and suddenly that was dead to! This is a phone that some fool has been inside earlier and changed battery, but I suspect he has done some more really stupid things. The Taptic Engine is living its own life and vibrating every time I slightly touch the home button. (I have a new Taptic Engine) The phone is also full of dust and small particles that does not belong there. One tri-point Y000 screw (step 18) is even missing! Now the biggest problem is that both screens are black! I know the phone is on, because I hear voice command speak when I turn on the power. The screen worked before I tried to change it? And one last thing: My new LCD screen came with new flex cables. Is it possible to switch over, so I can use the old ones?
Hi,
Is your problem solved?
Be careful of damaging MOSFETs by the LH side of the large lower display cable. After replacing the battery and turning the device on, the phone showed low charge and didn't have a charging symbol even after plugging into multiple cables and chargers. Turns out I had damaged the logic board attempting to disconnect the connector.
-
-
-
Stacca il secondo connettore inferiore del cavo del display, proprio sotto quello che hai disconnesso nel passo precedente.
I used the other end of the spudger on this connector and it seemed to work a little better for me. I came in from underneath the top-right edge instead of the bottom right.
-
-
-
Rimuovi le due viti tri-wing Y000 che tengono in posizione la staffa sopra il connettore del gruppo sensore del pannello frontale:
-
Una vite da 1,0 mm
-
Una vite da 1,2 mm
una vite da 1mm e due viti da 1.2 mm???
Ciao Matteo! Grazie per l’osservazione. Ho appena modificato il testo :) La traduzione è aperta a tutti. Hai quindi la possibilità di fare le tue suggestione direttamente nel testo e sei il benvenuto se vuoi usare di questa possibilità nel futuro. Grazie ancora per la vigilanza! Saluti, Claire
The tool kit does include a 1.0 or1.2mm screwdriver! How am I supposed to remove those screws?
Bought the screwdriver that supposedly fits these screws and it still doesn’t work.
My bracket looks different. Can’t get these screws out.
kit came with wrong bit. i received 2x P02 (penta tips) and no tri point y000.
-
-
-
Usa la punta di uno spudger oppure un'unghia per staccare dalla sua sede il connettore del gruppo sensore del pannello frontale.
-
-
-
Rimuovi il gruppo display.
Should there be a step somewhere in here to point out when to remove the blue plastic from the new iFixit screen?
-
-
-
Rimuovi le tre viti di fissaggio della staffa a forma di L vicino al Taptic Engine:
-
Una vite Torx Y000 da 1,3 mm
-
Una vite a croce Phillips da 2,6 mm
-
Una vite a croce Phillips da 3,5 mm
De Y000 schroef nam meteen ook de 2.4 mm standoff-schroef aan de achterzijde mee. Wat lastig om die uit elkaar te halen.
-
-
-
Usa un plettro di apertura per separare con cautela la parte del cavo flessibile dell'antenna incollata dalla superficie superiore dell'altoparlante
-
-
-
Con la punta di uno spudger stacca e scollega l'altra estremità del cavo flessibile dell'antenna dal suo zoccolo vicino alla porta Lightning.
I was unable to plug this back in when re-assembling. My home button doesn’t work anymore. The connector it was supposed to plug into seems to spin around.
I had a similar experience during this repair. My problem was that the nib on the ribbon that actually connects in to the socket came off the ribbon cable when I initially detached the cable. I didn’t realize this until after the repair, but I also had to replace the Wifi Diversity cable entirely. A tell-tale sign is that you don’t receive good cell reception.
Lucas -
I did not notice until reassembly, but the antenna socket pulled off the board. I have no micro-soldering tools. The friction of the connector was greater than the solder holding it in place.
The little connector in the first picture ripped the component off the circuit board when trying to pry it up so be careful. I’m guessing it’s like a previous poster said and the socket is stronger than the glue/material that holds the component to the PCB. This was on a new board during disassembly trying to locate a potential problem. Phone still workings with WiFi and cellular normally but the cellular signal is down about 1/3 on average wherever I am.
Mine broke too and wifi still works fine
Does this have anything to donwith upper speaker connection?
-
-
-
Rimuovi l'antenna diversity del Wi-fi.
This had a little adhesive on the metal band. Couldn’t just pluck it out as shown. What I did worked but what I should’ve done is run my blue puck up and down the length.
I followed these steps to this point and maybe applied force in the wrong spot or too much force and it appears that when I loosened the wifi diversity antenna from the socket below the Taptic Engine module, it came up with the socket detached from the logic board. Did I just really screw up my iPhones WiFi capability?
-
-
-
Rimuovi le tre viti che fissano la staffa vicino al Taptic Engine:
-
Due viti a croce Phillips da 1,5 mm
-
Un distanziale a vite da 2,4 mm
-
-
-
Ogni pezzo di adesivo ha una linguetta da tirare alla sua estremità, incollata non tenacemente alla superficie frontale della batteria.
-
-
-
Tira lentamente una delle linguette delll'adesivo della batteria allontanandolo dalla batteria stessa, verso la pa rte bassa del telefono.
-
Tira con fermezza, mantenendo una tensione costante sulla striscia finché non scivola fuori dalla sua posizione tra la batteria e il case posteriore. Per risultati ottimali, tira la striscia di piatto, a un angolo il più basso possibile, evitando di farle impigliare in qualcuno degli altri componenti dell'iPhone.
-
Se la linguetta dell'adesivo si rompe nel corso del processo di rimozione, usa le dita o pinzette a punte arrotondate e quindi riprendi a tirare.
-
-
-
Ripeti i passi precedenti per rimuovere le tre strisce rimaste.
-
Se hai rimosso con successo tutte le strisce adesive, salta il prossimo passo.
I can’t even find the upper ones. Tore into the battery cover trying.
Unfortunately both bottom and upper strips had been broken after pulling a little. Maybe I have pulled in a wrong way or maybe they had been more brittle as the time passes.
-
-
-
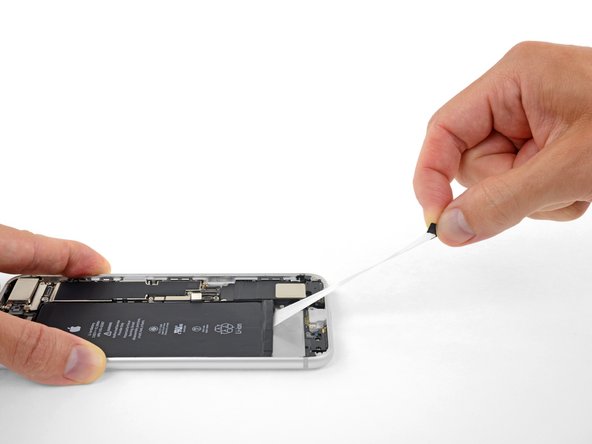
Tira il filo in modo alternato da un lato all'altro, come se usassi un seghetto, sull'intera lunghezza della batteria per separare l'adesivo. Non deformare o danneggiare la batteria.
If you use isopropyl alcohol, use it very sparingly. The black (insulating?) paint on the wireless charging coil is readily alcohol-soluble.
To add to Scott Boyce's comment, if you use too much alcohol, it may seep behind the camera glass, causing condensation behind it, and blurring the camera. With some time, it seems to all dry out.
Unfortunately both bottom and upper strips had been broken after pulling a little. After that, removing the battery was a nightmare. I used pry tools to lift the battery out beginning from the bottom side. I heated bottom of the battery via heated air blower as lifted, used dental floss etc. Battery is crashed while lifting via pry tools, its tip had been burned, a strong odor reveled. After a though fight, removed the battery. I probably damaged wireless charging coil, its black protective shield was peeled place to place. I hadn't removed out the taptic engine before replacing battery, so I worried about it to be damaged because I applied some force to battery from bottom side initially. After replacement, everything seems working flawless; battery, home button, touch operations, NFC etc. I haven't used wireless charge before and not tried yet after replacement operation; I hope it also works and everything continues to work flawless.
I also broke all four labels after pulling them lightly. I was however able to remove the battery easily and in less than two minutes without an iOpener or hair dryer.
I left the phone for 3-4 minutes over a plate, which was pre-heated in a microwave oven at 75W for 2-3 minutes.
-
-
-
Rimuovi la batteria dall'iPhone.
-
Incolla la batteria, scollegala e continua e riassemblaggio del dispositivo.
-
Se la tua batteria non ha l'adesivo preinstallato, fai riferimento a questa guida per sostituire le strisce adesive.
-
Effettua un riavvio forzato dopo il rimontaggio. Questa operazione può evitare diversi inconvenienti e semplificare la risoluzione dei problemi.
I managed to remove the battery after taking the display off saving the time and trouble of removing all of the other items. If you try and fail, then follow the instructions and remove all of the parts. I did this by pulling on the white strips at the taptic engine end. The outside one is most important. Pull the strip with your entire finger and thumb on the white strip (don’t pull the black part). Pull slowly and gently out and move left and right. Very slowly. I was able to remove it. The inner one tore out - all the better if you can get both out. You can do this on the other end as well. Both mine tore out. Use an old credit card, cut it the width of the battery. Push under the corner until you’re under the battery. Do NOT pry up on the battery but let the credit card bend flat to the bottom. You can minimize how much the battery bends. As you push under 1/4 the way to 1/2 way it’ll get easier. If you get the strips off the other end, all the better. Apply heat from underneath the entire process.
-


Confronta la parte di ricambio con quella originale: può essere necessario trasferire alcuni componenti dalla parte vecchia oppure rimuovere coperture adesive da quella nuova prima dell'installazione.
Per rimontare il tuo dispositivo, segui i passi qui sopra in ordine inverso.
Porta i tuoi rifiuti elettronici a un riciclatore certificato R2 o e-Stewards.
La riparazione non è andata secondo i piani? Vai sulla nostra comunità Risposte per trovare aiuto nella risoluzione dei problemi.
Annulla: non ho completato questa guida.
Altre 188 persone hanno completato questa guida.
Un ringraziamento speciale a questi traduttori:
100%


Questi traduttori ci stanno aiutando ad aggiustare il mondo! Vuoi partecipare?
Inizia a tradurre ›

39 Commenti
Do I have to remove the display to replace the battery? Or can I leave the display in
You can leave the display connected and skip steps 15-20, as long as you’re careful to support the display so as not to damage the display cables while you work.
Don’t do it,you can EASILY RIP LCD RIBBON CABLE
Are there any statistics or even educated guesses about how many people are able to successfully complete this repair? Although it is rated as “moderate” in terms of difficulty, I would rate it as more than just moderate. I tried to replace the battery on a much older iPhone and wound up with a brick. Is an 8 plus easier than an iPhone 3 or 4? Where might one find such statistics?
It takes a little time to learn how to do certain things. As always a video tutorial is better than the picture only version. But if you follow one of their teardowns maybe you can get an idea of how to do some of the more intricate things like the battery adhesive removal. I do this as a hobby and it took a while to perfect, but my first 2 repairs went well and I didn't brick my phone or my iPad so guess I was doing some of the basics right.
Don't be discouraged. Watch some YT vids. Then work up the courage to try again. Good Luck!
If you have a template and a really fine exacto knife maybe.
But it's better to buy the adhesive or use B-7000 or something similar.
Just finished my battery replacement.
My thoughts:
Nerve racking regarding the delicate hardware and the danger of lithium battery, but i’m glad I read through the guide and did each step slowly.
The guide is very well written, I think the video tutorial is too quick, and could be a bit more in depth and at a pace we can follow along with. I used a youtube tutorial to complement the written guide.
The suction cap didn’t work well so had to run the pick around a bit until I could get under, I think a heavier duty clamp would have been better.
I used a wheat heat bag however please be warned it does create condensation so have paper towel as a barrier between the heat pack and the phone, I’m unsure if the iFixit brand one behaves the same once heated..
My phone is 5 years old so with all the heating in the world the battery adhesive would not release as a peel, heaps of points for the last resort method of using dental floss, it worked flawlessly
Thanks iFixit :)
Second major repair, battery, after screen last year, I term IFixIt “The Best”.; not only parts with appropriate tool kits, but also detailed, accurate instructions. Parts are the EASY part of this type repair, the kit approach with well written, illustrated, instructions make this a do-it-yourself capable repair. Well, Done, IFixIt!
I’ve replaced batteries on several different iPhones/ipads and the ONLY problem I’ve ever had with a repair is the $#$?! adhesive strips. it doesn’t matter how much heat or patience I use, they always tear and snap back under the battery.
Just made it in 100 minutes. Most of the time was spent in removing battery itself, due to adhesive stripes. They torn from the center, I could see the tear growing from inside. Dental floss and iOpener have been very successful even though very long. I never thought that my dental floss would have such an use. Like many users, a flawless removal of those $@$*!& battery strips never happened to me, whatever the care I take, or the veeeeeeery slow speed I pull.
Before to attach the final brackets on screen connectors, I dared turn on and checked the antennas (I had a doubt with this antenna strip reconnection and the front camera connector) so I tested the screen, the touchID, the front camera and checked that all signals were present. Then shut off again and closed the device.
works fine, no flaws like battery not recognized or anything like this. I now have a faster iPhone probably because iOS does not slow down anymore due to weaker battery capacity. Thanks to iFixit team for offering this opportunity.
After replacing the battery, the audio from games is not audible over speaker. All other apps using the speaker seem to work: Phone, Clock (alarm), FaceTime, Skype, and YouTube are all audible. Could the issue with games be caused a poor seating of any of the connectors detached and re-attached in the battery replacement process?
Problem solved: The external sound switch (near the volume up/down buttons) had flipped to off when I removed or re-installed the drop protection case. Why it affected only games seems strange.
dv30fps -
Touch ID stopped working and battery won’t show that it’s charging after replacement. Removed and replaced all connectors multiple times, but nothing has changed. None of the ribbon cables were damaged
thankfully i bought a spare waterproof seal and the iopener , i screwed up the first seal. my iphone 8+ can live much longer now in the hands of my parents. now i got spare tools i can add to my arsenal of tools.
Do the bottom screws strip often when opening this phone? Wondering if I really need the replacements listed in this guide.
I replaced my battery successfully, but 3D touch to longer works, and reachability freaks out every time I'm asked for a touch ID prompt.
The only damage I did was ripping open the wireless charging coil sac, then gently placing it back. The coil itself was unaffected, but whoever replaced the battery last used the wrong adhesive; it stuck to the sac. (it was me; I was the last guy)
Does anyone know what might have gone wrong?
Replaced the seal pretty solidly, so I'm not sure if there's a cable I need to try plugging in again, or to check if I nicked something during repair.
Great guideline, but this was a challenge for my 66 year old eyes and shaky hands. The screws are VERY tiny! Never the less, following every step worked and my wife's iPhone 8 Plus is working just fine. I read the detail about replacing the water seal / gasket after putting the phone back together.
I'm not going to bother taking it apart again for this item as my wife stays away from the water hazards. - She is happy, so I am happy.
Thank you for a great product and great instructions.
I might rate this as more difficult too. No display on my iPhone 8 Plus. RIP.
Just successfully completed this, the hardest part being the removal of adhesive, it took an hour using fishing line instead of floss but it did the job.
The battery was extremely swollen and I felt like I was dismantling a bomb!
Excellent guide, just take time to read each step.
I am someone that is pretty confident using technology, but on a scale of 1-10, 10 being an expert techie, I would put myself at a 3 at most. I just repaired my iphone with a new lightning connector, battery and front screen and it took me approximately 8 hours (but I haven't slept going on 48 hours so my brain is in lag mode). I would say although I found it challenging because I have no previous knowledge of ever opening an electronic device to fix, as long as you take things slow and follow the step-by-step directions it's definitely attainable. Also, as someone who loves specific instructions for diy, I am thoroughly impressed with this
Left a comment at step 15 - be careful when disconnecting the lower display connector, and stay away from the logic board at the LH side of the connector. I damaged a MOSFET, and my phone wouldn't charge afterwards, with either the new battery or the old one.
I followed the guide here and successfully replaced the battery on my 8+. Disassembly was a breeze, but the reassembly is slow and tedious since you have to be very careful reconnecting cables etc. By far the hardest part was getting the old battery out. I could not grasp the edges of the old adhesive strips at all. But the dental floss technique work well, altho it was slow. I was able to the old battery out and removed the old adhesive strips from the inside of the case. Reassembly is greatly aided by lighted magnification; the screws are beyond tiny! Once reassembled the phone booted and showed 60% capacity. I charged it well past 100% and then left the phone off the charger for more than 24 hours to spend the battery out. Then recharged again to 100%. Now the phone lasts beyond all day. Great repair.
I was about to send my iPhone to Apple to change the battery, but they said I needed to remove it from Find-My. That basically removes the phone from my Apple ID account. They said that was necessary because they need to reset it to factory configuration when they open it. Is that the case with this procedure too, or is that only because Apple won't have my login pin number? Can I follow this procedure without having to reset my phone to factory configuration? Thanks!
Following the guide in reverse order isn't accurate. To replace the waterproof seal you need to do so before attaching the display. Spent well over 2 hours on this due to same issues with battery adhesive, and I found the display connectors a PITA to put back on and now need to do it again :|
6/14/23
I followed the instructions (after reading 3 times including comments). Stay very organized and go slowly. I''m 72, use cheater glasses and headlamps to see close up and have sausage fingers. On the plus side my hands are steady which may be a must.
Notes:
1. New battery and phone functions work EXCEPT the home button. I probably over heated it at the initial step for opening the case. I used a heat gun on low for 6 seconds and the case was initially too hot to touch, I use this virtual home button go-around:
https://www.youtube.com/watch?v=LbTlUm4p...
2. I considered just removing the screen and skipping steps to the battery removal but when I saw the layout I decided to do all the steps. I recommend this approach.
3. The adhesive strips did not come out probably due to the age of the 8Plus. I used some 99% isopropyl alcohol on bottom, left side and top waiting 2-3 minutes and was fianlly able to loosen it with the wedge end of the plastic spudger.
more notes in 2nd comment
4. The iFixit parts, tutorial, tools and customer comments are the best; the slightly magnetic bits are just the perfect touch for these tiny screws.
I now see why Apple got rid of the home button! Take a look at the tutorial for replacing that and you'll stick with the virtual HB.
Update to my comments on 6/14/23:
I got really tired of the virtual home button turning itself on and being in the way, so I read up on problems with removing the native HB. There was no mention of heat being a problem, and most comments involved a torn cable. I found no visible problems with my original HB which I had saved. I reinstalled it and it works just fine. I must have disturbed the connector when replacing the battery or something. So don't worry about heating near the HB and hopefully you'll never have to replace it. BTW I did extensive web searches about the virtual HB auto-starting when a 3rd party HB is installed. I found no solution and Apple was singularly unhelpful.
I replaced my iPhone 8+ battery.
Ordered it and leave it in stock for almost one year....
I would not advice to do this, but it turned out to be no problem.
The guide is obvious intended for as many people as possible to repair something.
Prefect, if you do it for the first time.
Removing the screen was no problem at all!
The real challenge is removing and putting back all these ridiculous screws.
I would advice to leave as many components in place unless you really need to remove them.
Depending on your skills of course.
Happy repairing!!
When change My Battery iphone8plus I complete 583cycles
I complete 583My cycles battery phone8plus.when changes
This is the second battery replacement I've done recently where the adhesive strips ripped from the get go and your descriptions for getting the battery out was priceless. This time I was much more calm and had the experience of dealing with an old adhesive. every repair makes the next one easier, in my experience. Thank you!!!
As someone with very little to no experience repairing smartphones, I will say that 40min-2hrs is very generous. It took me almost 9 hours to replace both the lightning cable adapter and the battery at the same time, and most of that was just working through the adhesives of both the display and the battery. The second-most time-consuming part was just keeping each screw labeled and organized - I used some sticky tabs to keep the screws in the cardboard trays that the replacement parts came in. Aside from that, the repair process wasn't bad at all. I made some mistakes: I accidentally scraped off some of the black film (graphite?) that was on the logic board, and I placed the new adapter just slightly too far to the right, which made plugging it into the logic board later a bit difficult. If I had to do it again, I would definitely prefer to try the Anti-Clamp and the iOpener - I had neither for this repair, and I would bet having both would have made it much easier. It'd be nice if they came with the tools.
what do I do about super stripped screws?
Ean Palacios - Replica
I’m sorry, your comment slipped past my radar earlier. For future fixers that might see this and ask the same question, you can check out our stripped screw guide for some detailed advice.
Adam O'Camb -
Do you need a toolkit like the essential toolkit
Adam Palmer - Replica
Hi Adam. Having a tool kit with all of the listed parts above is best. The screw heads are very small and each set of screws needs a very specific type of driver to remove them without stripping any of them.
Kyle Luksa -