Questa traduzione potrebbe non riflettere gli aggiornamenti più recenti dalla guida originale. Aiuta ad aggiornare la traduzione o visualizza la guida d'origine.
Introduzione
Se la batteria del Moto Z2 ti crea dei problemi, usa questa guida per sostituirla.
Se la tua batteria è gonfia, prendi adeguate precauzioni.
Cosa ti serve
-
-
Usando l'estremità piatta dello spudger in nylon, tira via il nastro adesivo nero disposto sopra il connettore dello schermo a cui è attaccato il nastro nero.
-
-
-
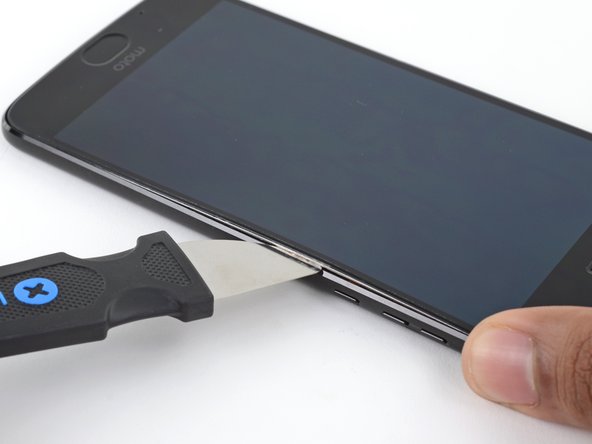
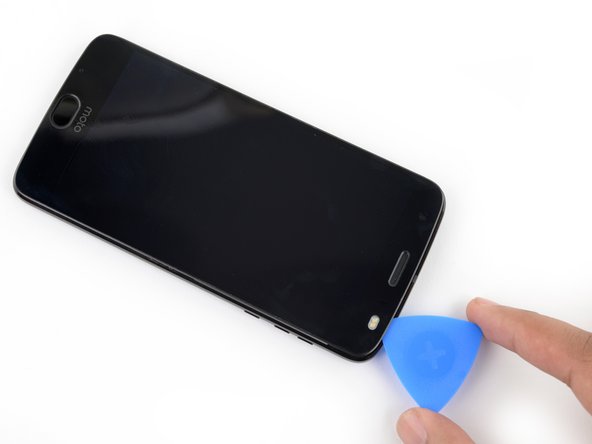
Incunea lo strumento di apertura in plastica nella fessura creata dalla separazione tra schermo e scocca nell'angolo inferiore destro per tenerlo aperto.
-
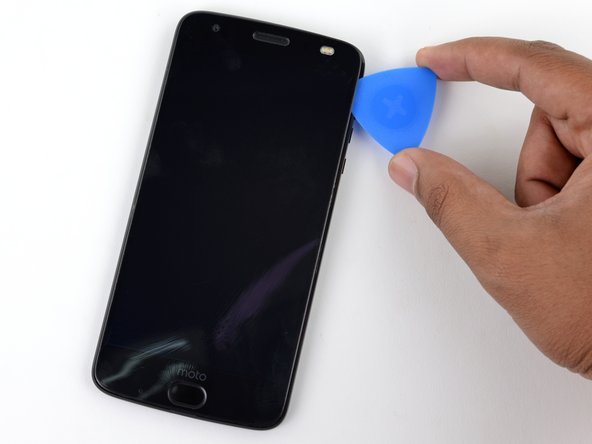
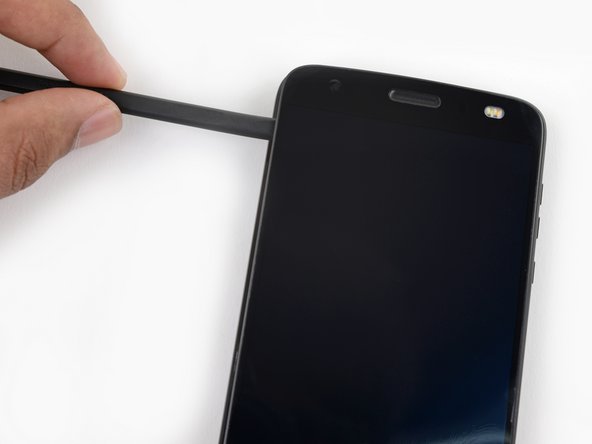
Inserisci lo spudger in nylon nell'angolo inferiore sinistro dello schermo e fai leva per sollevare il display.
-
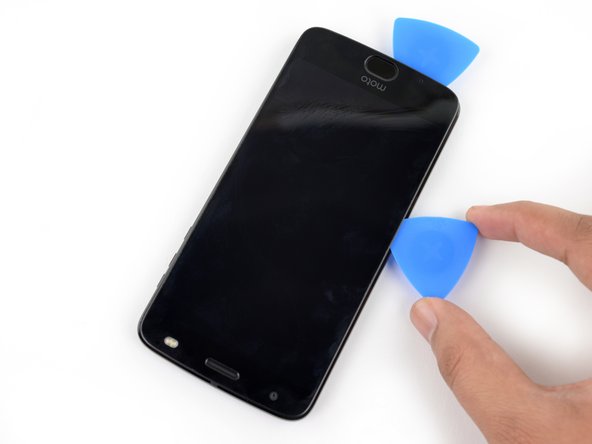
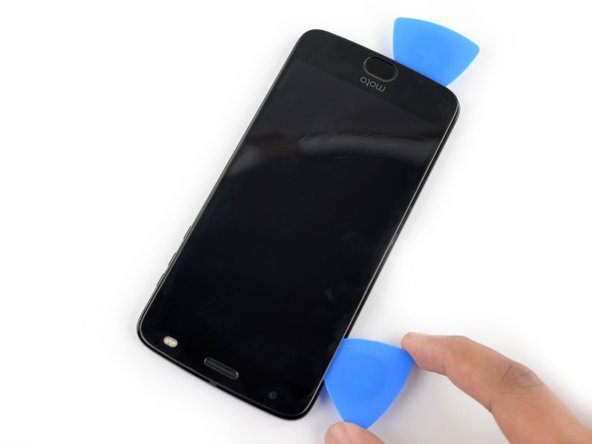
Continua a inserire gli strumenti di apertura in plastica e lo spudger tutto attorno al telefono e fai leva sullo schermo nei vari punti finché non si separa completamente dal dispositivo.
-
-
Questo passaggio è privo di traduzione. Aiuta a tradurlo
-
With the Jimmy still inserted, insert an opening pick under the silver midframe, on top of the Jimmy in the same location
-
Remove the Jimmy.
-
-
Questo passaggio è privo di traduzione. Aiuta a tradurlo
-
When separating the left side of the screen assembly, take care to not snag the display cable located on the left edge near the bottom of the display.
-
-
Questo passaggio è privo di traduzione. Aiuta a tradurlo
-
Insert another opening pick underneath the bottom edge of the screen assembly and slide it around the bottom left corner of the device so it is underneath the assembly's left edge.
-
Slide your tool all along the left edge of the phone to separate the metal clips and adhesive securing the screen assembly.
-
-
Questo passaggio è privo di traduzione. Aiuta a tradurlo
-
Slide your tool around the top edge of the screen assembly and slice all along it to slice through its adhesive.
-
-
-
Questo passaggio è privo di traduzione. Aiuta a tradurlo
-
There are two large pads of adhesive securing the screen assembly near the top edge but further past the 4 mm that have already been sliced through.
-
The front facing sensor array and cable surround the right patch of adhesive from the top and right, so prying or slicing from the top or right edge may damage the cable. The following steps will describe how to separate the adhesive from the left edge.
-
-
Questo passaggio è privo di traduzione. Aiuta a tradurlo
-
Apply a small amount of high concentration (>90%) isopropyl alcohol underneath the screen assembly's left edge, near the top of the device.
-
Allow the device to sit upright on its right edge for ~5 minutes to allow the alcohol to penetrate and weaken the adhesive.
-
-
Questo passaggio è privo di traduzione. Aiuta a tradurlo
-
Insert an opening pick as deep as possible under the top left corner of the screen assembly to slice through the left patch of adhesive.
-
-
Questo passaggio è privo di traduzione. Aiuta a tradurlo
-
Slowly and carefully slide the flat end of a spudger under the left edge of the screen assembly. Gradually insert it deeper to pry up the top edge of the assembly and release the right patch of adhesive.
-
-
Questo passaggio è privo di traduzione. Aiuta a tradurlo
-
Lift the screen assembly from the right edge and swing it open. It is still attached to the phone chassis at the lower left edge, so do not fully remove it yet.
-
If the screen assembly remains stuck, slice the adhesive repeatedly as needed.
-
-
Questo passaggio è privo di traduzione. Aiuta a tradurlo
-
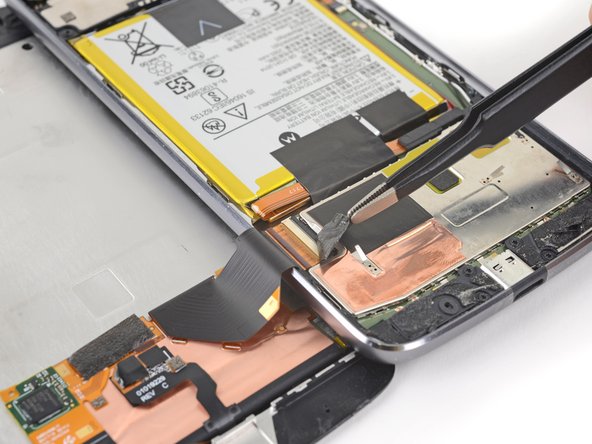
Use a pair of tweezers to remove the black piece of tape covering the battery connector.
-
-
Questo passaggio è privo di traduzione. Aiuta a tradurlo
-
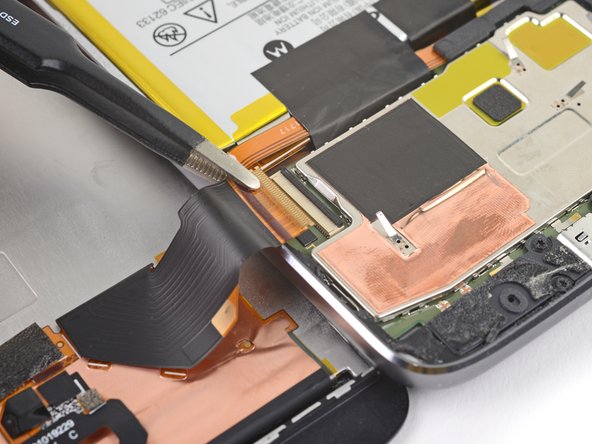
Use a spudger to pry up the locking tab on the display cable's ZIF connector.
-
Use a pair of tweezers to slide the display ribbon cable out of the connector.
-
-
Questo passaggio è privo di traduzione. Aiuta a tradurlo
-
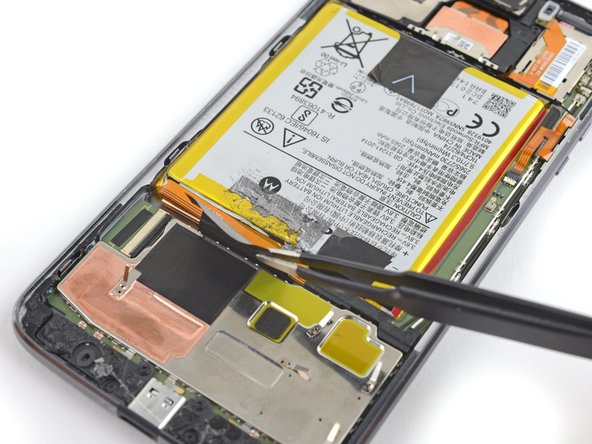
Use a pair of tweezers to remove the two black pieces of tape securing the battery.
-
-
Questo passaggio è privo di traduzione. Aiuta a tradurlo
-
Use an opening pick to pry up the small black bracket covering the battery connector. It is secured with a small bit of adhesive.
-
Use a pair of tweezers or your fingers to remove the bracket.
-
-
Questo passaggio è privo di traduzione. Aiuta a tradurlo
-
Use a spudger to pry up and disconnect the battery connector.
-
-
Questo passaggio è privo di traduzione. Aiuta a tradurlo
-
Apply a freshly heated iOpener to the back of the phone directly behind the battery for two minutes to help soften the adhesive. Re-heat and reapply the iOpener as necessary.
-
Alternatively, apply high-concentration (>90%) isopropyl alcohol under the edge of the battery to weaken the adhesive underneath.
-
-
Questo passaggio è privo di traduzione. Aiuta a tradurlo
-
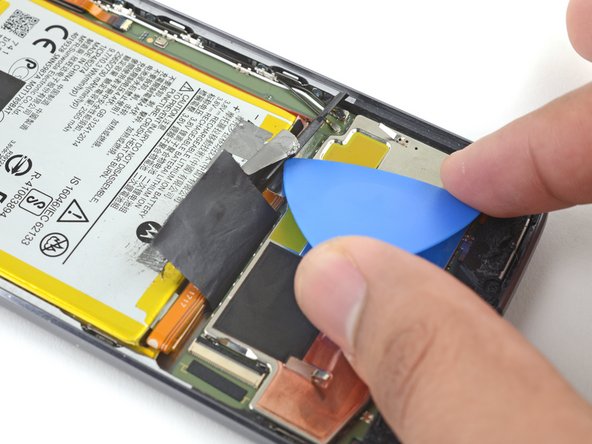
Insert a flexible plastic tool on the left edge of the battery. We use an opening pick here, but a playing card is a safer (albeit slower) option.
-
Gently pry up the battery with constant steady force.
-
Try to slowly release the battery's adhesive without deforming the battery. If the battery begins to bend out of shape, pry slower or apply more heat/isopropyl alcohol. Several rounds of heating or alcohol may be necessary.
-
Slowly work your tool underneath the battery and continue prying until it is completely released from its adhesive.
-


Per rimontare il tuo dispositivo, segui queste istruzioni in ordine inverso.
Per rimontare il tuo dispositivo, segui queste istruzioni in ordine inverso.
Annulla: non ho completato questa guida.
Altre 16 persone hanno completato questa guida.
Un ringraziamento speciale a questi traduttori:
22%

albertob ci sta aiutando ad aggiustare il mondo! Vuoi partecipare?
Inizia a tradurre ›

14 Commenti
Anyone knows where to get the lcd glue/tape/adhesive?
I got everything out, got a new battery, the screen works but the touchscreen doesn’t, anyone had the same problem?
Wow! This guide is way, way improved vs last week’s version! Nice work, Tarun! I picked up a “bad IMEI” copy of my Z2 Force on eBay to replace the damaged screen, and I’ll step my way through this when transplanting the screen. Thanks!