Introduzione
Segui questa guida per sostituire il gruppo altoparlante del tuo Nexus 5.
Cosa ti serve
-
-
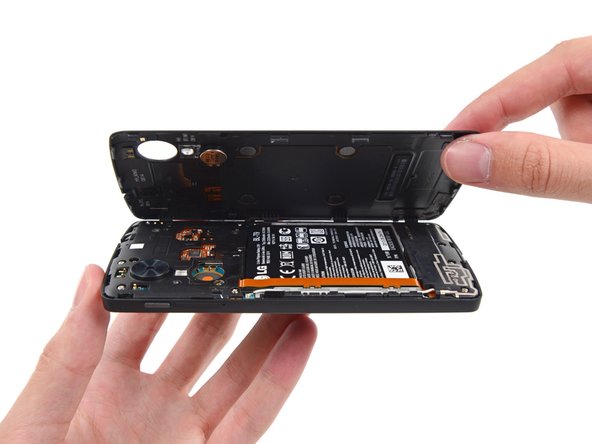
Usa uno strumento di apertura in plastica per sganciare le clip nella parte superiore e su ogni lato della cover posteriore.
-
-
-
-
Svita le quattro viti a croce Phillips #00 che fissano il gruppo altoparlante.
-
Usa uno strumento di apertura in plastica per rimuovere delicatamente il gruppo altoparlante dal telefono.
-


Per rimontare il tuo dispositivo, segui queste istruzioni in ordine inverso.
Per rimontare il tuo dispositivo, segui queste istruzioni in ordine inverso.
Annulla: non ho completato questa guida.
Altre 18 persone hanno completato questa guida.
Un ringraziamento speciale a questi traduttori:
100%


Questi traduttori ci stanno aiutando ad aggiustare il mondo! Vuoi partecipare?
Inizia a tradurre ›
Team

USF Tampa, Team 13-4, Staggers Fall 2014 Membro di USF Tampa, Team 13-4, Staggers Fall 2014
USFT-STAGGERS-F14S13G4
3 Membri
13 Guide realizzate
Un commento
Fantastic! My speaker assembly from iFixit arrived today, and about 20 minutes later I'd just saved myself the $600 dolalrs of buying a new phone. Great site, thanks guys!
Wireless QI and NFC.
Once I have put everything together with the new battery in place, I have as last replaced the plastic back cover, snapping all the clips back around the edges of the phone. Alas, I was quick to realise the QI Wireless charging has ceased to work.
I almost blamed the battery, or worse, me.
QUICK TIP: there is actually another clip in the middle of the plastic back cover - just press with your thumb just above the 'S' in NEXUS emblem and, voila! Snaps back in.
Wireless charge and NFC - works, once again.
cwioro - Replica
you just saved me like 30 bucks. thank you so much.
Robert Nolan -
+ 1, had the same issue and pressing just near the S fixed it! Thanks a lot!
nicco82 -
Just a me too, I had to press above the S and it was quite a snap
Erik Karlin -
There seems to be two contacts that snap into place. One is in line with the led pretty much in the middle of the phone and the second one in line with the camera lens on the opposite side to the lens. The middle one for me snapped pretty lightly, but the side one required a bit more pressure. After that the nfc started working again. Thanks for posting this!
Dennis Millner -
Is it hard to remove the battery door? Worried I might damage it.
Ash - Replica
When I openend the back cover I damaged two clips. One about 2.5cm (1 inch) below the volume controls and one on the other side about same height. The cover fits good without those two but on one side there is a small gap where the clip broke. But I have a hard cover protector on my phone so it's not that bad.
simonlwheeler - Replica
The case around the sim slot is pretty thin and easy to break, best to avoid using the pry tool at this point.
Aled Morris - Replica
Excellent tip, should be included in the main guide.
fprades - Replica
Hey Author, i need to ur expert advice...i replaced my nexus 5's back cover. since the new one did not have the vibrators battery i had to take it from the old one and connect it to the new one...on removing i noticed that it was stuck to the cover by a glue
Question: what glue to use to hold the battery to the cover?
suwaid akbar - Replica
Any adhesive will do. I used a hot glue gun. You shouldn't need expert advice to figure that out. Use your head.
tjt263 -
The case around the volume control is also pretty thin.... I broke mine prying so avoid the pry there too.
Also my back had glue at the bottom and I haven't seen mentioned
kornerson - Replica