Introduzione
Sostituisci un'unità ottica guasta.
Cosa ti serve
-
-
Allenta le due viti con testa a croce Phillips che fissano lo sportello di accesso all'iMac.
-
Rimuovi lo sportello di accesso.
-
-
-
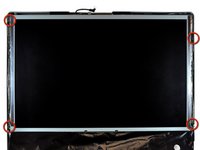
Rimuovere le viti seguenti lungo il bordo inferiore dell'iMac:
-
Tre viti Torx T8 da 6 mm
-
Una vite Torx T8 da 8 mm (lato destro dello slot RAM nel modello 2105)
-
-
-
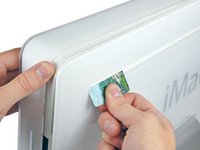
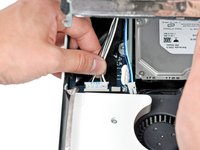
Inserire una scheda di plastica nell'angolo della fessura di ventilazione accanto alla parte superiore del case posteriore.
-
Premere la scheda verso la parte superiore dell'iMac per sganciare la chiusura della mascherina anteriore.
-
Rimuovere la mascherina anteriore dal case posteriore.
-
Ripetere la procedura per l'altro lato della mascherina anteriore.
-
Se la mascherina non si sgancia, provare a sollevare leggermente il bordo inferiore della mascherina anteriore dal case posteriore (l'operazione viene spiegata nei passaggi successivi) e ripetere la procedura di sgancio della chiusura.
-
-
-
Poggiare l'iMac dal lato della staffa su una superficie piatta.
-
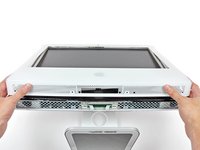
Per sollevare la mascherina anteriore dall'iMac, eseguire queste operazioni contemporaneamente:
-
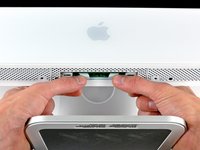
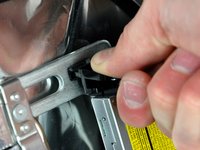
Premere con i pollici le alette della memoria RAM e tenere l'iMac verso il basso.
-
Tirare con gli indici il piccolo ponte sulla mascherina anteriore verso di sé.
-
Tirare la mascherina anteriore verso l'alto con gli indici.
-
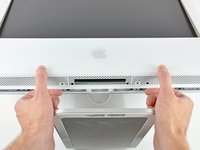
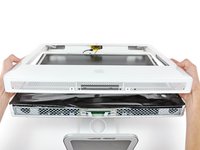
Dopo che il piccolo ponte ha liberato le alette della memoria RAM, sollevare la mascherina anteriore dal bordo inferiore, quanto basta a liberare il bordo inferiore del case posteriore.
-
-
-
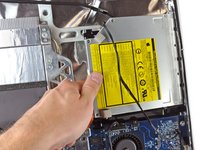
Sollevare la schermatura EMI dal case posteriore.
-
-
-
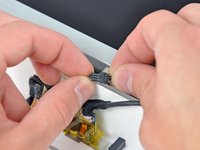
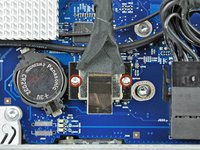
Rimuovere le due viti Torx T6 da 5 mm che fissano il connettore del cavo dati del display alla scheda logica.
-
Estrarre il connettore del cavo dati del display dalla scheda logica tramite la linguetta d'estrazione nera.
-
-
-
-
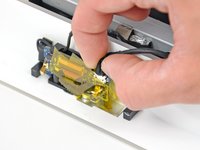
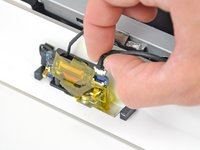
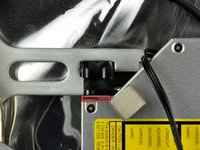
Scollegare il cavo del sensore termico dell'unità ottica estraendone il connettore dal connettore femmina sulla scheda logica.
-
-
-
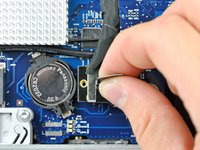
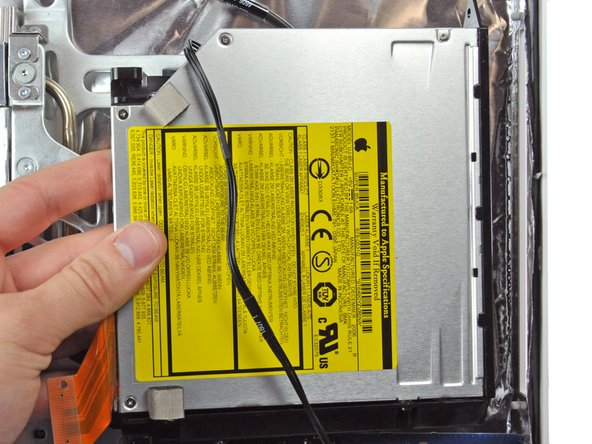
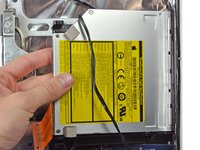
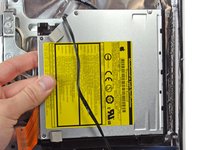
Rimuovere le due viti Torx T6 che fissano il cavo dell'unità ottica a quest'ultima.
-


Per riassemblare il tuo computer, segui queste istruzioni in ordine inverso.
Per riassemblare il tuo computer, segui queste istruzioni in ordine inverso.
Annulla: non ho completato questa guida.
Altre 27 persone hanno completato questa guida.
Un ringraziamento speciale a questi traduttori:
100%


Questi traduttori ci stanno aiutando ad aggiustare il mondo! Vuoi partecipare?
Inizia a tradurre ›

4 Commenti
I cannot get the top latches to release.Tried all the suggestions here and on YouTube. Especially a good video from Twistedmac. Made his suggested access card all different ways but nothing is working.
Any further tips or help will be greatly appreciated.
Also on the latch picture where does the credit card actually have to make contact? Please help I'm going bonkers.
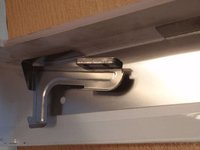
Finally figured it out. Lift up the bezel from the bottom about 45 deg
you will then see the latch on both sides. Put a spudger or whatever under the latch and push up. Do not lift the bezel too high or you will damage the latches. This worked like a miracle for me.
Had no success with the credit card method, it was really frustrating.
The sleestack post is also also great.
OMG!!! The rating for this repair as "moderate" is waaaaaayyyy off! I've been repairing various laptops for YEARS on iFixit and this was my first attempt at a desktop repair. It was so much more fidgety and difficult than the hardest laptop I've done (probably about 12 - 15 other repairs by now).
And sorry... tho' I love this site and am grateful for these tutorials, this one was wanting in detail and assumed that I not only knew terminology that I didn't know (I was able to figure it out of course, I DID finish the repair) but skipped important details that made it infinitely harder (and took me waaaayyy longer than it should have!). For example, when removing the optical drive, the guide skipped about three steps and I ended up accidentally breaking some delicate plastic bits. And gee thanks for waiting until I have everything apart to tell me I need a longer screwdriver! I found a tedious workaround, but... sheesh dude! All in all, I'd have to say...by far the WORST experience I've had on this site!