Introduzione
Se il tuo iMac era configurato con un SSD o un Fusion Drive, include un SSD Blade sul retro della scheda logica. Usa questa guida per accedere e rimuovere l'SSD Blade.
Prima di iniziare qualsiasi lavoro sul proprio iMac: Stacca il computer dall'alimentazione, premi e tieni premuto il tasto d'accensione per 10 secondi per scaricare i condensatori dell'alimentatore.
Stai molto attento a non toccare i connettori dei condensatori o qualsiasi saldatura scoperta sul retro della scheda di alimentazione. Maneggiala solo dai lati.
Cosa ti serve
-
-
Con il perno libero di muoversi, l'iMac sarà sbilanciato e sarà difficile lavorarci sopra. Le riparazioni possono essere fatte con l'iMac a faccia in giù, ma sono più veloci e facili con un cuneo di supporto per iMac.
-
Se stai usando il Cuneo iFixit di cartone di supporto dell'iMac. segui queste informazioni per montarlo.
-
-
-
Iniziando dalla sinistra del display, vicino al tasto di accensione, inserisci iMac Opening Tool nello spazio tra il vetro e la scocca posteriore.
Would a heat gun make this step easier? Or damage the iMac?
A heat gun wouldn’t help you here as you still need to cut though the adhesive. You also risk damaging the display with the excessive heat.
Dan -
Removing the original adhesive is easier than removing newly applied adhesive (e.g., if you have to reopen iMac). If you should happen to need to reopen the iMac, please use extreme caution and highly consider my suggestions below.
When using the pizza cutter tool, do the first few steps in reverse starting with step 8. Starting on the left side is better since this is where the adhesive is narrowest. The right side has two antennas and the top right has one, see the pictures for step 18-21, they are the brass colored metal rectangles near the edges. The adhesive on these pieces are wider and therefore have more holding power. The thickness of the pizza cutter tool is enough to crack the glass.
Continuing from my previous comment. To remove the adhesive on the right side you’ll need to create a very slight gap to give the pizza cutter some more room. Do this by cutting the adhesive on the left side up and around to the camera. Before attempting to cut the right side. Carefully slide the plastic cards (I purchased two sets) to ensure the adhesive on the left top and side is completely free. Now slowly move towards the right side. After every inch or two of removing new adhesive, slide the card over to create this slight gap. Be careful to not move the card too close to where the adhesive has not been cut. You want to create a very slight gap without creating too much pressure. Use extra caution with approaching the areas where the antenna are since the adhesive is stronger here and will need some additional cutting. Follow this approach all the way around the right side. Be careful to not create too much pressure at any one time. Good Luck!.
I can confirm with Walter - trying to remove freshly applied adhesive is WAAAAY harder! My pizza cutter didn’t work correctly (the circle became a rectangle!) and I ended up with a small crack on the left of my screen. Dang it!
I would highly, highly, highly recommend AGAINST doing this at home. I followed these instructions to a T, and still somehow managed to have the screen not be able to turn on after the hard drive replacement. Then, once you’ve opened your Mac yourself, Apple will refuse to fix anything on the computer, and even other third party, Apple-authorized repair facility will refuse to repair it for you, and you will have to locate a non-authorized Apple repair facility. There, I am having to pay ~$600 to fix things that got screwed up, even though I followed the instructions here to a T, step by step, and did everything slowly and methodically.
Beware, if you’ve never done this before, that be locked out of ever being able to use an Apple repair facility, or Apple-authorized repair facility, if you mess things up here now.
I performed this on a Late 2015 iMac and there weren’t any significant differences to these steps, but I did find the repair to be nerve-wracking. My model cost nearly $3,000 and about 10 steps into this guide (which I did fully read ahead of time) I was thinking, “what have I got myself into?” But I didn’t rush and happily I’m typing this on my repaired iMac! I found a video from OWC that was more useful than the photos in this guide for certain steps: https://vimeo.com/139364064
Don’t know if you are still around, but THANK YOU for posting this video! The video made it seem SO NOT SCARY and, in conjunction with the photos and comments and tips on this guide, was a lifesaver. Big thumbs up.
First impressions so far: yes it can be a bit nerve wrecking if it is your first time doing this sort of thing and even with lots of experience with a 2011 model it’s still a bit unsettling haha (nervous laughter).
What I recommend: use a guitar pick to start cutting the glue. You’ll need a bit of pressure so do just the tip.
Once you’ve done the whole perimeter (minus bottom) do it again but now it should be easier to go deeper so go very slow and careful. Then get the old suction cups used to open older models and start lifting the display very carefully to see where it’s still glued and cut those as well.
Then you should be done and now the real fun begins! :D
It’s ridiculous. Apple should pay for doing this. Like glue parts together to block a repair / make difficult. I smashed my iMac. FU Apple. Seriously, every product I owned had hardware issues. For example, bad solder joints. Never again Apple. I’m happy with Windows and in 2018 / 2019 there are many other manufacturers with high quality stuff. Apple is dying, if they do not change …
NOTE: I followed every step word for word, but the adhesive strips supplied are as bad as double sided tape. Within 48hours the screen had slipped off and cracked. Now I need to fork out for a new screen and try again.
Not sure what to try next time with strips? Perhaps a bit of glue to help hold it??
Where do i get the “iMac Opening Tool?” its neither in the list of tools nor could i find it on the tool page.
Hi @snappadoodle! The opening tool is included in the adhesive kit included in the tool list, but you can purchase it separately here.
After disconnecting the power cord and before cutting the panel adhesive, push and hold the power button for 10 seconds. This will discharge the power supply capacitors. In case you accidentally touch the solder joints on the board, you won't be shocked and drop the panel.
Bottom line: This repair seems to have worked (so far no more intermittent shut-downs). Thanks iFixit!
As a novice who fully expected to destroy the display or worse, I make the following recommendations: (1) Before you start, read the steps several (many) times; visualize doing them and imagine how things could go wrong; (2) Read all the comments—there were some really helpful tips—like simply displacing the left speaker rather than fully removing it; (3) Get the recommended tools*; and (4) take your time—if you start to feel frustrated—seriously, stop and take a calming breath. Time is your friend. Failure is not an option.
*I would add a 3-prong parts puller to the tool list—it’s great for pulling and starting loose screws so you don’t drop them down into the chassis like I did. It’s also great for retrieving the screws you’ve dropped into the chassis.
Hi brad, what exactly did you repair to stop the shutdowns? I’m having the same issue
merinian -
Merinian: I replaced the power supply and it’s still working fine at this late date. No more intermittent shut-downs. Fingers still crossed!
Thank you very much for the instructive tutorial. I just successfully replaced the hard drive on my 2012 iMac 27. I used a disposable surgical scalpel 15 blade, and locked the blade extending 9 mm from the scalpel shaft using office tape. I used regular double sided tape to reattach the screen. I cut the strips using the scalpel. I have no previous computer experience and this is the first time I replaced a computer part. This was easy and fun.
Filip Dolatowski - Friday 11th Dec 2020
You are very lucky! I’ve had three systems come in which someone did the exact same thing! All three cut the display ribbon cables. Please don’t use surgical knifes or any other knife! Use the proper tool the special pizza cutter wheel designed for the task.
.
You likely spent more on the knifes than what the wheel cost with the correct tapes. You make the next time doubly hard to open not using the correct tapes! Hows the built in microphone? You may have messed it up.
Dan -
Thank you very much for the tutorial. You are the best!
After reading all the post here I almost gave up doing this on my own. But I did it anyway and was succesful. I would recommend everyone to use the rollcutter. There is no risk of harming the screen if you use it. And in my case it was enough to open the imac. If you do not harm the screen connector or the screen the biggest part is done. It gets easier once you`ve stacked your screen somewhere safe. The parts inside are mostely not as delicate as the heavy and expensive screen!
Take your time and work carefully. It is definitely doable!
I found the cutter tool that came with my kit to work just fine. The wheel is extremely thin and I had no problem inserting the wheel to begin cutting. I follow the guide for the most part but took my time and use the cutting wheel slowly and then repeated the process a few times. Once I was able to pry the screen back about an inch I used the other end of the tool to cut additional adhesive that was still clinging to the body of the iMac and the screen. Having just replaced the power supply, and having my iMac running again, I do not think I will use the adhesive strips to reattach the screen. The screen fit back in place no problem which I did to test my Mac. Because the iMac screen sits at an angle I am quite comfortable that the screen is not gonna fall off. Also while having a screen off I was able to clean the inside of the Mac of dust buildup. I think I will only use the adhesive strips down the road if I’m gonna sell the Mac, which means I can give it a good clean before securing the screen.
If the screen falls off (which it will do!) it will damage the parts which would be a lot more expensive! PLEASE get the correct tapes and properly mount the screen back on.
Think of it this way how many people have shot them selves with a gun not realizing it was loaded or set to go off!
Dan -
I think Dan is right as I decided it best to complete the process with the adhesive tapes to secure the screen. I just took some time to do a complete clean of the interior before sealing the display.
Ordered the full kit to replace my busted 3TB disc hard drive. All the tools work and are excellent. These pictorial and instructional install videos are complete, easy to use, and have good imagery. The 2TB SSD installed exactly as depicted. I used some 3M double sided automotive emblem tape to stick adapter to iMac case, no probs there. The adhesive strips also worked fine and stick firmly. Screen is solidly mounted, no falling out here. IFixit is awesome and this kit saved my over $1200 in getting another iMac. Highly recommended.
-
-
-
Usa l'attrezzo come una rotella tagliapizza - fallo girare nella fessura per taglierà la parte centrale dell'adesivo in schiuma.
-
Fai scorrere l'attrezzo lungo la parte sinistra del display.
In my experience the cutter also worked very well for cutting the original adhesive. Unfortunately when I was reinstalling the display with the new adhesive strips, somehow the display power connector came loose. I had to open the display a second time and the cutter was not as effective against the new adhesive. I managed to break the cutter tool plastic wheel and cause a few small cracks in the edge of the displays glass as I worked! Be careful and go slowly!
The cutting tool worked great until I accidentally twisted it a bit while rounding a corner. A chunk of the wheel snapped off, making the rest of the job quite a bit more challenging. Just make sure you are keeping the tool directly parallel with the screen.
I concur, opening the screen a 2nd time is considerably more difficult because the adhesive strips are thinner than the original, which makes getting the cutting tool inserted much more difficult….as a result unknowingly I elongated a small crack to a much longer crack and somehow, the LCD now has a wide grey strip from top to bottom….The first time opening was easy, second time resulted in a ruined screen.. The cost of. a replacement LCD is the same has replacing the entire computer….I would recommend anyone attempting to remove the screen for any reason, do not use the aftermarket adhesive strips if you ever intend to open it up; again, or cut the strips much shorter, or possibly use a few pieces of scotch tape or similar to hold the screen in place….since the screen tilts back, this should not be a problem…Good luck…
-
-
-
Taglia l'adesivo lungo la parte superiore sinistra del display.
The pizza cutter will sink in all the way to the tool handle when the adhesive is full cut, but don’t feel you have to do this in one motion. Some parts cut easier and some require a lot (like 20x) of gentle back and forth.
-
-
-
Continua lungo la parte superiore del display.
I measured a depth several positions.
- About 6 centimeters near iSight Camera center, you must no use iMac opening tool, because iSight element exists.
- iMac opening tool has a 9mm radius, so it may break iSight camera element.
- Making a plastic card stacking 2 or 3 to 3mm, under the iMac opening tool, that makes inserting a gap 5~6mm like below.
@. iMac opening tool
====== plastic card3 (credit card 1mm)
====== plastic card2 (1mm)
====== platic card1. (1mm)
———————————————— isight camera element (total 5~6cm) ————
In my case, i got a display problem where lcd display yellow connector was torn without care.
Be helpful.
-
-
-
Finisci di spingere lo strumento di apertura fino alla parte bassa del lato destro del display.
I didn’t have the fancy cutter or cards. So I used my actual pizza cutter. Followed directions just the same, and it easily cut through the adhesive w/o issues or marring the surfaces. Actually used it to rock back and forth to lift the screen. It’s all about taking your time. I rolled it back and further until cut thru. The 3/8 to 1/4 inch is right, but the screen framing actually prevents further depth unless you force it further. The adhesive actually protected the glass while cutting thru, so no damage. Great instructions, but where to get the replacement adhesive to reinstall?? Should be four independent strips.
You are very lucky you didn't cut to deep! The plastic cutter that's in the kit is the only thing I would use. Spending a few bucks on a tool is a lot cheaper than $500 for a new display!
Please don't use a real pizza cutter!
Dan -
-
-
-
Posiziona l'iMac a faccia in su sopra un tavolo.
-
Partendo dall'angolo superiore destro, inserisci una scheda di plastica tra il display e il telaio.
I actually DESTROYED my display (black vertical strips) by pushing the card in a bit TOO DEEP. So it is REALLY important to insert the card only a bit (1-2mm) more than the cutter wheel, in particular at the top side, where many flat cables connect the panel with the PCB. These can be damaged very easily!
Same thing with me…. Pushed cards to far…. new panel needed…€600…..
i think ifixit needs to place a bigger caveat, as I have missed it the first time
i successfully upgraded two imacs. one opened with ifixit pizza knife and another with a regular paper knife. however, when i had to open the first one once again i broke its screen glass. it seems ifixit adhesive strips are too strong. next time i’ll try to use heater to weaken glue tension.
I broke one too. And even if you think you did it correctly, you’ll not be able to see where you might have gone too far. You would think it’s very protected behind that metal plate, but no. Take special care with this offence to “right to repair” This should have been designed WAY better. I mean replacing a hardrive that is very likely to fail over the course of time, or even a simple desire to upgrade to an ssd!.
Bummer
HINT: If you turn the card and use the blue part of it, then you can avoid going to deep: no further then the blue part …
On the cards I got with my iFixit kit, the blue part was way bigger than 9.5mm — closer to 20mm!
I made a line 9mm from the edge of each of my cards and used that as a guide.
I’m thinking I might just use vinyl tape to keep the screen in place for at least a little while after an upgrade. The extra strength of the replacement tape sounds scary.
I wrapped two layers of vinyl electrical tape around the short side of an old gift card 3/8” from the edge. This “stop" prevented the card from going in too far. The card really helps to break the panel free.
This is a good tip!
Great idea! Wish I had read this before doing it. My less then optimal solution was to draw lines 3/8” around the cards, not as safe as your fix, but fast.
surely the card should have been designed such not to go further than certain distance with a barrier band.
The cards don’t have any means to control the depth, its your skills which control it. Its no different from how you use a knife to cut your chicken up when you serve it for dinner.
Dan -
The pizza roller tool is enough to cut through the adhesive. You dont need to cut in a lot further. So the cards are really not necessary.
No problems. I used two old credit cards and marked out a line using permanent marker so it was at the same depth as stipulated on this page. I even pushed it in a little deeper and no issues.
-
-
-
Torci delicatamente la scheda di plastica per allargare la fessura tra il display e la scocca e taglia l'adesivo rimanente vicino agli angoli.
My children tend to collect cards like this from hotels, Disneyland, old IDs, iTunes cards, gift cards etc. They came in handy for this step. After wedging in the first card into the left corner, I wedged the left corner, then added cards along the bottom edge. Finally I continued to push in additional cards to existing cards and found that this created a smooth even pressure along the display top. At 2-3 card-thickness the last of the adhesive let go, gentle as a baby.
-
-
-
Fai scorrere la scheda verso il centro del display per tagliare l'adesivo rimanente.
-
-
-
Con le schede inserite come mostrato vicino agli angoli, torci delicatamente le schede stesse per allargare la fessura tra display e scocca.
-
Se c'è ancora qualche punto che sembra incollato e non vuole separarsi, smetti di torcere le schede e usane una per tagliare l'adesivo in quel punto.
-
Comincia a sollevare dalla scocca la parte superiore dello schermo.
I would recommend using suction cups at this stage to lift the display.
I would strongly recommend using suction cups
Agreed about the suction cups. An extra pair of hands might be good here as well.
The stickiest location on my iMac was the mid-to-lower section of the right side. There are a couple of thicker areas that needed attention from the plastic cards.
WARNING!!! This is where you can crack you screen. TAKE YOUR TIME! Everything work fine for me because I took my time. I was very shocked at how fragile the screen is. It does have a small amount of flex but don’t push your luck. There were two things that made this easy for me #1 Once you have used the cutting wheel to your best judgement to cut the adhesive, start using the iFixIt plastic cards as spacers and space them evenly around the screen. I used 10 individual cards of and gently moved them up and down at each section two at a time. Once I started having less resistance, I combined 2(i.e. 5 sets total) cards evenly space to allow for move rigid and stronger movement to separate the screen. This really helped me to free up more adhesive. #2 before lifting the screen up fully, use tweezers to pull the adhesive like a string from around the entire monitor. This will make lifting the screen much easier since all adhesive will be removed. Finally when lifting the screen use the cards with your hands under them.
Would any of you consider the possibility of heating the glass with a hot-air fan before starting the process? In that way, the adhesive would let the screen go easier, I think.
The type of tape has a lot to do with it. If the original tapes are still present then the pizza tool slices through the thin foam core of the tape so heating is not needed. If on the other hand someone replaced the tapes with just regular double sided tapes then there is no foam core to split and there is a sizable risk the display will get damaged in the process of taking it off. So sure in this case a bit of heat might help, just be aware the LCD panel area is quite close to the edge along the top three sides so you also have the risk of dating it from over heating!
Dan -
If not for iFixit tuts and tools, no way I could do this. iMac 27" takes the prize as the worst design ever for upgrades/maintenance, what were they smoking when they designed it like this?
I have always believed that a properly placed screw can be a beautiful thing. A few decorative, but functional, screws placed in the back of the iMac case to attach the screen would be awesome, but this method is anything but beautiful and borders on insane.
-
-
-
Mentre tieni lo schermo con una mano, usa l'altra per scollegare il cavo di alimentazione del display.
Mark all cable connectors with a spot of white correction fluid before removal. This will remove the risk, when reinserting them later, of getting them the wrong way round. Yes - I know they will only plug in one way round, but it does make life easier if you are not in perfect lighting!
At this step, if you mess up anything with these 2 cables, especially when plugging them back in, even if you think you’re following the instructions here to a T, then you’re screwed.
I would highly, highly, highly recommend AGAINST doing this at home. I followed these instructions to a T, and still somehow managed to have the screen not be able to turn on after the hard drive replacement. Then, once you’ve opened your Mac yourself, Apple will refuse to fix anything on the computer, and even other third party, Apple-authorized repair facility will refuse to repair it for you, and you will have to locate a non-authorized Apple repair facility. There, I am having to pay ~$600 to fix things that got screwed up, even though I followed the instructions here to a T, step by step, and did everything slowly and methodically.
Beware, if you’ve never done this before, that be locked out of ever being able to use an Apple repair facility, or Apple-authorized repair facility, if you mess things up here now.
Quote - "Beware, if you’ve never done this before, that be locked out of ever being able to use an Apple repair facility, or Apple-authorized repair facility" You cannot be serious can you? So because someone attempted to repair their own Apple device that they OWN, you are saying that they may/will be locked out of using any Apple repair service again? Ridiculous claim sorry.
The display cable, the wider one, has a lock on it , usually a plastic tape lift tab to release it, once thats flipped it should come out fairly easily, if your experiencing resistance and the cable isn’t coming out then check for this lock/latch, the power cable just pulls out, just don’t rush it everything should go fine, fairly easy to do with the end result a working iMac
Is it possible to replace the power cable if its damaged? I can’t seem to find anything about this.
After finishing my hard drive replacement I reconnected these connectors to test my display before using new adhesive. Everything was working beautifully. But then when I applied the new adhesive and went to seal the display on for good - the display power cable somehow became disconnected! I had to reopen the Mac for a second time which was far more difficult with new adhesive. When reinstalling double and triple check that the cables are securely inserted before the final seal. Sounds obvious but it’s quite the annoyance if something goes wrong at this point.
Very difficult to work with these connectors.
Power cable very difficult to unplug - data cable veeeeery difficult to plug in.
I noticed that working with the iMac positioned vertically (and with a proper support for inclination) makes this step slightly easier…
Interesting comments.. personally, I didn’t find the cables particularly difficult to detach and reattach. You do have to be patient and gentle. Personally, I found that a rolled up beach towel gently wedged between the unit and back of the display helped keep the glass up. Also, a small flashlight can be helpful to see the cables and connectors if you’re lighting isn’t perfect.
I’d agree to John - not overly difficult. My workaround was to prep the screen for re-installation and then place it in front of the standing machine. The cables are long and flexible enough to be put in place even in this state. You can easily attach the cables and continue with fixing the screen to the housing.
I would not recommend doing this step as pictured. The cable you are removing has little tabs on the wide side that can be depressed inwards towards the center of the connector, releasing the cable. If you just grab the cable as pictured and yank it out, without depressing the side tabs, you are likely to damage something. Don’t pull on the wires, use your fingernails at the connector to squeeze the very small little tabs inward to release the cable from the connector.
I agree with maccentric. DO NOT just pull the power cable. Use your fingernail or spudger and gently press the tiny notch inward and towards you gently and one side will disengage. Do the same for the other side and it will slide right out. The notches just have enough edge to catch your nail or spudger. Using your nail is better as you can better feel when you have caught the edge and can feel the cable move.
I lifted the display a few inches up and propped it open in the middle using my iPhone in portrait mode with its torch on. Did the job nicely:
-
-
-
Solleva la piastra metallica che assicura il cavo dati del display.
-
Scollega il cavo dati dello schermo.
I replaced HDD to SSD and assembled parts again. When I boot up the iMac, I found black lines on display (looks partly not broken).
I searched Internet, and some says graphic card problem, but I didn't touch anything but cable to lift up.
Could the damaged display data cable cause this situation? I hope I could fix this by just replacing the cables..
Sorry, Black lines is a damaged display assembly ;-{ In the process of removing it you either pushed the tool into deep or you torqued the glass severing the tiny wire traces.
Dan -
Same trouble here, is it cable trouble or connector trouble?
Sorry damaged display
Dan -
I think whenever words like "...is a delicate connection that can be broken. Be sure to pull the [cable in a certain direction] ANYTIME.... It is worth either a closeup or 2, maybe one with annotations or insertion directions and maybe a motion direction arrow with the something like and 'X' char or a circle division slash over the wrong one.
I agree! +1
Yes, John is absolutely correct on this one. I damaged the display cable trying to get it back in. A close up would have helped and now my computer might have actually been fixed.
[|There are 2 cables to disconnect on my Mac (?). Also, I don’t see a metal retaining bracket. I can take a picture, but cannot attach. I got the glass loose with no problem, but am worried about damaging the cables]
Hi Jim! You can go to our Answers Forum to post some better images of your situation!
At this step, if you mess up anything with these 2 cables, especially when plugging them back in, even if you think you’re following the instructions here to a T, then you’re screwed.
I would highly, highly, highly recommend AGAINST doing this at home. I followed these instructions to a T, and still somehow managed to have the screen not be able to turn on after the hard drive replacement. Then, once you’ve opened your Mac yourself, Apple will refuse to fix anything on the computer, and even other third party, Apple-authorized repair facility will refuse to repair it for you, and you will have to locate a non-authorized Apple repair facility. There, I am having to pay ~$600 to fix things that got screwed up, even though I followed the instructions here to a T, step by step, and did everything slowly and methodically.
Beware, if you’ve never done this before, that be locked out of ever being able to use an Apple repair facility, or Apple-authorized repair facility, if you mess things up here now.
First: During reassembly, I highly recommend you connect these cables and do a test boot BEFORE you remove the protective tape on the adhesive strips. That way you can fix any issues(like a damaged cable) if something is not right and you have not re-glued the screen back down which will cause a problem. If you have a second person and everything is working after test boot, you can just leave the cables connected, lift the bottom of the screen and have 2nd person pull the protective tape on the adhesive strips and you can set the screen in place. Second I damaged the video data cable during reassembly on my late 2015 iMac- I did not get the connector straight and I damaged the wires on the cable. I recommend you have someone else hold the screen while you attach the cables - they are fragile. Luckily, the data cable was easily replaced for only about $20. If you must do this by yourself, just be careful I highly recommend have 2 people at this step during reassembly.
At least on my “late 2013” model, the smaller display cable connector has tiny, tiny clips on the outside edges. These must be squeezed to unlatch it. Don't pull on the cable itself or the wires can be pulled out. Even with my small fingers, it was hard to grip the clips. When reconnecting, the connector will lightly snap into place.
I managed this step without any problems, but I had my wife hold the screen up while I disconnected/connected the cables. I STRONGLY encourage another pair of hands here so you can focus your full attention on being ultra careful with the cables.
On the 2015 there are 2 cables.
1. Once the display is loose use the Mac foam block sold from Ifixit to keep the display from rocking to hold open the glass
2. Blow out dust with canned air
3. Get a flash light and small flat edged screw driver
4. Use the screw driver to slow pry loose the connector from the socket by gently inserting it in the gap on the left and then on the right slowly easing the connector from the socket towards the top of the glass
5. The more center connector has a pull tape and a wire loop. Lift pull tape and the wire loop will raise up.
6. Pull the wire loop towards the top of the glass to slide out the connector from its socket
Good instructions except for the screwdriver - try and use a plastic spudger instead ! Also, getting a headworn LED light makes life a bit easier.
Have a late 2013 model and went to do the SSD upgrade. When going to remove the display we cracked the bottom left corner of the glass (just the glass frame part - not part of the screen that displays anything). We were also having difficulty putting re-attaching the display flex cable. Whenever we finally went to test it before re-sealing the screen back on with new adhesive it would sound like it is turning on as it makes boot-up noises and the fans start running, but the screen would just remain black. Just wondering if the crack in the bottom left-hand side of the glass/display would have damaged a part of the display assembly or if it would be more likely that we just damaged the display flex cable (which can be replaced for $26)?
Did you get to the bottom.of this?
does anybody know how the Display Cabel pin assignment is? I want to try if I can attach the Panel to another grafic card
I’ve completed the upgrade to SSD, but while restarting my screen remains black. As if no connected.
I assume I broke the sensitive connector.
—> how to order a spare?
Did you get to the bottom of this?.
No! Apple loves to mess us up!
Dan -
The panels are different since technology progresses at a rapid pace and Apple does like to be on bleeding edge of things. When they do a manufacturing run of screens, there will be a few years that will have the same screen. I believe 2017 is when they introduced the higher resolution panels. Everything from 2012 late to 2015 should be the same though.
That display cable connector is common to many Macs of the 2012 era. I’ve destroyed 2 in 38 years of servicing all types of computer equipment.
As stated, there is a latch on this connector. If you put any incorrect force on the cable or connector during disassembly or reassembly, you will break the cable and possibly the connector. The cables can be purchased online and the video connector on the display is exactly the same.
I repeat, if you pull out on the video cable after it has been unlatched instead of parallel to the logic board, YOU WILL BREAK IT.
-
-
-
-
Solleva il display in posizione quasi verticale.
-
Rimuovi più adesivo possibile afferrandolo agli angoli e tirandolo o arrotolandolo in direzione del centro.
Thanks Stef, this has saved me! Simple yet very effective.
Yep, I cracked the lower corner of the display as well. I failed to work the adhesive enough to loosen it sufficiently. Be careful, I just had to buy my customer another screen!
There seems to be missing a step or two. As I was removing the old display, there are two wires that need to get transferred to the new replacement display. There is not note about these two wires located at the top of the display. The 1.128-inch ribbon cable and then this other 4-inch long, two-wire cable that goes to a very small circuit board that is 1/4 by 3/8 of an inch and seems to be adhered to the panel.I have not been able to get this cable off the old display. There is a port for it on the replacement display.
Note: When ordering this screen, and plastic cards as noted tools, ifixit.com did not list the pizza cutter or the new replacement adhesive strips. So now I’m not sure how to get the new one on and secure.
Are you sure your trying to remove a late 2013 model A1419 display assembly?
robert -
The adhesive strip along the bottom is designed with a pull tab on each outer end. Rather than lever and pull the screen simply carefully pull the tab which removes that half of the lower adhesive strip and frees up the screen.
Niemals den unteren Klebestreifen mit einem scharfen Gegenstand wie Rasierklinge oder so versuchen zu trennen, davon geht die Beschichtung des Displays kaputt und man hat hässliche Streifen unten hinter dem Glas. Stattdessen lieber versuchen, das Display nach oben zu klappen und abzuziehen.
translation from Bas Ti because this is very important:
Never try to separate the bottom adhesive strip with a sharp object such as a razor blade or something, the coating on the display will break and you will have ugly strips at the bottom behind the glass. Instead, try to flip up and pull off the display.
If you are just replacing the hard drive, I have found that it is quite possible to do while leaving the screen connected, making the process much easier. The amount you need to tilt the screen to access the little pull tabs at the bottom to release the screen is also sufficient to access the drive. I remove the drive while the iMac is upright. I also heat up the bottom of the screen to soften the glue and to help with the possibility of the glass cracking while doing this step.
Very dangerous! You’ll stress the cables and the logic board connectors.
Dan -
I meant that you can leave the bottom strip of adhesive attached; you still need to disconnect the 2 cables.
As mentioned before you can pull out the lower adhesive strip. Dont cut it or move the display up and down. This is even more dangerous. On the lower side of mac where the display glass ends is a offset. When moving the display up and down you might crack it over that offset.
When removing the adhesive from the top of the screen, be sure to start at the iSight camera location (= in the middle). If you start at an upper egde of the glass (side doesn’t matter) towards the middle, you risk removing the black background foil from the screen, which will result in ugly stripes behind the glass.
-
-
-
Se necessario, puoi usare una scheda di plastica per tagliare l'adesivo rimanente.
Would have been helpful to box the same red area when using the plastic card to separate the glue. Since the red blocked picture is inverted, if someone doesn't pay close attention it may not be obvious that the area of concern is at the right top of the graphic pictures in which the plastic card use is being demonstrated..
you don't need to cut the bottom part as the bottom tape is stuck on each side and you can easily pull it out
[|I opened up my iMac and there’s no HDD or SSD in that spot. its just empty.]
You probably had just an SSD installed and no HD, which is on the opposite side of the motherboard (and quite a bit more work to access).
Please update the picture to include the RED BOXED IN AREA that you refer to on all three pictures in this step. I have had a few zaps from these supplies and it is not pleasant.
J’ai réussi à intervenir dans l’iMac sans décoller l’ensemble de l’écran. Je l’ai ouvert en laissant la dernière partie collée (vers le logo Apple) et qui sert comme une charnière. Bien calé et assuré l’écran n’a pas bougé et j’ai pu changer mon disque dur facilement. Le grand avantage et d’avoir l’écran toute suite juste quand on le recolle par la suite.
Well, I of course touched a soldering point in the red area as my hand slipped. I heard and felt a tiny “click” and after replacing the HDD with SSD etc I can not power the iMac up anymore. Not a sign of life :-( I suppose I broke the power supply. Can someone confirm? Or could something else have broken too?
I took my time and pulled both tabs slowly gently. Easily removed and glass came right off.
-
-
-
Solleva il display dalla scocca e rimuovilo dall'iMac. Appoggia il display faccia in giù su una superficie piana e morbida.
-
Potrebbe essere necessario sollevare lentamente lo schermo da una parte per staccare l'adesivo rimanente.
You really should be using film handling or surgical type gloves to handle the screen to minimise finger grease on any of it. Even if it’s possible to clean most of it off, it can be corrosive over time.
Use a large suction cup and latex gloves for this:
I think iFixIt should have mentioned this step might be safer using a suction cup as mentioned by Philip.⏎
I thought following the guide, holding the screen on each side would be fine, but the glass cracked almost immediately.I did not grab it by the corners, just the middle of the glass.
This glass is horrendously fragile. I don't think I can afford to repair the screen :(
Lowering the screen down at the end here does not need a suction cup. It sounds like you left something in the channel so you fractured the screen from the object (a loose screw?). I've done a ton of these systems and have not needed a suction cup at this step. I do agree a suction cup can be helpful in the screen removal process. just to give you a better purchase, not pulling! As you can damage the screen if you pull too hard.
Dan -
-
-
-
Se c'è un cavo sotto un nastro adesivo, tira via sempre il nastro adesivo prima di tutto.
-
Se il cavo è incollato al telaio, usa un iOpener riscaldato o un asciugacapelli per ammorbidire la colla. Dopo potrai inserire un plettro sotto il cavo per liberarlo. Non tirare mai direttamente connettori delicati.
-
Fai scorrere un plettro sotto i cuscinetti ammortizzatori per separarli dal display e tirali via delicatamente. Potresti aver bisogno di nastro biadesivo per riattaccarli sul nuovo display.
Be extremely careful removing the LCD Temp Sensor from the rear of the screen. If you pull the wire, you run the risk of severing the metal wire from the connector but not notice it because the surrounding plastic insulation may still be intact. Use a razor blade so “shave off” the sensor under the adhesive. I just had the screen replaced by a local shop and, upon boot, the fan was running full-speed and the Mac’s speed was miserable; Excel took 30 bounces in the Dock to launch rather than the expected 4-5. Novabench showed the Mac running at 4% of its expected speed (overall). The tech examined the sensor carefully, found the broken connection, soldered it back into place, and all was fine. Note that the (partially disconnected) sensor actually showed up when I ran Macs Fan Control in an attempt to work-around this. No problem controlling the fan speed then but the iMac’s running speed was awful until the disconnected sensor wire was fixed.
Hi barryjaylevine,
I’ve had my LCD replaced on my iMac 27 / 2013 and there is no LCD Temp Sensor cable on the replacement screen.
I’m experiencing the same performance issues.
I’ve ordered a new sensor, do you have any pointers as to how to install it?
Thanks,
Simon
UK
hey Simon, I used 2-sided tape….this is assuming the new sensor doesn’t already come with an adhesive surface already applied.
a roll of kapton tape for your own peace of mind will make sure nothing detaches from thermally-induced adhesive crystallization
make sure you position it in such a way that you can easily plug the lead back into the mobo….not a lot of length to that wire
Howdy folks,
Thanks for all the tips, LCD sensor fitted and iMac back in action.
Never again!
Simon
Hello all. So I’m trying to pinpoint my backlight issue on my 2015 retina 5k - I noticed I’m missing my thermal sensor on the LCD. Would this help with the backlight? I’m sure it will keep my fans from going crazy. Any help would be appreciated! Note: I have LEDs except the 4th one. Thanks!
-
-
-
Usa un cacciavite a croce Phillips per svitare le nove viti da 3,2 mm che tengono ferma la staffa di supporto.
-
Potresti dover rimuovere l'adesivo dello schermo dal bordo inferiore dell'iMac per accedere alle viti.
I did not find it necessary to remove these screws and this bar
-
-
-
Rimuovi la staffa di supporto inferiore dall'iMac.
No comments on this ?
It's quite possibly the most difficult part to put back in the entire process
The screws are tiny and the there is no easy way to line up the holes on the bracket with the screws
Having got this far - it wasn't even all that necessary to remove this part in the first place
Severe pain in the neck
With the right tools and technique, the bracket can easily be replaced in under a couple of minutes.
Use a screwdriver with a magnetized tip which frees up one hand and place a screw on the tip first.
Then line up the screw hole on just one end of the bracket and using a pair of tweezers from the side, hold the bracket in place while you put in the screw.
Next, do the same on the other end of the bracket. After that, all of the screws in the middle are quick to replace. I didn't really have to touch the bracket again after the end screws were in place.
Hope that helps someone else since removing this bracket does make later steps a bit easier.
-
-
-
Rimuovi due viti Torx T10 da 10 mm.
I found i didn’t need to remove the speaker nor the hard drive. In fact I managed to remove the old PSU without even removing the chin strap. However, to install the replacement PSU, I had to remove the chin strap. So I would say, remove the chin strap, but you can optionally leave the speaker and hard drive in.
While you do not need to fully remove the screws as once you loosen them a few turns the speaker becomes free. I found that after the removal of the speaker, I turned it over and popped the screws out as this made it easier to replace it later as I could see the alignment before putting the screws back in. If not you may be off a little and you do not want to force the screw back in.
I used a pill container that I got from Walgreens to hold all of the fasteners I removed during the disassembly process. The container has 14 compartments (individual compartments for each morning and evening of the week). I put a small piece of paper in the compartment with the fasteners to note the name and step of the procedure and the size of the tool I used. Hopefully this will be useful when I go to put it back together again.
-
-
-
Disconnetti il cavo dello speaker tirandolo direttamente dalla sua porta sulla scheda madre. Stai attento a sfilare il cavo rimanendo in direzione dell'asse della presa.
-
Sfila il cavo dalla fessura tra l'hard drive e la scheda madre.
I didn’t unplug and de-route this cable. Later, Step 29, has you remove the left speaker. This isn’t necessary. If you can just move the speaker over to expose the hard drive mounting screws, so if you’re not going to remove the speaker, you don’t need to unplug it.
-
-
-
Usa uno spudger per disconnettere il connettore del pulsante di accensione dalla sua sede sulla scheda madre.
there is no need to disconnect the speaker, just unscrew it and move aside slightly to reach the HDD screws (about 5mm) - if you want to replace just the main HDD
Take note of exactly what direction this tiny little wire was.
The connector has a plain black side and the other side you can see the 2 silver connectors.. the side you can see the 2 silver connectors faces the front.. the plain side is to the back/against the logic board.
If I leave my iMac unplugged for an extended period, say 24 or 48 hours, is it still possible to get an electric shock from the PSU? Do the capacitors eventually discharge?
you can do this method, or just wear latex gloves.
make sure you’ve actually unplugged the mac when running this cable, and not had it plugged in to test the diagnostic LEDs, because one of those wee silver spots is carrying 230v, and its 6mm away from the place the cable runs, So if you have fat fingers like mine, that’s a free wake up zap
-
-
-
Solleva con attenzione l'altoparlante sinistro fino a quando il cavo del pulsante di accensione diventa visibile (1-2 cm).
This is MUCH easier to do if the support bracket along the bottom is removed first. See Sostituzione scheda logica iMac Intel 21.5" Display Retina 4K (2017) step 25.
Use a P00.
To replace it, introduce it like in the photo at the link to be able to hold the right most holes of the chassis and bracket. Replace the first screw, align the bracket to the horizontal and add the screws from right to left. Each one will bring up the next hole in the bracket close enough to screw through. Reverse those directions if you are a leftie.
-
-
-
Sfila delicatamente il cavo del pulsante di accensione dal suo incavo sull'altoparlante sinistro.
Pay attention: if pulling out the loudspeaker tear off the wire of the power button, Apple have not any service parts except for the whole rear housing!
This is MUCH easier to do if the support bracket along the bottom is removed first. See Sostituzione scheda logica iMac Intel 21.5" Display Retina 4K (2017) step 25.
Use a P00.
To replace it, introduce it like in the photo at the link to be able to hold the right most holes of the chassis and bracket. Replace the first screw, align the bracket to the horizontal and add the screws from right to left. Each one will bring up the next hole in the bracket close enough to screw through. Reverse those directions if you are a leftie.
-
-
-
Solleva l'altoparlante sinistro e toglilo dall'iMac.
-
Spingi dalla parte terminale del connettore mentre tiri dalla parte terminale dell'altoparlante per infilare il cavo sotto il supporto destro dell'hard drive.
I found it wasn't necessary to remove the speaker from the left side to remove the hard drive. You can remove the screws, and then slide it over to the left — giving more than enough room to access the hard drive.
me too. don't need to remove it if you only want to change the hd
Agreed, wast of time to fully remove the speaker.
easier to remove the speakers if you unscrew the front ‘chin strap’ - 6/9 phillips screws that you can see in the picture hold that aluminum piece in place
Agree. This is MUCH easier to do if the support bracket along the bottom is removed first. See Sostituzione scheda logica iMac Intel 21.5" Display Retina 4K (2017) step 25.
Use a P00.
To replace it, introduce it like in the photo at the link to be able to hold the right most holes of the chassis and bracket. Replace the first screw, align the bracket to the horizontal and add the screws from right to left. Each one will bring up the next hole in the bracket close enough to screw through. Reverse those directions if you are a leftie.
-
-
-
Tira verso l'alto il cavo SATA dati/alimentazione per disconnetterlo dal disco.
Is the WD hard drive an Apple Special with some internal rom or other thing? Planning to put in a Seagate Firecuda 2TB. Is there some special plug or temperature sensor requirement? Seems like there is only the SATA connector. Will I encounter fast fans? (can load the software to stop that). Think it’s a swap and is “easy”.
-
-
-
Rimuovi le due viti Torx T10 da 7,3 mm che fissano al case il supporto di sinistra del disco.
Left hard drive bracket screws are T8!! Had to remove HD first before derouting left speaker cable.
Thank you iFixit for sending a T10 with magnetic tip. You saved me!
The bracket screws are T10. The screws on the left side of the SILVER hard drive itself, are T8. If you seem to need a T8, you are actually trying to remove the wrong two screws. Look immediately to the left of the hard drive & you will see the BLACK bracket frame with two screws that use T10.
I can confirm that some models are indeed a T8 on both sides of the bracket (NOT the drive itself). I have two 2015 A1419 and one is T10, the other T8
mine were T8s
Bracket to iMac case screws,T8.
Which is fine.
Just as in the next step, T8 or T10.
-
-
-
Afferra il disco rigido insieme al suo supporto.
-
Inclina verso l'alto il lato sinistro e fai scorrere l'insieme verso sinistra.
-
Rimuovi il disco rigido e il suo supporto sinistro dall'iMac.
Two notes here: If you are using OWC’s Thermal Sensor HDD Upgrade Cable, be sure to tuck the cable under the hard drive slightly. You cannot allow the connector to sit near the top edge since this will not allow the monitor to sit flush with the chassis when it is reattached. Additionally, the SATA connector does not seem to fit together as snuggly as when it was connect to the HDD, so tape or a plastic cable tie to keep the connection tight may be good insurance to prevent it from coming loose.
If you are planning on dual booting with Windows 10, the Windows 10 installed failed when the SSD and HDD were both connected at the same time. I had to disconnect the HDD until Windows 10 was installed. Note: I did a fresh install on a new SSD not configured as a fusion drive. If you are planning on doing this as well, use packing tape (or something similar) to hold the monitor in place until after installing the OSs. Then reconnect the HDD and apply the adhesive to the monitor for a permanent seal. Good Luck!
Hi Walter, i’m looking to replace the broken fusion drive with a SSD, do i have to get the OWC’s Thermal Sensor HDD Upgrade Cable?
Full removal of the speaker is unnecessary - just very carefully unplug the two-conductor power button cable, which is routed through the groove along the edge of the speaker enclosure. Next, unfasten the two large torx screws holding the speaker enclosure to the chassis. Now you can easily scoot the speaker away from the drive mount - move it over just enough to reach the drive mount’s 2 torx fasteners beneath the edge of the speaker (a CM or two). There’s now enough room to easily remove and replace the drive assembly .
Just wondering if the HDD 3.5 (3TB) in my 2015 27’ 5K iMac case are the ones with the temp control firmware onboard. Just got quote from Auhorised repair centre for 2x the normal price of a 3TB drive. They say I can drop in one i source myself if I like but I don’t want to get it back and have the fans run all the time. Thanks in advance :)
-
-
-
Rimuovi il supporto sinistro del disco rigido.
This step is unnecessary. Just leave the bracket in place and set the assembly aside.
On Late 2015 27” iMac I found that after removing this speaker, and the Right side one, I could reach under the motherboard and squeeze and disconnect the SATA data connector with a needle-nose and then remove the SATA power connector and slide the cable out from under the logic board without removing the board. The new cable slid in from the hard drive side with little effort.
If switching to an SSD, the posts on the drive can be removed and used on the 2.5” to 3.5” adapter tray.
-
-
-
Disconnetti il cavo di controllo dall'alimentatore.
I found this cable very difficult to disconnect, be very careful because the cable is between a black tape and it's stuck very hard to the logic board and the cable is very short and you don't have space to move and separate it from the connection! Be patient and take the time you need
I found than putting the flat end of the spudger at the center of the cable, and tilting it got the cable out without an issue.
I was able to use the flat end of the spudger on the sides. You can see a tiny little clip on each side. Be very gentle!
These connectors seem pretty tough to remove until one understands the latch. Each side of the plug are two little sprung tabs (the tab is part of the spring clip which runs down the side of the plug on each side - makes sense once you see the removed plug!). Squeeze them in towards each other and then gently pull the plug from the socket. No great force, or even the spudger, needed once that is done.
One more tip, has worked on other cables for me. Fish the skinniest spudger tip you have under the cable, and with a finger of your other hand put opposite pressure on the cable against the spudger and gently work it out
If u are right handed, i can recomend to use your index left nail to press de bottom sprung, and a flat spudger on the right hand, came off so easy
If you have a insulated long nose pliers along with a splugger and can get underneath the cable WITH the long nose pliers on the RIGHT side of the cable, towards the logic board, with the splugger on the LEFT Side of the cable doing the same, you can get the leverage to GENTLY pull this cable out very easily.
-
-
-
Sposta la scheda dell'alimentatore verso il bordo sinistro del case e verso l'alto per liberarla dall'incavo nella scheda logica.
This is MUCH easier to do if the support bracket along the bottom is removed first. See Sostituzione scheda logica iMac Intel 21.5" Display Retina 4K (2017) step 25.
Use a P00.
To replace it, introduce it like in the photo at the link to be able to hold the right most holes of the chassis and bracket. Replace the first screw, align the bracket to the horizontal and add the screws from right to left. Each one will bring up the next hole in the bracket close enough to screw through. Reverse those directions if you are a leftie.
The top right screw on the power supply actually screws into a stand-off screw connected to the back of the iMac case. Once you have removed the 4 x Torx 8 or 10 screws you can move the power supply enough to see the upper face of it.
It has a Torx 25 slot in it and comes out easily. This will give you a lot more room for your fingers in Step 40, depressing the tab on the DC power cable connector to pull it out, and when replacing it on reassembly. You may find it won’t require you removing the support bracket as in the suggestion above.
-
-
-
Premi la linguetta sul connettore del cavo di alimentazione DC, quindi estrai il connettore dalla sua presa sul retro della scheda logica.
Remember to push in the disconnect tab on the large connector. Carefully insert your finger and push on the tab before you pull on the connector.
Thank you Manuel, this was a tricky one.
Yes, I pulled the whole socket out because I didn’t know about the tab. Fortunately I was able to place it back in. Not sure if it was glued or how it was anchored but it seems to have a solid connection and I can’t easily pull it out by hand. Once I plug the power cable back in should be ok.
This connector was very difficult for me to remove (even after pushing the disconnect tab). Eventually I had to use a pair of needle nose pliers to wiggle it back and forth out of the socket. A lot of the cables on the my late 2015 model were very tight and a struggle to get out.
I'm struggling with this step. I presume that the tab to which you are referring is behind the connector. I can see a plastic protrusion there but it does not move when I push it. Just to get my finger behind it requires the power board to be moved quite a bit btw.
i could not get it out by the force of my fingers, so what i did was slightly turn the imac 90 degrees so i could reach the area better, push up (so, vertically) the power control board, push in the tab on the bottom of the connector with my right hand, and slightly wiggle the connector out of its socket with a plier
Left index finger pushing on the tab from behind the connector, using needle pliers in right hand to rock up & down did the trick thanks @starfleet_tone
Just be careful! I’ve seen two systems where the socket was pulled fully off! So the logic board then needs repairs or replacing being just a bit too aggressive!
Dan -
Needle nose and wiggling worked for us too. We were stuggling like heck with it when just using hands!
This is MUCH easier to do if the support bracket along the bottom is removed first - more space to angle the board upwards. See Sostituzione scheda logica iMac Intel 21.5" Display Retina 4K (2017) step 25.
Use a P00.
To replace it, introduce it like in the photo at the link to be able to hold the right most holes of the chassis and bracket. Replace the first screw, align the bracket to the horizontal and add the screws from right to left. Each one will bring up the next hole in the bracket close enough to screw through. Reverse those directions if you are a leftie.
I did as Andrew Gough did, per other videos reviewed. Removed it right away. Just makes things easier, more space for just a few screws :)
The top right screw on the power supply actually screws into a stand-off screw connected to the back of the iMac case. Once you have removed the 4 x Torx 8 or 10 screws you can move the power supply enough to see the upper face of it.
It has a Torx 25 slot in it and comes out easily. This will give you a lot more room for your fingers in Step 40, depressing the tab on the DC power cable connector to pull it out, and when replacing it on reassembly. You may find it won’t require you removing the support bracket as in the suggestion above.
I used your suggestion to remove the stand-off and then used my left hand index finger to press the tab while rocking the connector side to side with a needle nose pliers. Plug came out easily.
The tab is a pain in the a$$$ to get your finger in there. I was so horrified at the size of the capacitors that I put on gloves to reduce any amount of shock :-) . To get it loose I would pull out carefully the power board as far as I could than I wedge my index finger under and press the tab and slowly pull until I saw a slight gap between the end of the socket and the plug. I than place the flat part of the black spudger or blue one into the gap and use as it as a wedge to help move the plug forward as I kept the tab pressed.
-
-
-
Capovolgi verso di te la parte superiore dell'alimentatore per rivelare il connettore del cavo di ingresso AC.
-
Scollega il connettore del cavo di ingresso CA.
To reassemble, do the same in reverse but keep power supply board more upright than slanted down when re-inserting it in to the lower right corner. The lower right screw post has an protrusion under/behind it and the Power Supply's small 2 wire plug must fit between the front of your Mac and the obstruction. Then it just slides right in and then screw it down.
Wear gloves when doing this to reduce any shock. The size of those capacitors are very unnerving and scary. Also those solder joints.
-
-
-
Solleva l'altoparlante per rimuoverlo dall'iMac.
Did this tonight. I couldn’t get the right speaker out. But I was able to move it far enough to the right to be out of the way of the logic board.
You have to remove the five small screws on the lower edge of the iMac to remove a strange bracket or something, like the 21.5” 2012->… iMacs
Same here. 2013 27”. If you remove two of the tiny screws along the bottom edge then it comes out.
This is MUCH easier to do if the support bracket along the bottom is removed first. See Sostituzione scheda logica iMac Intel 21.5" Display Retina 4K (2017) step 25.
Use a P00.
To replace it, introduce it like in the photo at the link to be able to hold the right most holes of the chassis and bracket. Replace the first screw, align the bracket to the horizontal and add the screws from right to left. Each one will bring up the next hole in the bracket close enough to screw through. Reverse those directions if you are a leftie.
-
-
-
Usa l'estremità a punta di uno spudger per scollegare i connettori dei cavi dalla presa nella scheda logica.
-
-
-
Rimuovi la ventola dall'iMac.
Use a piece of tape around the antenna cables to keep them in the same order, makes reassembly a little easier.
-
-
-
Usa l'estremità piatta di uno spudger per disconnettere ciascuno dei quattro connettori delle antenne dalla scheda AirPort/Bluetooth.
-
Il più a sinistra
-
Il più in alto
-
Quello in alto a destra
-
Quello in basso a destra
My iMac has a slightly different assembly. There are 2 - T5 torx screws holding little clamps for each cable (2 clamps per screw). Certainly more secure but another size screw to deal with…
My iMac also same with Greg mentioned. need to T5 torx driver. A1419. Late 2015, Korean Version.
My 2017 has long WI-Fi card, It’s It’s a M.2, cuz no remove antenna. Undo WI-Fi card fix screws and pull out card. Easy one.
Before I disconnect the cables, I use different color sharpies and draw a different color on each one’s head & then I take a picture of the cables connected to the board. Pic is my reference of which cable goes to what connector.
I have a 2017 and I agree with Tanya. There are 2 T4 screws fastening the airport card to the motherboard. It’s easier to remove these and gently pull the airport card straight up out of the motherboard while leaving the 4 antenna wires fastened. You can’t see the connector or the airport card as it’s on the back side of the motherboard but just wiggle it side to side while pulling straight up and you’ll have no problem. I’ve broken off those tiny airport connectors in the past and it’s no fun replacing them.
same as Greg, did with the torx t5
I have a 2019 iMac and we needed to use a T4 screw
My late 2015 has a Airport/Bluetooth card secured with two T5 screws. After removing them you can just wiggle and unplug it from the logic board, without needing to fiddle with the antenna connectors.
Same as the other comments, in my iMac 27” retina 2015, the WiFi/Bluetooth board is a bit longer and the 4 coax cables are fixed by 2 T5 screws…
-
-
-
Ruota verso l'alto la staffa di fissaggio in metallo del cavo della fotocamera iSight.
-
Tira il connettore del cavo della fotocamera verso la parte superiore dell'iMac.
-
-
-
Usa l'estremità piatta di uno spudger per scollegare il connettore del cavo del jack cuffie dal suo zoccolo sulla scheda logica.
-
Spingi delicatamente il cavo dove non dia fastidio.
On my 2017 iMac there is a tiny little cable and connector on the motherboard that is approximately half way along the motherboard and is connected down towards the base of the case. It came free easily when I removed my motherboard but just wanted to remind people to reconnect!
It’s the microphone cable!
Lift upwards with the spudger/fingernail, rocking it up back and forth.
(For those who have not seen this style of connector.)
-
-
-
Rimuovere le seguenti viti Torx dalla parte anteriore della scheda logica:
-
Due viti T10 da 23,7 mm
-
Quattro viti T10 da 7,4 mm
-
Una vite T25 da 20,8 mm
-
Una vite T10 prigioniera
The central screw is very difficult to reach! Use a long and very thin T10 screw driver
On my late 2015 there is another T10 (approx 16 mm long) on the lower edge slightly left of the hole in the logic board giving a total of 4 screws along the bottom edge.
My 2017 has small flat cable and connector on logic board. And all screws are changed to T 9
My 2017 had all T8’s, including the captive screw beneath the motherboard
Late 2015 iMac - mine had all T8 screws and 4 along the bottom row
On 2019 iMac
Red = T8
Orange = T8
Green = T8
Yellow = T25
In 2017 too.
2017 here.
IMPORTANT - note Tanya’s comment. The narrow flat cable in the middle - it’s the mic cable on a *tiny* ZIF. See Sostituzione scheda logica iMac Intel 21.5" Display Retina 4K (2017)
Also has the extra bolt middle lower edge.
All T8 except the yellow T25.
In my iMac 27” retina 2015 all screws are T8.
There is also an another T8 screw between the left and central “orange” on bottom of the CPU board
Just completed and removed logic board. All my screws were T6. The screw beneath is a captive screw, stays retained in the fixture after unscrewing.
There is a 25T stand off that is not listed. It is not on the board but beside or underneath the yellow/red on power supply side.
-
-
-
Tirare il cavo e il connettore attraverso il supporto di destra del disco fisso. Sposta il cavo sul lato destro dell'iMac, dove non interferisca con il condotto di scarico.
Anyone know if models that shipped with only a bladed SSD have the SATA cable still inside? I’m guessing probably not, but haven’t been able to confirm anywhere.
The cable was so stiff, I didn’t try to pull it through the bracket. Instead I removed the upper screw holding the right HDD bracket in place. Then I rotated it counter clockwise enough to just move the cable behind it and out of the way. Once I did that, I screwed the bracket back into place. I reversed the process when I put the machine back together. It’s a Torx-10 BTW.
Excellent tip, Kenneth! I did the same, made things easier.
Jesse, no SATA cable inside. My iMac came only with the blade SSD and an empty HDD bay, so I have to buy the SATA cable separately.
the card drive cable is affixed to the heat sink with some sort of adhesive. If it is not placed back similarly, the system cannot sense the heat sink temperature, and the fan will run at full speed continuously. I used double sided tape and pushed it back in adhered position after re-attaching logic board.
-
-
-
Rimuovi due viti Torx T10 da 5,7 mm dalla parte superiore del condotto di scarico del dissipatore.
My model (2015) had another screw holding the heatsink duct and a stand-off holding the whole thing attached to the back. Even gently moving the logic board almost got the duct damaged till I realised what was going on so I’d suggest to be careful and DO NOT pull the logic board if it looks like it’s still attached - most likely it is!
Carlos,
I am at a bit of a loss. I have a 2015 as well and removed everything else, but the motherboard is still not moving. I found the two, as shown in the picture, but can't find a third one anywhere on or around the heatsink duct. Any help is sincerely appreciated.
Marc
MarcW58 -
Ditto for the 2013 27”. One extra screw
My model 2546 late 2012 has 2 screws on heat sink shroud. First is on left side. The right can only be accessed with board tilted out a bit.
I just finished disassembling a late 2017 27” Retina and for the life of me I couldn’t get the logic board to come out. What. I discovered was that there is a part of the heat sink shroud that is held in place by a stand off boss for the power supply. You will need to remove the stand off boss using a T25. Remove carefully and save for reassembly…
Same here for late 2014.
Yes, there is a screw holding down the fan shroud it is an angled black part where the guy's left hand index finger is located in Step 56
-
-
-
Inclina leggermente in avanti la scheda logica.
-
Alzare la scheda logica direttamente verso l'alto e fuori dall'iMac. Attenzione a non impigliarti in nessuna delle sedi a colonna delle viti all'interno del case posteriore.
The 2017 iMac has a small cable with a ZIF connector coming from the bottom of the machine that needs to be detached from the logic board before it can be removed.
I can confirm this. As i recognized the cable after i removed the logic board i had some trouble to find the spot where to plug it in.
If you are having a hard time removing it, you might have forgot to remove the spacer rod when you removed all the motherboard screws. In my case, it was a T20. This is in my late 2015 the case. Just like Eric said 11-01-2020.
Same for late 2012. For those curious the spacer is just to the left and appears to attach to the heat sink.
The iMac 27” didn’t come with the PCIe SSD card so of course there wasn’t the necessary screw to mount one.
Here is the screw to order;
https://www.ebay.com/itm/283482947478?ch...
What I did was find a screw that fit. Happened to be the case screw from the iFixit external 2.5” case but since that was a countersunk screw, I fabricated a washer for it.
-
-
-
Nel riassemblaggio dell'iMac, stai molto attenti all'allineamento delle porte I/O esterne. La scheda logica potrebbe essere disallineata anche se fissata con tutte le sue viti.
-
E' possibile usare una chiavetta USB o un cavo ethernet per essere sicuri che l'allineamento della scheda logica sia corretto mentre la fissi con le viti.
To help me line up the IO ports, I filled all the USB ports on the back with thumb drives before I screwed the Logic board back down. Worked like a charm!
Thanks Alex :)
iMac (Retina 5K, 27-inch, 2017) の場合、Thunderbolt 3(USB-C)ポートの位置がシビアです。
Ethernet、USB 3ポート、Thunderbolt 3(USB-C)へ最低でも各1本(合計3本)を差し込んだままの状態でロジックボードのネジを閉めるようにすることを強くおすすめします。
EthernetケーブルとUSBメモリの2本を挿して調整し組み上げましたが、最終的にThunderbolt 3(USB-C)が刺さらないことが後で判明し、結果組み直しをしなくてはいけませんでした。
For iMac (Retina 5K, 27-inch, 2017), the location of the Thunderbolt 3 (USB-C) port is severe.
It is highly recommended to close the logic board screws with at least one cable each (total of three) plugged into the Ethernet, USB 3 port, and Thunderbolt 3 (USB-C).
I plugged in two Ethernet cables and a USB memory stick, adjusted and assembled the board, but in the end I found out later that the Thunderbolt 3 (USB-C) would not stick, so I had to reassemble the board.
Translated with www.DeepL.com/Translator (free version)
貴重な情報ありがとうございました!
I do this job fairly frequently and I have a small box in my iMac tool kit containing a headphone jack, four USB drives, a short two-ended Thunderbolt cable and the end of a red moulded Ethernet cable to keep things aligned from the back when screwing the logic board back into place.
I loosely screw all the screws in, then tighten them gradually, going round the board several times to make sure it lands in exactly the right position.
-
-
-
Tira verso l'alto il connettore del cavo SATA per scollegarlo.
-
Scollega il connettore del cavo SATA sganciando la sua aletta di bloccaggio e tirandolo verso l'alto sul connettore.
-
Rimuovi il cavo SATA dal gruppo della scheda logica e spostalo in un punto dove non interferisca per prevenire un eventuale danneggiamento.
Is this picture correct with 7 pins? Or is it form the 5k version? (See comments on that case below).
There is an cable on eBay with 5 pins.
This guide was written the year before the 5K model first came out. The cable in the photo is definitely for the model listed, although it’s always possible Apple made more than one variation.
Hey, if you got this far and your iMac is getting along in years, maybe pick up a BR2032 battery and replace the PRAM battery while you’re at it, as you have to get to this point to access it.
I'm waiting on the battery now! I have a CR2032 in the house, but I looked them up, and they're too different to make me comfortable using one. And I accidentally ordered the BR3032, AAAGH. Sigh. Stupid Amazon put them side by side, and I clicked on the wrong one. :) Must've been Amazon's fault. :) But for sure, I was looking at my computer in pieces, and I looked at that battery, and I thought, wait, when was this thing built? 2017? Um. Might be time for a change.
Tom, great tip on the battery. I put a new one in my 3½ year old iMac.
Could have used a warning that this cable is not present in models that shipped with a SSD. I was replacing my blade SSD and adding a new SSD at the same time, only to find that I was missing this cable while my iMac was in pieces. Had to reassemble it without adding the SATA SSD, major hassle.
This is a bit of a grey space.
Clearly you don’t need the cable if you are replacing the HDD or switching it out of a SSD. Its only when you are enhancing your system by adding a drive which you didn’t have before.
Dan -
Hello congratulations on your ssd blade upgrade. Have you used the owc blade or a samsung + adaptor? Regarding the cable, do you know if we can buy the cable and plug it into the logic bard so to add another ssd in the aluminum frame ? thanks a lot have a niceday
Patrick -
@patrick7508 - I encourage you to stick with a pin-compatible drive not use a M.2 adapter as they are not reliable and some drives are not compatible. Stick with a real Apple drive or OWC. Just think of the work you needed to do just to get to the drive.
Dan -
-
-
-
Rimuovi la singola vite Torx T8 da 5,3 mm che fissa l'SSD alla scheda logica.
What type och screw is this? I just need the measurements, is it a standard M-size screw?
Did you find out any details about the screw in the end?
djones -
I am also searching for the right screw. There wasn’t one there before as there was no M.2 SSD there before (late 2015 iMac with HDD configuration). It’s definitely smaller than the T8 Torx’s I have been taking out so far.
Boris -
I bought the 1TB PCIe SSD for my 5K iMac (late 2015). Worked like a charm without any hiccups; great vendor: https://beetstech.com/product/solid-stat...
I have bought an iMac 2015 with 3TB Fusion drive, from which the SSD blade was out of order.
A serviceman had split the Fusion drive and the iMac ran on HDD only. Awfully slow...
On the top of it the boot time was very long since the bootloader waited 3 minutes for the defective SSD to show up.
Since I had an Apple 121GB blade from an upgrade on a Macbook Air I replaced the SSD.
Now my iMac boots directly from the 121GB blade (AFPS), lightning fast. The 3TB HDD is HFS+ and holds my user files and Time Machine. -
-
-
Solleva lievemente l'estremità dell'SSD e tiralo direttamente fuori dal suo zoccolo sulla scheda logica.
What do you mean? I'm going to buy a ssd to add it in my imac 27 late 2013 the came without it.
Which part I need?
I think what he meant to say is the SSD shown (Samsun) is for a late 2013. The 2014 iMac uses a Sandisk unit (see the 5k teardown).
Ifixit have made the mistake of referencing the late 2013 iMac teardown photos here.
Brent -
Not get confused! Apple used different vendors of their SSD’s both SanDisk & Samsung supplied SSD’s in this series.
Dan -
For the 2012 iMac 27”, I can confirm the Blade SSD is an 8+18 pin SSDD and I believe this is a SATA drive, NOT a PCIe (NVMe) drive. I took my 2012 apart to try to add an NVMe drive with 2013 macbook adapter, and it does not fit. I didn’t have an adapter that worked so I just replaced the 3.5” HDD with a 2TB SATA 2.5” SSD and left the blade slot empty.
The SSD drives available from OWC have speeds consistent with SATA drives, so I think the benefit of replacing or filling the blade slot are pretty minimal unless you’re really trying to maximize your available storage space, in which case it’s likely better to invest in an external or network attached solution.
TL;DR 2012 iMac is an 8+18 pin setup that is likely SATA, not PCI-E so just replace the HDD with a big SATA drive.
Here’s a good source of info The Ultimate Guide to Apple’s Proprietary SSDs And BeetsTech is a good source for the SSD’s
iMac 27” 2019!
I did it ;-) and ist works fine … but I had no microfon after reinstall. I had put the adhesive strips over the mic holes.
So I need to open again with a new pair of adhesive strips ;-)
I Have installed a Samsung NVME SSD 970 EVO 1TB with the “long” sintech adapter and a Sandisk Ultra SSD 2TB (SATA).
I am about to do this to my 27” late 2015. Haven’t decided on which Blade SSD to use yet. But I have bought af Crucial MX500 2 TB SSD SATA.
I have read a lot of problems with the Samsung NVME SSD 970 EVO.
Also read a lot about needing a SATA cable from OWC (OWCDIDIMacHDD12) In-Line Digital Thermal Sensor for 27-Inch iMac, to ensure the fann does not spin uncontrollably.
Have you had any problems with your setup with the Samsung SSD, and did you use the OWC cable ?
Lars -
I also did it with the same adapter, ordered for a few bucks from china.
I’m usign the 970 EVO Plus 1TB, they have updated the firmware and it works out of the box.
The firmware for older models can be updated directly on the mac with the updater from Samsung (can be installed on a USB stick and used to start the mac with it)
The standard 970 EVO does not have had the firmware issues, just the Plus had in the past.
For the blade SSD no OWC cable is required, that is only if a SATA-HDD is replaced by a SATA-SSD, thats a completely different thing.
maccy -
Is there supposed to be a heatsink attached to the replacement drive? I don't recall receiving one in the OWC package and I am seeing temps hitting 190 F (almost 88 C) under heavy load.
No heat sink on the blade SSD, you could add one but it won’t really change what you are facing here.
It does sound like your SSD maybe to small (and/or your system needs more RAM) given what you are doing.
Keep in mind boot drive (SSD here) is used for virtual RAM, caching and depending on the app scratch space. You want to leave at least 1/4 of the drive empty for best performance. 256 GB or smaller drives will need 1/3 reserved.
Dan -
How to boot the system after replacing the ssd? Where is the recovery partition? I have followed all the steps but the screen is black and not even the question mark is displayed.
Then you have an issue with your installation as you should be treated with a flashing question mark. Check your displays connections and maybe see if an external display works. Did you use the proper tools and technique within the guide to lift the display off? Many people have damaged the display in the process if they don’t follow the guide to the letter.
Dan -
Installed a 2019 SSD in my late 2015 iMac retina, purchased from fast_macs on eBay AOK with nearly 1900MB/s write 1800MB/s read (ish). Also installed Apple 2TB drive too whilst I was doing it.
The 2017 and 2019 SSDs should be the same (or very similar). Both are SSPOLARIS and the same generation. I’m in the middle of doing the same on mine (mid 2017), going from a 2TB Fusion to a straight 1TB blade.
I purchased this one, based on the excellent feedback:
If I install a new 2TB SSD to replace my HDD (2019 imac 27), do I have to install a new logic board SSD? I’d rather not have a fusion config any longer (S/W seems buggy - hence my fusion drive problems). I’d much rather have just the new 2TP SSD in place of the old HDD, if possible?
Replacing your SATA HDD for a SSD makes a lot of sense! Any size will work.
You should pull the blade SSD which was mated to the HDD to create the Fusion Drive pair.
Dan -
Thanks Dan - blade SSD to be discarded!
Hola. Quería saber que iMacs de 27” pulgadas llevan ese tipo de conector M2. Gracias
@chucklott I'm in the same situation as you were. I have a new 2.5" SSD in-hand and would like to just use that, and pull the existing blade SSD out. I think I have to purchase a SATA cable though, because the iMac doesn't appear to come with one. Is that what you did too? Any other issues that you encountered with your fix?
Depending on what your system was configured with for drives you may have the needed cables.
The low end config came with a SATA HDD as such you will have the needed SATA cables
If you bought the Mid tier config then you have a Fusion Drive which is really two physical drives the SATA HDD as well as a small blade SSD which is used as a cache drive (not visible from within the OS or Disk Utility as a mountable volume) again you will have the SATA cables. But you will need to remove the blade SSD as it gets in the way.
The last config is the high end which is where a much larger blade SSD is installed this is the only config that will require a SATA cable.
These setups are independent of the CPU/GPU the system also offered.
Dan -
-


Per riassemblare il tuo dispositivo, segui queste istruzioni in ordine inverso e usa la nostra guida alla sostituzione delle strisce adesive per riattaccare il vetro del display.
Porta i tuoi rifiuti elettronici ad un riciclatore certificato R2 o e-Stewards.
La riparazione non è andata come pianificato? Prova alcune soluzioni base dopo una riparazione, o chiedi alla nostra comunità risposte per aiuto.
Annulla: non ho completato questa guida.
Altre 244 persone hanno completato questa guida.
Un ringraziamento speciale a questi traduttori:
100%


Questi traduttori ci stanno aiutando ad aggiustare il mondo! Vuoi partecipare?
Inizia a tradurre ›


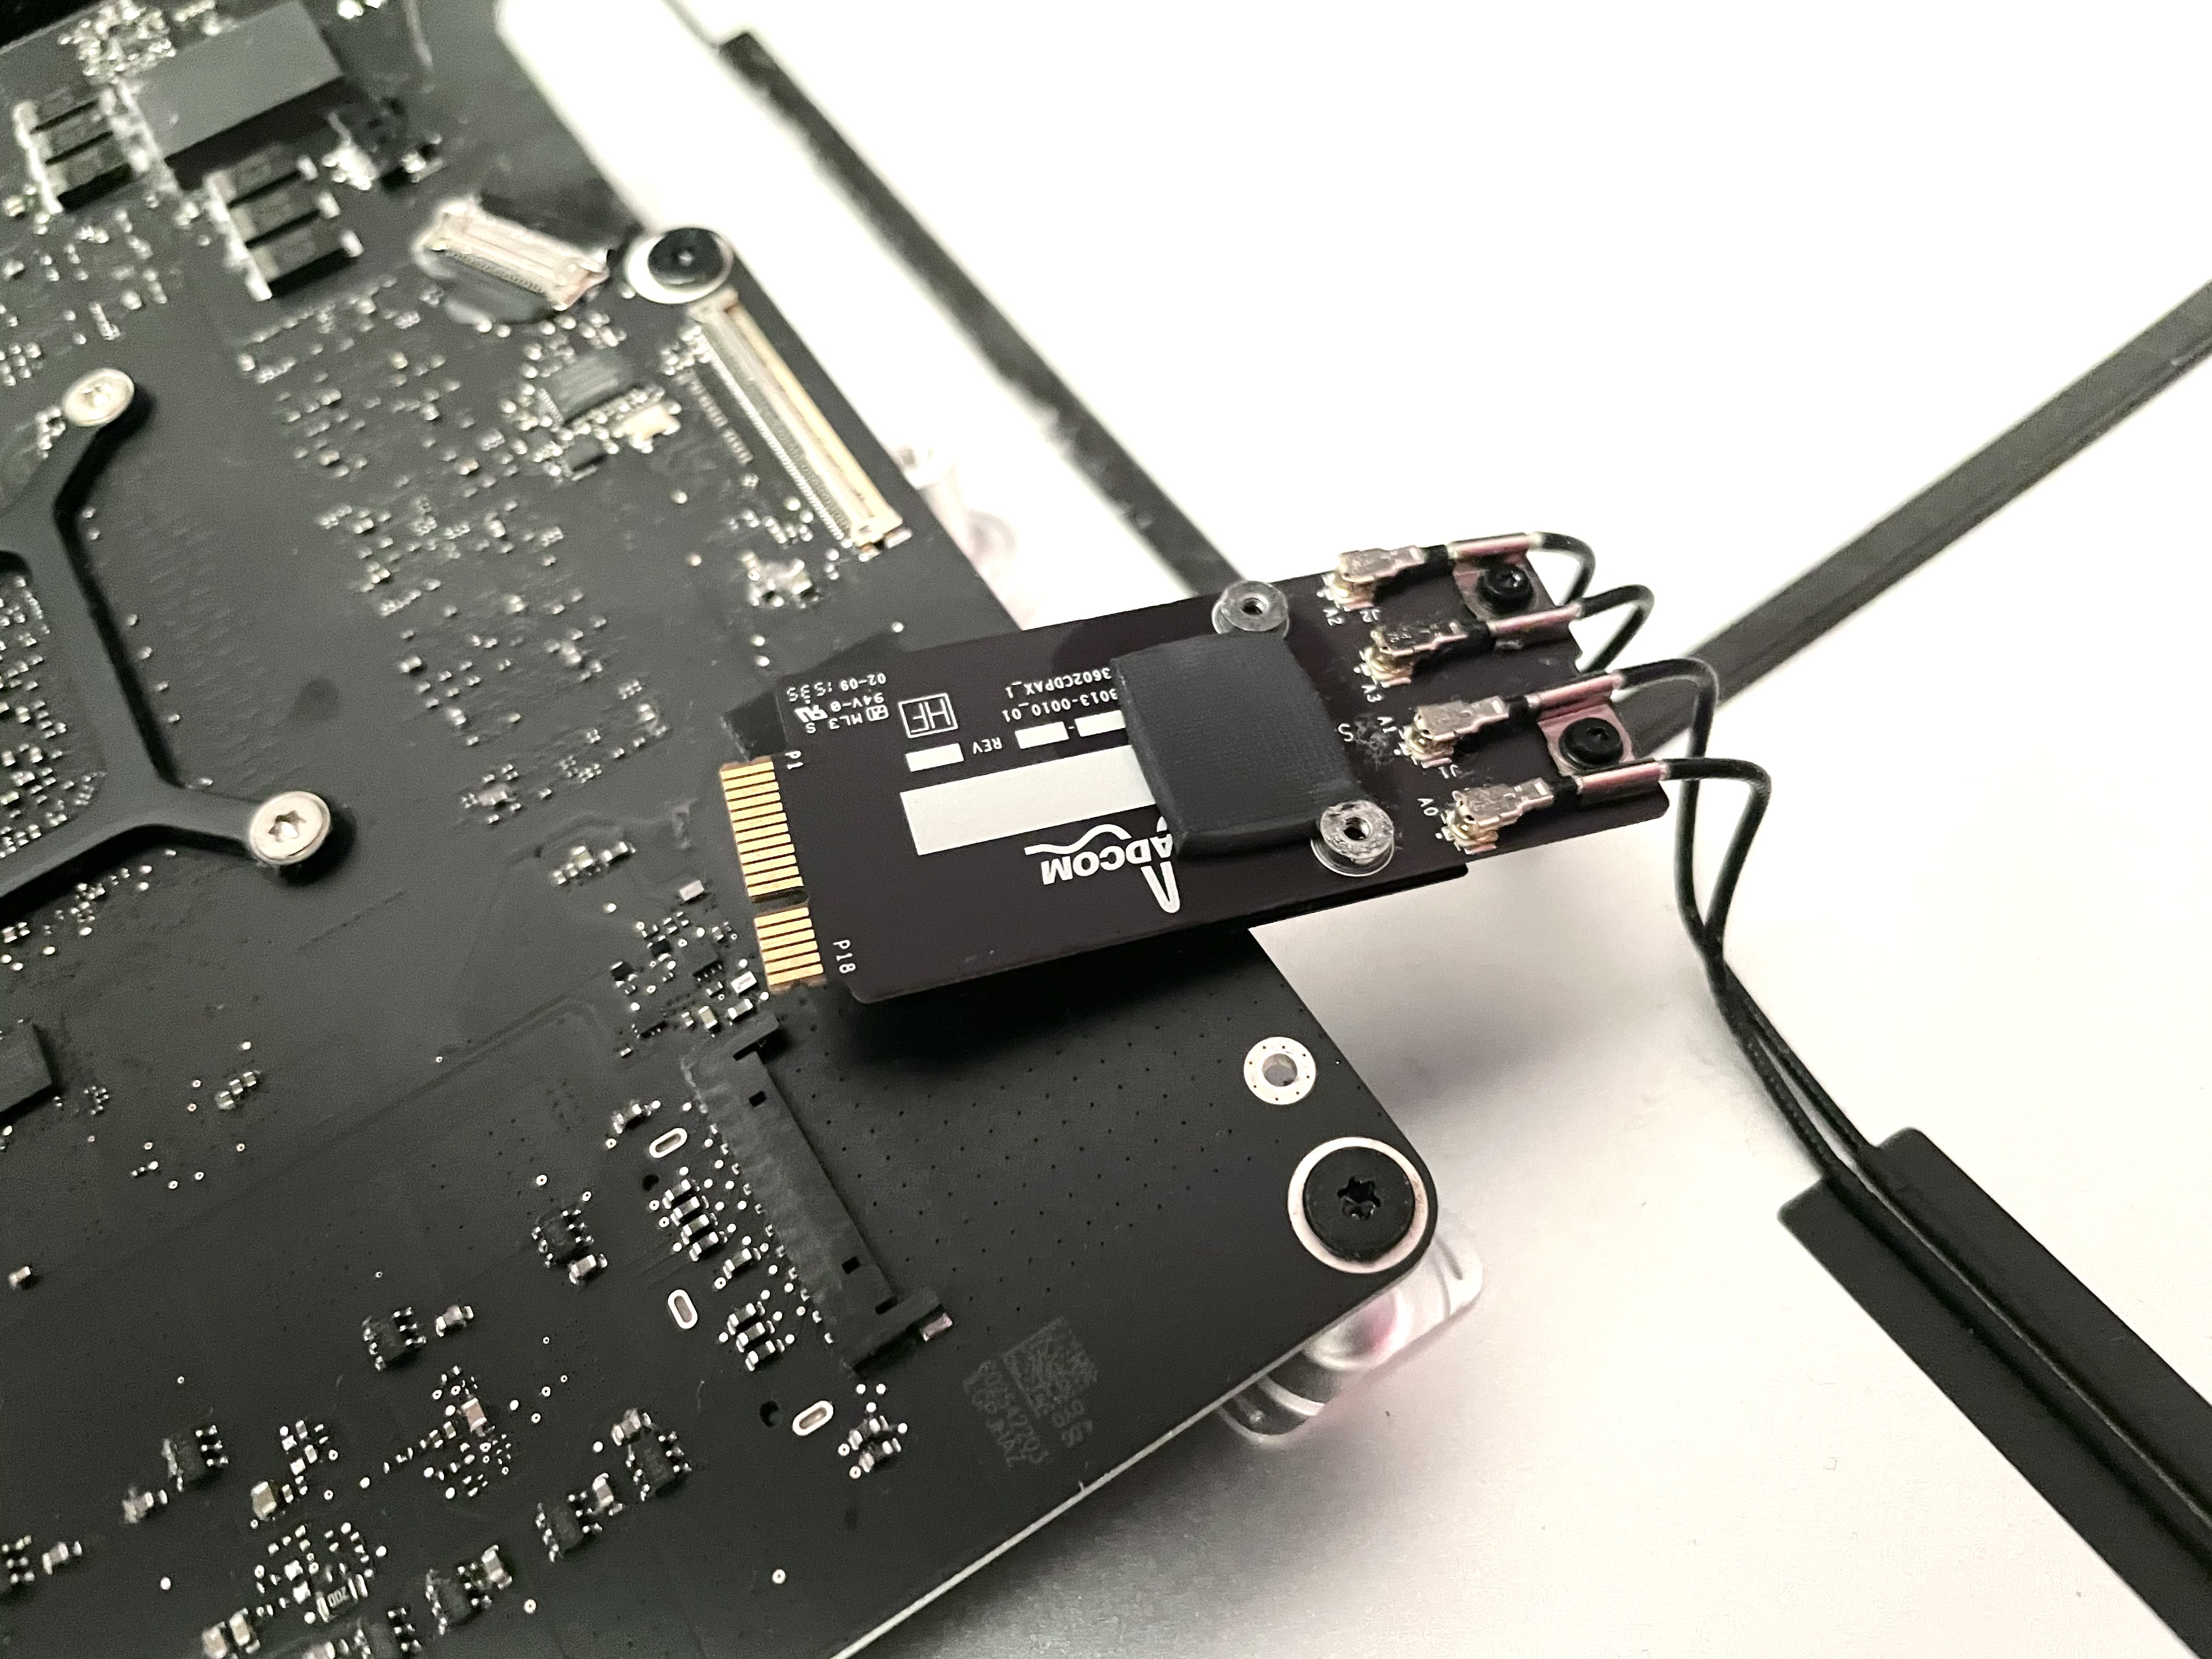
126 Commenti
Does it mean that I can install Mavericks to the new hard drive rather than Yosemite for imac retina new model. I really dont like Yosemite.
Hello,
So i have maxed out version of 2014 iMac 5k with 3TB fusion drive. I am looking to replace above described SSD with crucial 920 gb ssd. Is there other brands of compatible ssd's you would recommend? Will this new ssd still act as fusion drive or can I install OS X separately on it?
Thanks
If I want to swap the fusion drive with a SSD, do I need to remove the SSD-part of the fusion drive as well or can it be left behind?
Yes - you can leave it behind but at some point you will need to reformat and break the fusion into the 2 separate drives that actually there. Please backup first as this is a data destructive operation.
Chip T -
Does anybody know if 5K Retina iMacs purchased *without* Fusion Drives come with SSD connectors inside?
Answering my own question: YES
loccie -
I am also wondering, my Mac have only Flash SSD 512Gb - Apple SM0512L….do those Macs have the HDD brakets inside and the SSD/HDD cabel connectors???
Madrock -
What type of the SSD is used for the imac 5K.
check my post. I only found used in ebay, and I am not sure about the amperage.
I also not mentioned that there are some 1tb that are larger than the smallers gb. But that seems be ok
I just bought the late 2015 27 5k imac (fusion drive 1tb) and I intent to upgrade everything on it
since in the teardown we see this is the same ssd that was in the macbook pro retina 13" late 2013, and until 2015 macbook pro did not changed the ssd type... I looked for it on ebay, a lot of seller sell those apple used SSDs from some sellers include a Compatible list:
Mac Pro Late 2013 and newer
iMac Late 2013-
Mac mini 2014
Macbook Pro Late 2013-
MacBook Air 13 and 11" 2013-
size, pins, and voltage are always the same, but there is some variations in the Ampere spech. I tried find something about but I couldn't discovery if it will be relevant.
There are 2 and 4 lanes versions (4 is faster)
also there are samsung and sandisk options (any doubt abou the better?)
I ignored the amperage diference and bought one that is 2,5A (samsung MZ-JPU256T/0A6). the late 2015 came with a no specified manufacturer and no specs on it. I did right or a mistake?
Hello ....did you test it ? Works Ok on iMac 5K - Late 2015 - 17.1 ? Thank you !!!
ysaine -
I want to do the same thing, did this work for you?
michael -
Vey sorry for so late answer , I didn't saw this at the time. I was revising today the process and saw the question. It worked perfectly for me. You have of plenty options when installing the blade SSD, the better is also put a regular Sata SSD and have 2 SSDs. I also changed the i5 for a i7. It is a long time work but is not that hard, once you are opening the iMac worth change the processor. The used by apple in their upgrade option was the: i7 6700K 4.00 GHz Unlocked Quad Core Skylake Desktop Processor, Socket LGA 1151
Hi, does it still work as a “fusion drive” or two separated drives?
Thanks
SimonG80 -
Hi there. I’m planning to replace the blade ssd on my iMac 27” late 2015. May I know which SSD you’re using for purchase reference?
Thanks a lot.
I replaced the HDD with a Samsung 850 Pro (late 2015 iMac). Removing the "fusion drive" was not necessary -- if you install OS X from scratch, you can configure the two drives to work in parallel.
Thanks for answer my question, before ask :)
Can i just replace only the moving hard drive and leave the solid state the mac came with, that would make the world easy.
can i buy brand new 2016 imac 5k 27" 3.2GHz Processor
1TB Storage (without fusion drive) and do this upgrade after???
So - it's about an inch above the ports on the back - anybody want to try using a dremel to make the %#*@ door that should have been there in the first place? :)
I agree, why the !&&* did they put the blade on the back of the logic board, surely if anyone is tech savvy enough to take the glass off their imac they’re savvy enough to go through the ardous process of complete disassembly- surely that just makes it more inconvenient for the service centres
also why do you have to disassemble the entire machine to get the logic board out &&^&
I have a quick question, on the owc site they show you don't have to take the logic board out. You can actually replace the stock 7200 HD with a new bracket and a SSD, attach a heat sensor, plugin, and put screen back on.
Is that also a correct way to upgrade the system? I have a MK462/A1419 system that I want to replace the HD and add and SSD to the system. As a 2nd choice, am I able to add a SSD to the logic board that will now act as a fusion drive with the original HD in place? Thanks for all your help.
You don’t have to take the logic board out to just replace the mechanical HDD, but you do to replace the blade SSD portion of the hybrid drive in the machine.
You can just replace the SATA HDD with a SATA SSD - you’ll just need to split up the hybrid drive first in Terminal (recovery), install macOS on the new drive, and you can optionally rebuild the hybrid drive using the new SSD, or leave the internal blade SSD redundant. Not sure about the comparative performance gain of rebuilding the hybrid drive with the new SATA SSD, and the SATA SSD will be adequately fast for most people, so it’s easiest to just split the drive and leave the blade SSD redundant after the procedure.
Not so fast! Rebuilding a Fusion Drive config using a HDD makes sense! Running a Fusion Drive set with two SSD’s does not! You end up loosing performance! Its better to swap out both the impish Fusion Drive blade SSD with a bigger one (500GB ~ 1TB) making it your boot drive and then either leaving the HDD as your data drive or upgrading it as well.
Dan -
how can you lose performance by improving your hardware?
It’s not so simple! Think it this way I have a car which can go 50MPH (Car-A) and I have a second car which can go 75MPH (Car-B). I put a chain between them letting Car-A take the lead going as fast as it can which is 50MPH. So now we put Car-B in front so letting it go as fast as it can would be 75 MPH. But wait I’m not getting the additive of the two! Now lets add in a few factors the second car will add drag so while Car-B can go faster it can’t achieve 75MPH due to the drag (for arguments sake lets say it looses 5MPH).
I think you are starting to see the PCI SSD alone will get you more performance than tied in a Fusion Drive chaining it the slower SATA SSD to it. Remember the PCIe SSD is acting as a cache to the SATA drive so while cached stuff will be at the PCIe’s I/O speed anything that’s not will be slow!The other factor is the reconciling of the cache with the SATA drive take time.
To really gain performance you need to go into RAID setups Striping across a set of drives. Thats a technique Apple leveraged within the iMac Pro and 2019 Mac Pro with their custom Flash (SSD) controller.
Dan -
Still, it will improve the HDD prerformance. It won’t reach PCIe speeds, but it expected when buying a SATA SSD. You still have a minor performance boost too because of the PCIe drive caching the SATA SSD. Is it the best way to increase storage? No. Is it a viable opztion? Yes. Is it the best storage to performance to money option? Probably yes.
@cardegn - Using two SSD’s PCIe/NVMe Blade and replacing the SATA HDD for a SSD won’t get you any more performance than just using a PCIe/NVMe Blade alone. The PCIe interface is just so much faster than the SATA interface you are holding it back. There is no improvement beyond what the Fusion Drive already has cached. Then you’re back to the limits of the SATA based drive.
So while the boot up will be snapper, any real work won’t be any faster as the unique data will all be loaded afresh from the SATA drive.
What likely got you is how many performance tests work, as its data was cached. So a Fusion Drive will have the appearance of being great! But in truth its a data mirage! As all you are seeing it eh PCIe/NVMe performance not the SATA SSD’s.
Dan -
Did you get my point in the comment above? I agree with you that a single NVMe drive is faster, but it is very expensive too. Getting a SATA SSD offers a great upgrade for much less money. And, as far as i know, the actual thing that holds back the NVMe is the fusion drive protocol, so he can always decide to use the two drives as stand alone, getting full NVMe performance for what he (and not apple) choses, while still having great performances with everything else. Would you suggest everyone to trow away their HDD just because it is holding back the blade SSD while running in fusion dive mode?
I was only speaking about a dual SSD Fusion Drive set being pointless. Sticking with a just a SATA SSD alone is quite good! And for many it maybe enough, for others it may fall short.
Dan -
You are holding the blade SSD back with the HDD too. So ,getting it upgraded to an SSD makes sense to get much more fast space for much cheaper, and you can get another prestation boost by disabling the fusion drive and use the 2 SSD as stand alone drives.
I have a 2015 27'' retina with 256GB SSD and I want to put a 1 or 2TB SSD in. Do I need to do the full tear down, or can I just put it in place of where the HDD is in this demo?
To add an OMC 2TB SSD where the original HDD went requires changing out the cable, about a $30 part, but one that requires removing the main logic board. While there stuff in as big of a blade SSD as possible.
westwind -
Is it posible to use HDD and SSD without "fusion drive" functional? I have imac 5k with HDD only. But i want to add ssd as second drive. Thank you
Hello,
Is possible to add an SSD pci to iMac 5K 27" LATE 2015, which came without fusion drive?
I will have this connection on the motherboard?
Thanks
Same question?
michael -
I have the iMac 27 5K late 2015 with 1TB Fusion drive. The SSD drive is 24GB and the hard drive is 1TB 7200rpm. Can the hard drive be change to a Samsung 1TB SSD drive or not? I have not seen anyone commenting on this. Everyone seems to want to upgrade the SSD drive instead. I think the hard drive would be the easiest thing to do. Someone please help. Thanks
I own a Late 2015 27” iMac 3.2 GHz Quad-core Intel Core i5 with Retina 5K display and 1 TB HDD. I find it slow and want to install a Fusion Drive.
Question: Is the internal SSD in the 2013 and later MacBook series, specifically, the Late 2013 15" MacBook Pro exactly the same as the blade style SSD in the Late 2015 iMac?
MacBook Pro Replacement Drives:
https://eshop.macsales.com/shop/ssd/owc/...
I ask because I would like to take the 500 GB blade style SSD out of my late 2013 15" MacBook Pro and use it in the 27" iMac. I will also replace the current 1 TB HDD in the iMac with this 6TB drive:
https://eshop.macsales.com/item/Toshiba/... Then I can configure both drives as big ass Fusion drive.
FYI: I plan to replace the current MacBook Pro drive with a 1 TB SSD:
Hi guys, I'm Rik from Florence. Today I went to a apple reseller because my imac 5k 27 has only one 250gb ssd, without any other disk. They told me that my imac is not upgradable because inside there aren't any cable for an other disk. I asked if was possible to remove my ssd with other bigger but they said that maybe the ssd inside the imac is settled. Any other official upgrade on my imac is forbidden and will cause the warranty end. I think it's a shame. I paid more than 3000€ for an not upgradable computer??? ps. sorry for my poor english
Okay, so the late 2015 (October) 1TB Fusion has a 24gb SSD and a 1TB HDD in combination - My understanding is that the earlier 1TB Fusion Drives were 128GB SSD + 1TB HDD - and were mounted separately. What I am not sure of is whether the tiny 24gb is mounted on the logic board like the larger ones, or mounted inside the larger disc like some of the Seagate SSHD hybrid drives. That is my first question.
As to the question of whether the sockets for SSD are still in place to add a SSD to the iMac units that only come with the larger HDD, I think that was answered yes above. Now about the iMacs that come with only small SSDs (256 or 512) is there an unused SATA connector on the logic board where you could add a SATA cable and install another disc (SSH or HDD)? I do know there are cables available if the socket is there.
I'm about to pull the trigger on a late 2015 unit and wonder whether I want to get one with the 1TB HDD and add two big SSDs or just pay the extra $500 to get the model with the 2TB Fusion?
Hi Guys and SSD Experts .... :-)
I needa a hint from your end ... because I'm a little bit confused because most descriptions that I found are showing how to replace the internal HDD against a SSD.
I purchased a iMac 5k 27, with internal 256 SSD. from the Apple Store in 2015.
So it's a pure SSD Model (no Fusion Drive).
Now I would like to upgrade the 256 SSD with a larger 1 TB SSD.
My thought was that the iMac 5k SSD Version runs a normal 2,5 " SSD.
Is it possible to buy a normal 2,5 " SSD with 1 TB and to insert it at that place where normally the Fusion Drive is located?
Do I need any specific set of cables, etc because of an thermal sensor?
I prefer to runt he iMac with an larger internal SSD. So an external Thunderbolt SSD isn't my preferred option.
Thanks for any comments, support.
You have a 2.5" SSD and not a blade SSD? If your iMac has a 2.5" SSD, just remove the screen, remove the left speaker for access to the left hard drive bracket, unscrew and remove the left hard drive bracket, unplug and remove the SSD and install the new one.
If however your iMac came with a blade SSD only, you can install a 3.5" HDD or 2.5" SSD, but you need a mount to fit the 2.5" SSD in the 3.5" HDD bracket, if there's even a bracket there at all. If not, find a creative way to keep in it place I guess...
You also need a specific SATA cable (see guide I linked below). Use it as a reference to see where the HDD/SSD is mounted and where the SATA cable needs to plug in (it's not a normal SATA cable). I was able to connect the it without removing the logic board, but it's not easy as the logic board is installed backside up. It needs to connect to both its on-board power connector and the on-board SATA slot:
mikai -
Another note: thermal sensor is not required for SSDs on systems using OS X El Capitan/Sierra. I installed an SSD without one. No fan throttling at all.
mikai -
imac 27" 5k ssd (sm0256g) replacement---My computer has Apple sm0256g ssd... Can I use Samsung 960 Evo M.2 500gb Sata3 Pcıe 3200/1800 Ssd Mz-V6e500bw instead? please help me.
No, unfortunately. The proprietary Apple SSD has a unique slot configuration. It just simply won't fit. I've replaced the SSD of my iMac 27 5k and had to buy the SM0512G.
See the pictures below and look at the end of each. They are different.
960 EVO:
https://images10.newegg.com/ProductImage...
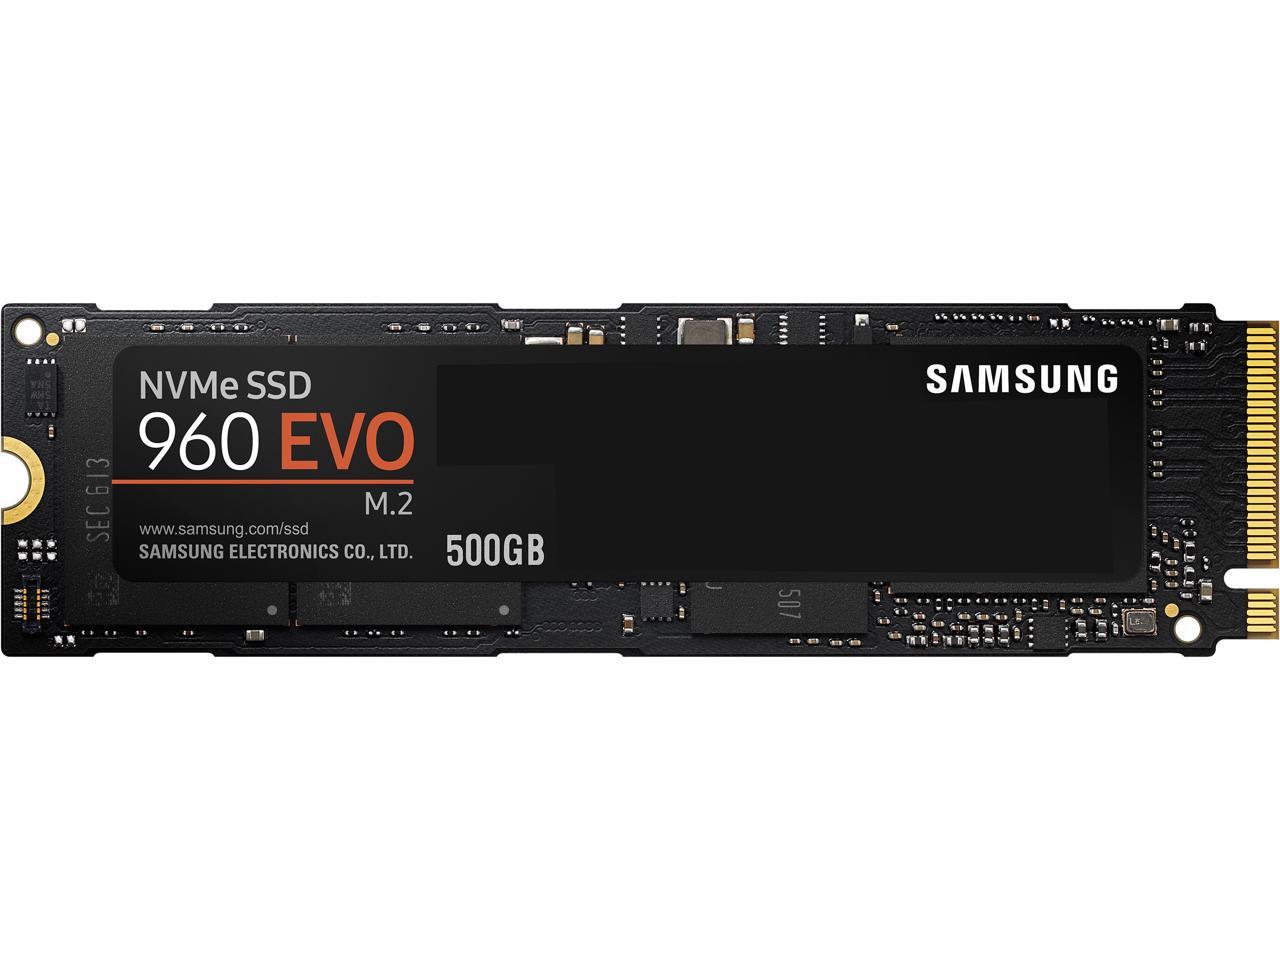
SM0256G/SM0512G:
mikai -
Hi Mikai, where did you buy your SM0512G? Thank you!
Ernest -
This would solve it?
OWD has SSDs that would fit, for example: https://eshop.macsales.com/item/OWC/SSDA...
Okay. External SSD thunderbolt drive only for me.
Hi there,
I would like to add a 256 GB PCIe SSD on my iMac 27 5k late 2015 which only has 1TB HDD. I read that it has the PCIe interface to install a blade SSD but I cannot find any on the Internet. Can someone please suggest me possible sellers (especially in Europe)?
Thanks in advance
iMac 27 5k late 2015:
Forgive me if this was asked already — but if I want to switch from a 24gig ssd / 1tb hdd fusion configuration to a strictly ssd config, which PCIe SSD can I use? I wrote OWC to see if I can use any of their PCIe blades, but they wrote back that they don’t make one that works for this model — but now that I’m doing a little more digging it looks like I’m finding old eBay listings for the SM0512G that point to it being used in the Macbook Air line.
Anyone have luck with an OWC PCIe blade as their main drive? Any lucky with a Macbook Air SSD?
If I’m going to upgrade to a SSD, I want it to use the fastest connection possible so the 2.5 drive isn’t optimal.
Any help appreciated, have a great day.
Matt
I remove the fusion drive(24GB ssd blade and 1TB hdd) and added a 512MB ssd blade(MZ-JPV5120/0A4) and 1TB ssd(Samsung).
The blade is doing read 1800MB/s and write 1400MB/s so I am happy with the upgrade.
BUT when I check the system preference, NVMexpress option tells me that there is no hardware…
(when the fusion drive was installed, it showed properly 5GT/s and 4 Lane…)
Can you tell me how to remove the 24GB ssd blade and install the fusion drive ?thank you very much.
Email:tigerpa6666@gmail.com
Blank -
Can you tell me how to remove the 24GB ssd blade and how to install the fusion drive?Thank you very much.
mail:tigerpa6666@gmail.com
Blank -
Not sure why the instructions call it adhesive, when it’s double sided tape. Calling it adhesive implies to me that it could be reheated to close things back up.
I’ve read that on High Sierra we can use N-941A adapter and Samsung blade drives in our iMacs 5K 2017
So Samsung M.2 Nvme 960 Evo through N-941A adapter should work.
Some reported nvme is seen on system as external drive and not bootable on beta High Sierra
Have anyone tested and can confirm?
All boot options must share the Main Drive format., My MacBook P booted of my SSD ext,
iMac stopped booting from same SSD at the last moment
During update the SSD was reformatted with the new APFS the fusion remained HFS
Hi I have a Imac 27” 2015, 3.2Hz, with 1 tb 7200rpm drive. When I want to replace the 7200rpm spinning drive to SSD. Is there another ssd inside the Imac I need to look for also? I just want to replace the 7200rpm with the samsung evo 850. Do I need to replace any other hardrive inside the Imac?
Depending on how your iMac was configured when you bought it, you may have both an SSD (shown in the guide you’re viewing now) and a standard spinny drive. If you’re looking to replace the spinny drive, the guide you want is this one.
Hi guys im thinking of upgrading my ssd blade . Ive been looking about and noticed the do a m.2 convertor Would this be possible to do and just buy a m.2 ssd ?. If not im looking into leaving that there and upgrading the hdd to Evo 850 ssd , Do i need the sensor kit , and i do need to un-pair the Fusion Drive. Thank you Guys
No, you want to get a real Apple drive The Ultimate Guide to Apple’s Proprietary SSDs
Dan -
Yes, you can upgrade your SSD Blade , you can buy M.2 NVMe Adapter 12x16 pin, and use any storage from Samsung EVO 970, they use the same chip as Apple and they are also a bit faster :)
Madrock -
For all: when swapping out either the blade or the HDD from a Fusion setup, you have to do a full backup to an external drive. Removing a drive will BREAK the Fusion drive like removing a drive in a RAID array.
After you upgrade, you have to re-create a fusion drive of the Blade and the spinner HDD. Google “do it yourself fusion drive” or search macsales.com (blog). After you build the new fusion drive, you can restore your backup to it (easy with CarbonCopyCloner, SuperDuper, etc.) You can even make a fusion of two SSDs.
First of all, thank you so much Sam for posting this guide. It was super useful to me. My late 2015 iMac was running very slow and I decided to upgrade it with both a 1Tb SSD and a 128Gb flash drive (from a 2017 iMac). I followed your tutorial and everything is working well so far, after installing High Sierra in the flash unit.
There is only one thing that I’m a bit worried about. When running the Black magic test, read speeds are around 2500Mb/s while write speeds stay much lower, at 750Mb/s.
Is that normal?
Thanks again
luis
Here’s a good reference The Ultimate Guide to Apple’s Proprietary SSDs
Dan -
I just confirmed with OWC. They do not have a part to replace/upgrade the PCIe SSD in the 5K iMac.
OWC does not offer their blade SSD’s for any of the iMac’s. Their position is it’s to risky for most people taking the logic board out. You can find the correct Apple SSD’s from a few sources.
Dan -
I have a iMac with SSD 128GB and 3TB fusion drive, my question is if i replace the 3TB hard disk and put a SSD drive will the system work as fushion drive?
I mean i i have 1TB SDD and the 128GB SSD stick can i use it as fusion drive .. will it be faster?
Not really, It would be smarter just running the two drives independently (dual drive). Setup the blade SSD as your boot drive and your new SATA SSD as your data drive. One of the issues you face is the size of the blade SSD may not offer enough free space to cache your work if you are working on large photo’s, vid’s or music pieces.
Dan -
It will be twice as fast, but you cannot replace one of the drives easily, you need to do a full backup/restore. I wouldn’;t do it because th 128GB is just not worth it.
I have the same fusion drive setup (stock 3TB HDD, 128GB Blade SSD) and would like to know how a separated drive setup works (using the suggestion to make 1 a boot drive, the blade, and 1 a data drive, the other one). Is the idea behind this that only your OS lives on the blade drive, while all data lives in the data drive? Or is it the OS+apps in the boot drive? How exactly is this setup?
My questions has already been answered. Found a previous answer from Dan here, under comment from Nome Park: Replacing HD portion of Fusion Drive with SSD
What nobody says:
1) be careful when you open the display, the adhesive stuff from apple is easier to remove than the replacement you will put - test your setup properly before you close the screen (I managed to break it when I opened it for the second time)
2) if you put the hdd from your fusion drive into an external case (usb), your mac won’t be able to mount the filesystem: make sure you copy or backup all your date before you remove the hdd. even disc repair tools were not able from the fusion drive
3) there’s not need to remove the blade ssd if you’re just swapping your hdd with an ssd.
I have a retina 27” imac late 2014. It was supplied with a 1TB HDD only. Does anyone know if there is an M2 socket available on the logic board and if so, is it worth installing an M2 250GB and a 2TB 2.5” SSD. Or should I just install the SSD?
Hello David,
There is no M2 slot on the Logic Board. It’s actually a PCIE slot located on the inside of the Logic Board. It’s possible but not really worth upgrading the PCIE card as Sata SSD prices are getting pretty cheap. Install a Sata SSD and fuse the drives together.
Anthony -
I am currently replacing the PSU on a mid 2015, 27” 5K iMac. I have not torn into the logic board but I’m going to assume the blade SSD is there making this an iMac with a fusion drive. Anyone know the standard capacity of the blade SSD? Is it mSATA or M.2 form factor or something proprietary? For storage, if I am looking to increase speed primarily and capacity secondarily what’s my best storage upgrade approach for this type of set up? Oh and finally is there a solution that would allow me to use APFS as the file system. Thanks!
Sorry folks looks like there’s quite a bit of comments I should go through. If my questions have been asked and answered, my apologies :)
sagert -
Standard capacity of the PCIE SSD is 128 GB. Replace your Hard Drive with a Sata SSD for the best price per performance. You can then re-fuse both drives and format to APFS if your running High Sierra or higher.
Anthony -
Hi!
I want to change the HDD to an SSD. I purchased the SSD and installation tools including adhesive tape and the pizza roller … :-) I read about high spinning fans and i am wondering if the problem is still out there so i need the special cable. My iMac is a 2017 version.
All i found is cables for 2011 and 2012 iMacs.
Will the 2,5” SSD connect to the SATA HDD cable or is there any adaptor needed?
Please help
Thank you!
Hello Jonas,
You do not need to worry about high fan spin on this model. Just be careful swapping the drive and you’ll be fine.
Anthony -
Für den Austausch einer defekten HDD habe ich die sehr ausführliche Anleitung ohne Probleme befolgt und in kurzer Zeit einschließlich Klebestreifen ausgeführt.
Danke für Eure Mühen, es gibt Sicherheit und macht Mut.
For the replacement of a defective HDD, I followed the very detailed instructions without any problems and executed in a short time including adhesive tape.
Thank you for your efforts, there is security and courage.
mandy
Thanks for the tutorial really explain it well :)
Hi Sam, thanks for your post, but there is more important information here missing…..
could you please add comment with all compatible (non-Apple) NVMe M.2 Blade drives and adapters for iMac 27” 2017, A1419 ……like Samsung 970 EVO + Sintech M.2 2280 adapter for Mac?
Thank you
The guide is correct as is! The guide is setup to use the original Apple SSD’s. It’s not setup nor do we recommend using M.2 SSD’s with any adapter in iMac’s.
While we understand the desire to find a cheaper solution than the more expensive custom Apple SSD’s, the amount of work to get to drive as well as the history of many adapters/SSD drives breaking down it does not make economic sense on the long run.
Dan -
Most Apple original SSD blades are now older and slower than the new Blade SSD’s on the market today.
I recently upgrade my MacBook Air (early 2014) from 128GB SSD Blade (SanDisk) to 1TB (ADATA . For this upgrade I used M.2 NVMe Adapter cost 3.50 usd and the M.2 NVMe 2280 SSD, XPG was around 220usd.
No other adjustments needed, sleep function and hybernation works out of the box. The read and write speeds, APFS (Encrypted) I get now are 5 times higher than with my original blade. The new Blade has also come with a heatsink, it fits into the MacBook Air too.
This SSD Blade also has low power consumtion and the is no change in battery life. Intel 760p blades are even more power save devices.
R/W Speeds btw Samsung and XPG you will never notice, but you will defenetly notice the price.
Samsunng blades can be used in iMac’s as they need a bit more power.
Madrock -
The newer SSPOLARIS x4 PCIe/NVMe is no slouch! Its the same as the Samsung 970 EVO & PRO SSD! So I don’t see the need to make such a jump and the reliability of the custom SSD’s beats using an M.2 SSD with these fangled adapters. FYI I’ve pulled out over a dozen putting in the correct SSD.
The amount of difference the Samsung 970 EVO Plus has over the older 970 SSD’s is only an improved sequential write. While its an improvement its not one you will likely encounter as needed for most of what your system does or offer any real saving. This is like arguing the differences between two top race cars performance differences, while trying to drive on city streets!
Remember we are talking about a the iMac here, not a MacBook Pro or air at least they are a lot easier to get to.
Dan -
I’m a newbie to macs. My question is, how to back up and restore the OS to the new blade SSD?
Restart your system and press the Command (⌘) and R keys to enter into Internet Recovery. No need to back up the OS at all! But you likely want to backup your apps & data using TimeMachine first onto an external drive.
Reference: About macOS Recovery
Dan -
I have an imac 2017 27” with 3 TB Fusion Drive.
Can i use in the NVME Port Samsung MZ-V7S1T0BW SSD 970 EVO Plus 1 TB M.2 Interne NVMe SSD (bis zu 3.500 MB/s) without adaptor
Does this mac have 2 or 4 lanes?
APPLE SSD SM0128L:
Kapazität: 121,33 GB (121.332.826.112 Byte)
TRIM-Unterstützung: Ja
Modell: APPLE SSD SM0128L
Version: CXS7CA0Q
Seriennummer: S3CWNY0J223995
Link-Breite: x4
Link-Geschwindigkeit: 8.0 GT/s
Absteckbares Laufwerk: Nein
BSD-Name: disk0
Partitionstabellentyp: GPT (GUID-Partitionstabelle)
Wechselmedien: Nein
Volumes:
EFI:
Kapazität: 314,6 MB (314.572.800 Byte)
BSD-Name: disk0s1
Inhalt: EFI
UUID des Volumes: E783267B-A4C3-3556-B751-DBED770EB996
disk0s2:
Kapazität: 121,02 GB (121.018.208.256 Byte)
BSD-Name: disk0s2
Inhalt: Apple_APFS
Andreas
The blade SSD used in your system is not M.2 it’s a custom Apple SSD made by Samsung for Apple. You should stick with the SSD the system was designed to use. Review this great guide The Ultimate Guide to Apple’s Proprietary SSDs
Dan -
Your current blade SSD is 4 lanes. As to what you buy I would recommend you get the correct 4 lane PCIe/NVMe SSD Apple uses. (custom Apple SSD - Samsung SSPOLARIS series)
Dan -
My apple service says that blade ssd must be apple branded you cannot use other brands because it cause problems.
Does anybody aware of any issues?
Thanks
I too don’t recommend using other SSD’s with odd adapters in the iMac systems. At least in a MacBook you can get to them easily enough to replace as the adapters and SSD’s being sold don’t tend not to hold up well over time.
The old saying: You get what you pay for. That’s very true here! I have a very full drawer of used adapters and SSD’s that came out of MacBook Pro’s and iMac’s either replacing them with the correct SSD or finding alternative drive solutions depending on the system series.
As to the issues:
● Sleep mode won’t work correctly (MacBook Pro’s)
● Excessive CRC errors
● Garbage collection processes fail to work
● Wear leveling process gets corrupted when the drive is too full or has hight data I/O concurrently.
● Over provision blocks not used.
● General corruption - Not recoverable.
Dan -
A late reply that may help others. OWC Aura Pro X2 is great.
Hi, thx for the tutorial.
So it’s possible to install a SATA SSD 1TB + PCIE SSD 1TB?
Is any SSD suitable?
Your system has two ports for drives: A 3.5” SATA III (6.0 Gb'/s) drive bay for a 3.5 HDD (or you could swap it out for a 2.5” SSD). And a second custom Apple PCIe/NVMe SSD blade interface.
Presently Apple offers a 2 TB PCIe/NVMe blade drive as the largest and Samsung offers a 500 GB, 1TB ,2TB,4TB or 8TB 2.5” SATA drive.So if you have the bucks max out the blade SSD with the 2 TB drive and throw in a 8 TB SATA drive for the deepest storage you could pull off internally! Or any combination!
Dan -
Hello Guys,
this explanation is great but I was still not able to find out which Blade SSD will work with a late 2015 iMac and/or if I need an adapter?
Please help!
I strongly recommend you stick with the Apple custom blade SSD’s. Here’s one source 512 GB Samsung SSPOLARIS Blade SSD
Dan -
So I did the blade exchange, and a ssd 2,5 inch as well. And I am regreting the decision for the owc aura pro x2 because of the kernel panic caused by a wrong or missing hibernation procedure. I first ordered and did the fix on my iMac. Should have done a research first. There a lots of reports about many owc blade ssds by owc which causes kernel panics. And why on earth are they selling there stuff with this error? Every time my iMac goes to sleep the machine panics. So I turned hibernation off, only the screen turns off. Not a good way. The point is: it takes a couple of hours to get the iMac apart and back together only for the blade ssd. Plus the glue stripes are necessary every time the panel is taken off. How about returning the blade ssd? Besides that: The Tutorials for the fix are superb and very easy to follow. I was stunned when I realized that I went through the hole process and everything just worked fine in the end. Except the OWC Error.
The idea with the hole in the back is good. :-)
Thank you for sharing it with us, I have the same IMac late 2015 trying to upgrade the NVME M.2 but not detected! I wonder if you could help me, what I do wrong. I bought Samsung 970 EVO Plus 2TB NVMe M.2 and this SupaGeek M.2 NGFF NVMe SSD Adapter Card from amazon, any suggestion, please
Do you have a MacBook Pro which supports the adapter and blade drive? If you do I would get it working there. I’m not a lover of these adapter/SSD setups in iMac’s given the difficulty to get to the port. I use either the custom Apple SSD’s from Samsung or I use the OWC drives.
Dan -
As far as I read, you have to do a new installation of macOS with a bootable USB drive, otherwise the NVMe-drivers are not included in the system. The USB-drive seems to be mandatory, so also do not use the interal recovery partition.
Zumo -
The macOS release is the variable. Adding a blade SSD with the High Sierra or newer on your current HDD you won’t have an issue prepping and installing the blade SSD. If you are replacing your current blade SSD with a newer larger one then you could encounter an issue if you didn't’t use the correct internet recovery option or if you haven’t setup a bootable drive first.
.
I still recommend sticking with either a real Apple SSD or OWC SSD in a iMac as being the smarter choice given how much work it is to go back in to replace it again as these M.2 adapters are just not that good.
Dan -
After reading the comments, am I correct in assuming unless you have deep pockets, that it is way better to leave the PCIe drive alone and only upgrade the SATA drive. I have the 1tb fusion drive.
Not that simple! The PCIe/NVMe blade SSD is much faster than the SATA III (6.0 Gb/s) drive interface. So while the blade SSD is more expensive it might be more useful!
Do keep in mind the Fusion drive you currently have is using both interfaces but the current blade SSD is quite small! Its just being used as a cache drive to your 1TB HDD.
So if your workflow is video or music I would go with the blade SSD a 500GB would be a good size for small projects.
Dan -
2017 model, done in 2021
For anyone looking and wondering….
I used this guide to update my 2017 27” iMac. I’ve used a Crucial MX500 SSD for main storage and an OWC Aura Pro X2 for the NVME. I’ve gone from a best of 761 MB/s write, 1331 MB/s read to 2320 MB/s write, 2858 MB/s read with them configured as a Fusion drive.
Big things I noticed:
• READ THE COMMENTS UNDER EACH STAGE. There are useful updates for later iMacs.
• Watch out for the narrow cable from the logic board to mic in the chin of the machine. The ZIF is tiny but work - you just need a deft hand.
• Do take out the support bracket under the lower edge to the display (see comments).
• Well worth creating a bootable installation disk. https://support.apple.com/en-gb/HT201372 Creating a Fusion drive in the tools in Mojave and later are a breeze. https://support.apple.com/en-gb/HT207584
• As they are split 1TB / 480GB, I’m sure some would suggest splitting them, but this is more than fast enough to me to not have to think about what goes where.
You’ll get better performance just using the blade SSD alone!
Dan -
Hello,
Is the iMac 27” late 2015 17,1 fusion drive the same steps? No extra or different cables?
A Fusion Drive is a logical Drive made up of two physical drives! The base drive is a spinning SATA Hard Drive (HDD) and the other is a PCIe/NVMe blade drive which is nothing more than a hidden cache drive which is what this guide allows you to replace from its tiny 24 G blade drive with a tTB HDD or 128 GB blade drive with a 2TB HDD.
Other than the display adhesives to reattach the display assembly nothing additional is needed.
The only additional steps is depending on the macOS release is breaking the Fusion Drive set within the OS space.
Dan -
The question before I order:
My iMac 27inch Late 2015 EMC: 2834 has an original HD Drive, can I still purchase the Blade SSD as an upgrade? or Do I need the older SSD version I see listed ???
Here's a great reference The Ultimate Guide to Apple’s Proprietary SSDs
Your system offers a NVMe/PCIe 3.0 x4 interface so any of the 5th generation Apple blade SSD's will work as well as the OWC Aura Pro X2 SSD
Dan -
If this has been answered, my apologies. I did not see a clear answer.
I have an iMac 27" 5k Late 2014 that came stock with the 1TB blade SSD on the back of the motherboard. I knew there was an open spot for a 3.5/2.5" drive, but my system did not come with the SATA cable, L/R mount plates, or the tiny mount posts to hold the drive in place. I sealed it back up and went external. It's doable, but that's a lot of work and more $$$.
I'll probably convert it to a monitor down the line - How to make a DIY Studio Display With A 27" 5k iMac
Merci pour ce tutoriel, très, très bien fait. Je trouve que ce genre de tutoriel est bien mieux que des vidéos YouTube, on va à sa propre vitesse, pas de retour en arrière ou autre... J'ai suivi la procédure pour un changement de SSD sur un iMac 27 2017... Tout s'est hyper bien passé, je suis ravi !!!
Thank you for this fabulous guide, today I've installed an Aura Pro X2 on my Mid 2015 27" 15,1 iMac. Unfortunately, plugging a 1tb Crucial MX500 instead of original 1Tb 3.5" classic HDD I've got a lot of problem with fan and after almost 2 hour Recovery did not install the OS on my Blade. So I've put back original 7200rpm HDD and everything went fine. Tomorrow I'll receive 32Gb ram and the adapter with sensor temperature. My question is, is normal an average speed of 700MBps read/write on my blade? Is possibile upgrading ram and putting a second SSD speed of NVME will be fast? Thank you for your support and sorry for my English ;)
Franco
Without the sensor that is expected as your system is running in CPU Safe Mode ramping up the fan and lowering the CPUs clock which in turn slows I/O
Dan -
Perfect guide. This was helpful step by step. If you don't know the mm of your screws, grab a caliper and it helps a bunch! Especially for sizes that are close together. Thank you for this guide!
This instruction page is not clear and is ambiguous if you have to do all the steps to just change the power supply please clarify another words do I have to remove the speaker and the hard drive to replace the power supply?
crawfordjohn - Replica
This is a display removal guide not the power supply guide!Here’s the guide you need to follow for that Sostituzione alimentatore iMac Intel 27" EMC 2546
Dan -
Didn’t need the cardboard wedge to remove the display. Waste of money. Lay your Mac on its back.
James Clive - Replica
Die verlinkte Karton-Reparaturhilfe ist für den 21"-iMac. Passt sie auch 1:1 für das 27"-Modell?
Stefan - Replica