Introduzione
Ti insegneremo per prima cosa come rimuovere la batteria e il pannello superiore sul retro della console, per poi accedere al joystick per pulirlo o sostituirlo.
Cosa ti serve
-
-
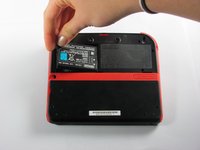
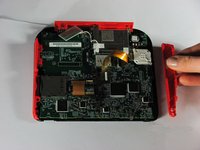
Rimuovi le due viti imperdibili che tengono il pannello superiore nel retro del dispositivo.
-
-
-
-
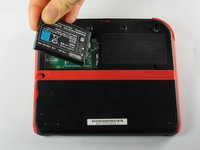
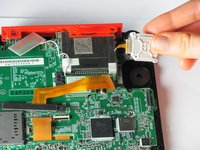
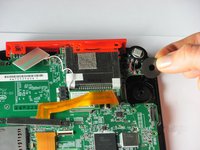
Rimuovi il pulsante dorsale nell'angolo in alto a destra tirandolo verso l'alto e verso l'esterno.
-
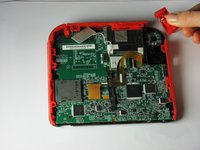
Rimuovi il pannello sul lato destro tirandolo in fuori.
-


Per riassemblare il dispositivo, segui queste istruzioni in ordine inverso.
Per riassemblare il dispositivo, segui queste istruzioni in ordine inverso.
Annulla: non ho completato questa guida.
Altre 25 persone hanno completato questa guida.
Un ringraziamento speciale a questi traduttori:
100%


Questi traduttori ci stanno aiutando ad aggiustare il mondo! Vuoi partecipare?
Inizia a tradurre ›
Team

Cal Poly, Team 70-1, Forte Winter 2015 Membro di Cal Poly, Team 70-1, Forte Winter 2015
CPSU-FORTE-W15S70G1
4 Membri
35 Guide realizzate
12 Commenti
My ribbon cable is broke, Is there a way to fix it?Thanks.
When I put the circle pad back in, my 2DS thinks that I am holding up and right on it, when in reality it is in the neutral position. Please help.
Use the calibrate option in system settings. Also make sure the cable is connected nicely.
Recalibrate it in system settings.
The guide fails to mention that the joystick ribbon cable is locked into the motherboard. You can use a spudger to lift the grey tab, leveraging upwards on the side opposite of the ribbon cable. The tab will pop up and should make getting the ribbon cable out (and back in) easier.
I followed this guide and ripped the ribbon cable while attempting to get it connected back to the system. If I had known the grey tab unlocks, I might not have ripped the cable by trying to force it back under the pins. My iFixit tweezers were also very sharp, and may have cut the ribbon cable. Would anyone be able to recommend something gentler for the ribbon cable?