Introduzione
Usa questa guida per sostituire o aggiornare il tuo hard drive.
Cosa ti serve
-
-
-
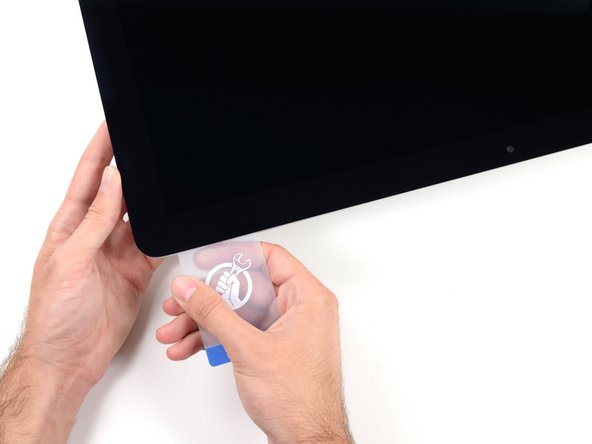
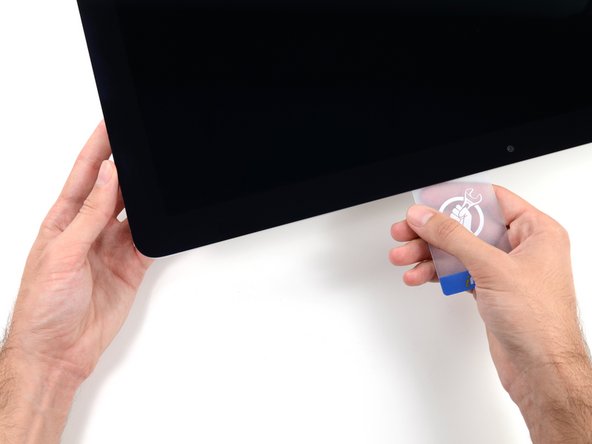
A partire dall'angolo superiore destro dell'iMac, inserire una scheda di plastica fra il display e il telaio.
-
-
-
-
Rimuovi le seguenti viti che mantengono al loro posto le staffe di bloccaggio che fissano il disco rigido alla scocca posteriore:
-
Due viti Torx T10 da 21 mm sulla parte sinistra della staffa del disco rigido.
-
Una vite Torx T10 da 9 mm.
-
Una vite Torx T10 da 27 mm.
-
-
-
Solleva l'hard drive dal bordo più vicino alla ventola e tiralo lievemente fuori dal suo alloggiamento.
-
-
-
Rimuovi la copertura flessibile del disco rigido partendo dall'angolo in alto a sinistra.
-


Per riassemblare il dispositivo, segui le istruzioni nell'ordine inverso e usa la nostra Guida alle strisce adesive per riattaccare il vetro dello schermo.
Per riassemblare il dispositivo, segui le istruzioni nell'ordine inverso e usa la nostra Guida alle strisce adesive per riattaccare il vetro dello schermo.
Annulla: non ho completato questa guida.
Altre 344 persone hanno completato questa guida.
Un ringraziamento speciale a questi traduttori:
100%


Questi traduttori ci stanno aiutando ad aggiustare il mondo! Vuoi partecipare?
Inizia a tradurre ›


41 Commenti
I used the iMac Opening Tool just as shown in this guide to separate the tape. DISASTER! The screen cracked! I used the tool slowly and carefully and despite this, the screen cracked. I should have simply used a guitar pick. That said, while I was inside my iMac replacing the Harddisk with a SSD, which was pretty easy to do, I decided to also see if I could replaced the 8GB RAM with 16GB RAM WITHOUT removing the logic board, as shown in other instructions on this site. I found that by simply removing the fan assembly, this makes enough room to reach behind the logic board and unclip the 2 memory modules. I installed 2 8GB modules (1600MHz DDR3L SO-DIMM PC12800 204 Pin) without much trouble. I used a plastic stick to reach behind the logic board and unclip the existing memory modules, then carefully inserted the new ones and clipped them into place. This is much easier than removing the power supply and logic board and all of the associated connectors and screws.
I had to replace the HD as it failed after less than two years. It was a good opportunity to increase the RAM from 8 to 16 GB. So I ordered the RAM chips from Kingston and a 256 GB SSD from Angelbird.
The repair went smoothly: to anyone trying this, please carefully follow the iFixit step-by-step guide. I recommend reading at least twice the whole procedure *before* beginning. Check all the photos. During the operation itself, I had the guide open before my eyes on my iPad and followed it step by step. The opening tool is a bit fragile, the wheel got damaged after the operation, but I guess it was designed to be used only once. After all, the adhesive strips can also be used only once!
For those replacing the hard-disk with an SSD: I highly recommend the Angelbird model "SSD wrk for Mac" (http://www.angelbird.com/en/prod/ssd-wrk...), for several dollars more you spare yourself the need to use additional software to enable TRIM or persuade the fans of your Mac that the HD's temperature is Ok.
Thanks for the tip on the Angelbird, working smoothly so far!
Elling -
Hi! Thanks for the tip! Do you know if can I put an SSD on an imac 21.5 in late 2012 ?