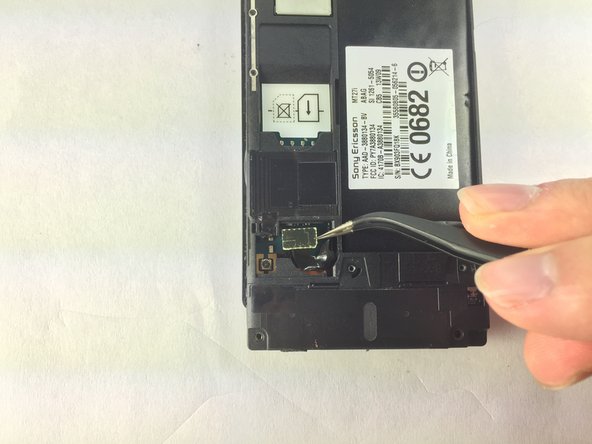
Salta al contenuto principale

Sony Xperia Sola Speaker Replacement

Cosa ti serve

  1. Sony Xperia Sola Speaker Replacement, Speaker: passo 1, immagine 1 di 1
    • Lay the phone as shown and put the camera facing up.

  2. Sony Xperia Sola Speaker Replacement: passo 2, immagine 1 di 2 Sony Xperia Sola Speaker Replacement: passo 2, immagine 2 di 2
    • Push the back cover as shown, then lift the cover off.

  3. Sony Xperia Sola Speaker Replacement: passo 3, immagine 1 di 3 Sony Xperia Sola Speaker Replacement: passo 3, immagine 2 di 3 Sony Xperia Sola Speaker Replacement: passo 3, immagine 3 di 3
    • Remove the five screws as shown on the phone by using 26 Bit Kit.

    • Use a T6 screwdriver bit to remove top two screws.

    • Use a J000 screwdriver bit to remove the bottom two screws.

    • Use a T3 screwdriver bit to remove the middle screw (close to camera).

  4. Sony Xperia Sola Speaker Replacement: passo 4, immagine 1 di 2 Sony Xperia Sola Speaker Replacement: passo 4, immagine 2 di 2
    • Use plastic opening tool to remove the bottom white cover as shown.

  5. Sony Xperia Sola Speaker Replacement: passo 5, immagine 1 di 2 Sony Xperia Sola Speaker Replacement: passo 5, immagine 2 di 2
    • There are two additional screws under the bottom white cover as shown.

    • Use T3 drivers to remove two additional screws as shown.

  6. Sony Xperia Sola Speaker Replacement: passo 6, immagine 1 di 3 Sony Xperia Sola Speaker Replacement: passo 6, immagine 2 di 3 Sony Xperia Sola Speaker Replacement: passo 6, immagine 3 di 3
    • Using plastic opening tool, lift to remove the small black cover on the bottom left of phone as shown.

    • Then, using tweezers to lift the connector straight up to disconnect the battery's circuit as shown.

  7. Sony Xperia Sola Speaker Replacement: passo 7, immagine 1 di 3 Sony Xperia Sola Speaker Replacement: passo 7, immagine 2 di 3 Sony Xperia Sola Speaker Replacement: passo 7, immagine 3 di 3
    • Turn the phone onto its side and insert a flat object and gently remove cover, using plastic opening tool as shown.

  8. Sony Xperia Sola Speaker Replacement: passo 8, immagine 1 di 3 Sony Xperia Sola Speaker Replacement: passo 8, immagine 2 di 3 Sony Xperia Sola Speaker Replacement: passo 8, immagine 3 di 3
    • Flip over the black back cover and locate the speaker phone at the bottom, then use the tweezers to remove the speaker. It is glued to the back cover so a little force will be needed.

Conclusione

To reassemble your device, follow these instructions in reverse order.

Altre 3 persone hanno completato questa guida.

Bo Wu

Membro da: 02/15/17

292 Reputazione

2 Guide realizzate

Team

USF Tampa, Team S5-G3, Lacy Spring 2017 Membro di USF Tampa, Team S5-G3, Lacy Spring 2017

USFT-LACY-S17S5G3

3 Membri

2 Guide realizzate

0 Commenti

Aggiungi Commento

Visualizza Statistiche:

Ultime 24 Ore: 0

Ultimi 7 Giorni: 0

Ultimi 30 Giorni: 0

Tutti i Tempi: 325