Salta al contenuto principale

Sony WH-CH720N Volume & Noise Cancelling Control Button Replacement

Cosa ti serve

  1. Sony WH-CH720N Volume & Noise Cancelling Control Button Replacement, Battery: passo 1, immagine 1 di 3 Sony WH-CH720N Volume & Noise Cancelling Control Button Replacement, Battery: passo 1, immagine 2 di 3 Sony WH-CH720N Volume & Noise Cancelling Control Button Replacement, Battery: passo 1, immagine 3 di 3
    • Remove the four 5 mm screws in the right using a Phillips #00 screwdriver.

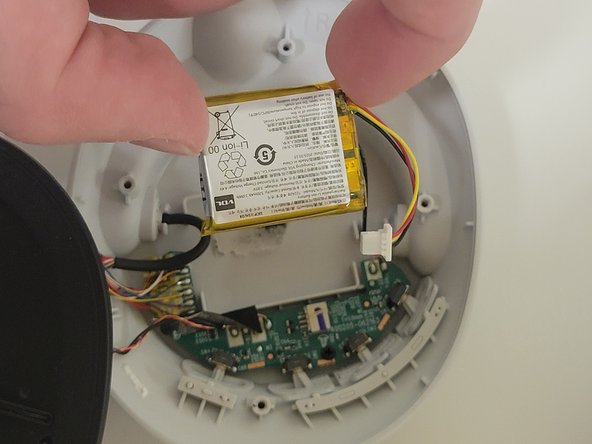
    • Remove the speaker panel to reveal the battery.

  2. Sony WH-CH720N Volume & Noise Cancelling Control Button Replacement: passo 2, immagine 1 di 2 Sony WH-CH720N Volume & Noise Cancelling Control Button Replacement: passo 2, immagine 2 di 2
    • Unplug the battery with tweezers

  3. Sony WH-CH720N Volume & Noise Cancelling Control Button Replacement: passo 3, immagine 1 di 3 Sony WH-CH720N Volume & Noise Cancelling Control Button Replacement: passo 3, immagine 2 di 3 Sony WH-CH720N Volume & Noise Cancelling Control Button Replacement: passo 3, immagine 3 di 3
    • Gently remove the battery from the device using the plastic spudger.

  4. Sony WH-CH720N Volume & Noise Cancelling Control Button Replacement, Volume & Noise Cancelling Control Button: passo 4, immagine 1 di 3 Sony WH-CH720N Volume & Noise Cancelling Control Button Replacement, Volume & Noise Cancelling Control Button: passo 4, immagine 2 di 3 Sony WH-CH720N Volume & Noise Cancelling Control Button Replacement, Volume & Noise Cancelling Control Button: passo 4, immagine 3 di 3
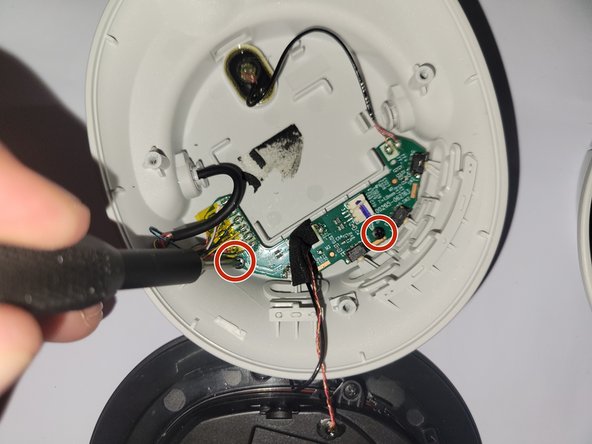
    • Unscrew the two 3 mm screws retaining the circuit board to the headphones.

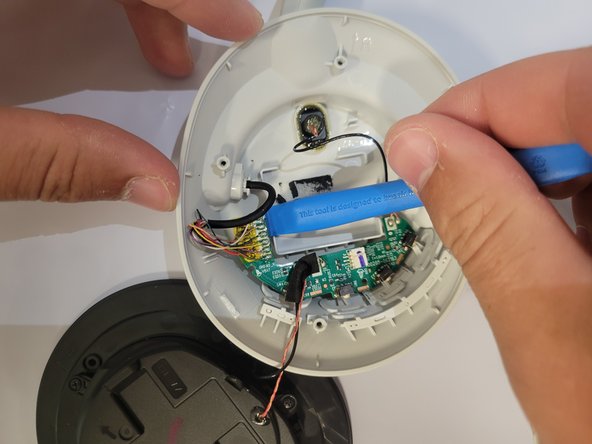
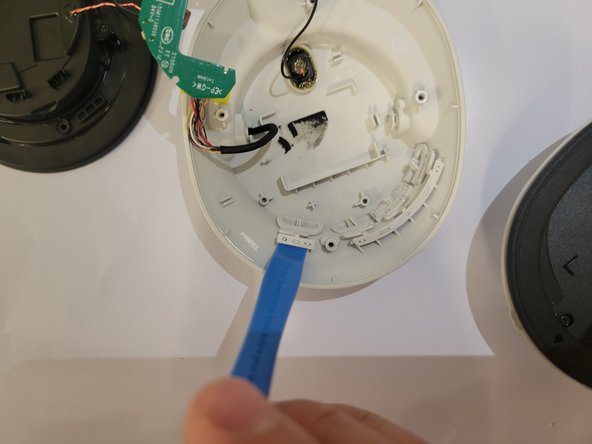
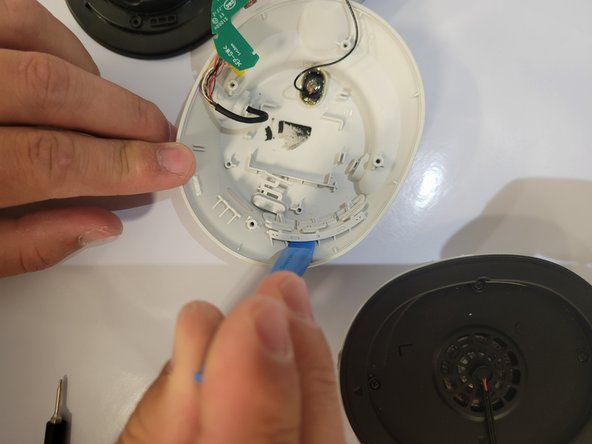
    • Carefully remove the circuit board with the plastic prying tool.

  5. Sony WH-CH720N Volume & Noise Cancelling Control Button Replacement: passo 5, immagine 1 di 3 Sony WH-CH720N Volume & Noise Cancelling Control Button Replacement: passo 5, immagine 2 di 3 Sony WH-CH720N Volume & Noise Cancelling Control Button Replacement: passo 5, immagine 3 di 3
    • Next, use the prying tool to remove the buttons.

  6. Sony WH-CH720N Volume & Noise Cancelling Control Button Replacement: passo 6, immagine 1 di 1
    • Remove buttons and replace.

Conclusione

To reassemble your device, follow these instructions in reverse order.

0 Commenti

Aggiungi Commento

Visualizza Statistiche:

Ultime 24 Ore: 0

Ultimi 7 Giorni: 6

Ultimi 30 Giorni: 21

Tutti i Tempi: 65