Questa versione può contenere modifiche errate. Passa all'ultima istantanea verificata.
Cosa ti serve
-
Questo passaggio è privo di traduzione. Aiuta a tradurlo
-
Start with the laptop face up on a flat surface.
-
-
Questo passaggio è privo di traduzione. Aiuta a tradurlo
-
Open the laptop with the keyboard facing you.
-
-
Questo passaggio è privo di traduzione. Aiuta a tradurlo
-
Use a plastic opening tool to pry up the keyboard. Start at the end closest to the screen.
-
-
Questo passaggio è privo di traduzione. Aiuta a tradurlo
-
Carefully detach the ribbon from the base of the computer with your hands.
-
Remove the keyboard.
-
-
-
Questo passaggio è privo di traduzione. Aiuta a tradurlo
-
Use a Philips #0 screwdriver to remove the 7 top case screws.
-
-
Questo passaggio è privo di traduzione. Aiuta a tradurlo
-
Using a metal spudger, pry open at the seams.
-
Open the gray top of the laptop from the base black portion.
-
Slide the spudger along the seam, and then carefully open the top.
-
-
Questo passaggio è privo di traduzione. Aiuta a tradurlo
-
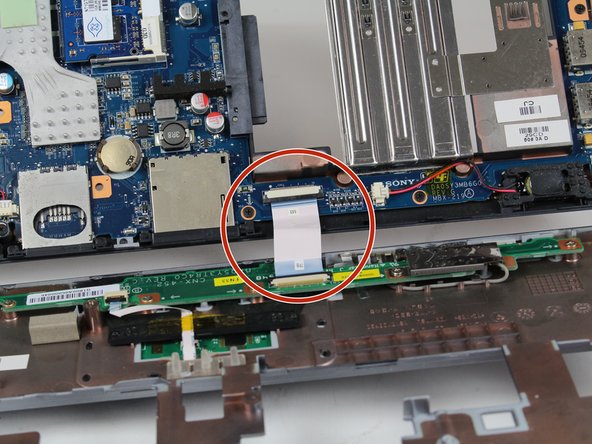
Open the top carefully without disconnecting the two parts.
-
-
Questo passaggio è privo di traduzione. Aiuta a tradurlo
-
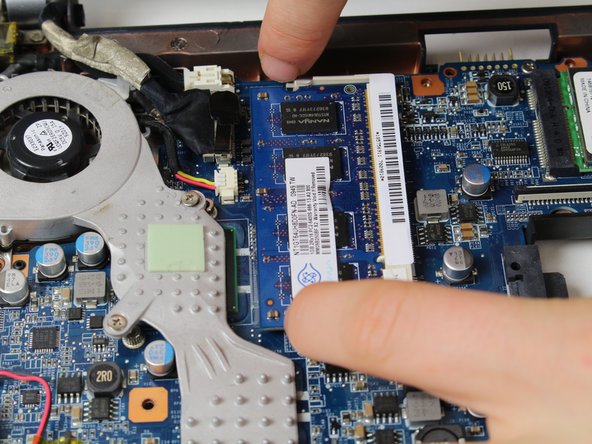
Using your fingers, pry apart the two side metal pieces that hold the part in place as shown on the picture.
-
-
Questo passaggio è privo di traduzione. Aiuta a tradurlo
-
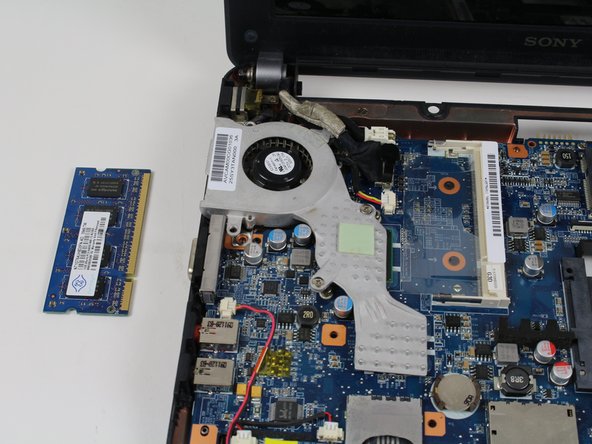
After that step, the RAM should pop up on its own as shown in the picture.
-
-
Questo passaggio è privo di traduzione. Aiuta a tradurlo
-
Carefully press the sides near the right edge of the part and remove it from it's base.
-
Un commento
I have a 21212L and you have to remove the screws under the flap to remove the keyboard firstm you also do not have to remove the top assembly at all.


