Salta al contenuto principale
Sony Vaio VPCCW17FX LCD Screen Replacement

Sony Vaio VPCCW17FX LCD Screen Replacement

Seowon Song

Seowon Song e 5 altri collaboratori

Ultimo aggiornamento il December 7, 2022

5 minuti
Facile
Necessarie Immagini Migliori

Introduzione

Vai al passo 1

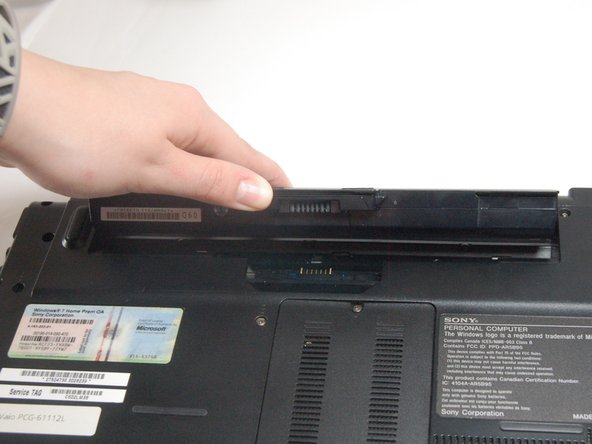
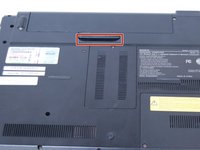
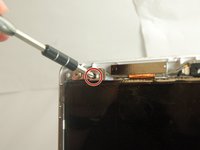
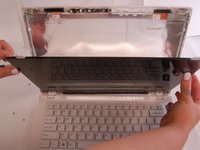
In order to remove the screen safely, be sure to take out the battery first. The screen can be replaced once you remove the plastic cover located on the back of the laptop with all screws removed.

Cosa ti serve

Strumenti

  • Phillips #0 Screwdriver
    Phillips #0 Screwdriver
  • Spudger
    Spudger
  1. Sony Vaio VPCCW17FX LCD Screen Replacement, LCD Screen: passo 1, immagine 1 di 1
    • Turn the laptop over and orient it as shown.

  2. Sony Vaio VPCCW17FX LCD Screen Replacement: passo 2, immagine 1 di 1
    • Slide both latches towards the center of the battery to release.

  3. Sony Vaio VPCCW17FX LCD Screen Replacement: passo 3, immagine 1 di 2 Sony Vaio VPCCW17FX LCD Screen Replacement: passo 3, immagine 2 di 2
    • Use your fingernail or a plastic tool to lift the battery. Rotate the battery up and away to remove from the laptop.

  4. Sony Vaio VPCCW17FX LCD Screen Replacement: passo 4, immagine 1 di 2 Sony Vaio VPCCW17FX LCD Screen Replacement: passo 4, immagine 2 di 2
    • Remove the rubber pads on all four corners of the screen bezel using the spudger.

    • Remove the four screws (Length: 7.7 mm) using the Phillips #0 screwdriver.

  5. Sony Vaio VPCCW17FX LCD Screen Replacement: passo 5, immagine 1 di 1
    • Remove the screen's plastic bezel.

    • You need to use slight pressure to release the clips.

  6. Sony Vaio VPCCW17FX LCD Screen Replacement: passo 6, immagine 1 di 2 Sony Vaio VPCCW17FX LCD Screen Replacement: passo 6, immagine 2 di 2
    • Remove all four screws (Length: 7.7 mm) using a Phillips #0 screwdriver. Make sure to hold the screen while removing the screws so it doesn't fall.

    • Using your thumb, carefully lower the glass and place it on the keyboard.

    • Do this slowly to avoid damaging the screen.

  7. Sony Vaio VPCCW17FX LCD Screen Replacement: passo 7, immagine 1 di 2 Sony Vaio VPCCW17FX LCD Screen Replacement: passo 7, immagine 2 di 2
    • Pull off the tape and disconnect the display cable connector by gently sliding up to remove it from its socket.

  8. Sony Vaio VPCCW17FX LCD Screen Replacement: passo 8, immagine 1 di 1
    • The screen can now be removed.

Conclusione

To reassemble your device, follow these instructions in reverse order.

Un'altra persona ha completato questa guida.

Seowon Song

Membro da: 03/20/17

113 Reputazione

1 Guida realizzata

Team

0Commenti sulla guida

Aggiungi Commento

Visualizza Statistiche:

Ultime 24 Ore: 0

Ultimi 7 Giorni: 5

Ultimi 30 Giorni: 22

Tutti i Tempi: 1,182