Salta al contenuto principale

Sony Vaio SVS151190X Disk Reader Replacement

Cosa ti serve

  1. Sony Vaio SVS151190X Disk Reader Replacement, Hard Drive: passo 1, immagine 1 di 1
    • Using a #1 Phillips screwdriver, remove the two 5mm screws as directed.

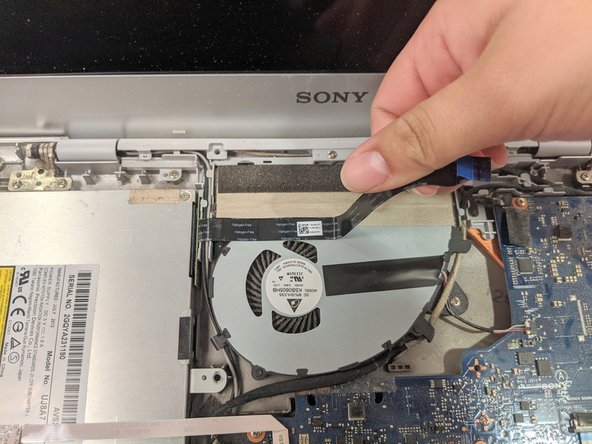
    • Slide off the back cover.

    • Ensure different sized screws are kept separate during disassembly.

  2. Sony Vaio SVS151190X Disk Reader Replacement: passo 2, immagine 1 di 1
    • Remove the four 3mm screws using the Phillips #1 screwdriver.

  3. Sony Vaio SVS151190X Disk Reader Replacement: passo 3, immagine 1 di 1
    • Lift out the hard drive and unplug the orange ribbon wire.

  4. Sony Vaio SVS151190X Disk Reader Replacement, Disk Reader: passo 4, immagine 1 di 1
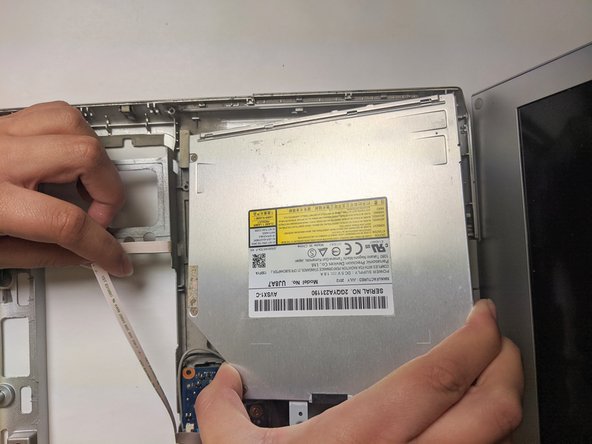
    • To loosen the keyboard, remove the twenty 5mm screws using the Phillips #1 screwdriver.

  5. Sony Vaio SVS151190X Disk Reader Replacement: passo 5, immagine 1 di 1
    • Flip the device over and open it up.

    • Using a plastic opening tool and opening picks, pry off the keyboard from the bottom cover. Start from one of the corners of the device and work your way around.

    • The bottom cover is somewhat fragile, do not be too forceful when prying off the keyboard.

  6. Sony Vaio SVS151190X Disk Reader Replacement: passo 6, immagine 1 di 2 Sony Vaio SVS151190X Disk Reader Replacement: passo 6, immagine 2 di 2
    • The ribbon wire that attaches the keyboard and bottom cover is fragile, take care during removal.

    • Remove the keyboard from the bottom cover and place it down as demonstrated.

    • Carefully pull the plastic tab and remove the ribbon wire.

  7. Sony Vaio SVS151190X Disk Reader Replacement: passo 7, immagine 1 di 2 Sony Vaio SVS151190X Disk Reader Replacement: passo 7, immagine 2 di 2
    • Slightly pull up the black tape covering the disk drive's ribbon wire.

    • Pull up the blue plastic strip attached to the ribbon wire and remove the ribbon wire from the port.

    • Detach the ribbon wire from the fan so the disk reader can be removed.

  8. Sony Vaio SVS151190X Disk Reader Replacement: passo 8, immagine 1 di 1
    • Remove the two 3mm screws using the Phillips #1 screwdriver.

  9. Sony Vaio SVS151190X Disk Reader Replacement: passo 9, immagine 1 di 2 Sony Vaio SVS151190X Disk Reader Replacement: passo 9, immagine 2 di 2
    • Take out the black plastic covering.

    • Remove the disk reader.

Conclusione

To reassemble your device, follow these instructions in reverse order.

0 Commenti

Aggiungi Commento

Visualizza Statistiche:

Ultime 24 Ore: 1

Ultimi 7 Giorni: 4

Ultimi 30 Giorni: 15

Tutti i Tempi: 571